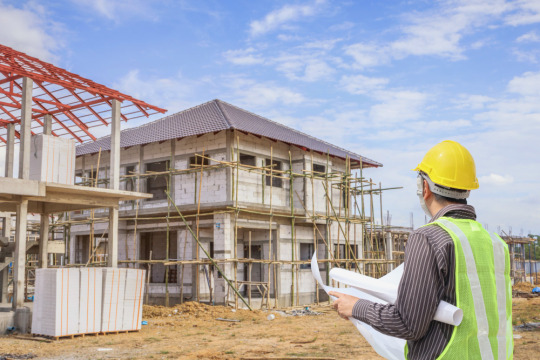
#Crawl Space Ventilation Installation
Explore tagged Tumblr posts
Visit Tumblr Blog
Explore Tumblr blogs with no restrictions, modern design and the best experience.
Last Seen Tumblr Blogs


Fun Fact
Mobile Tumblr US users spend an average of 4.04 minutes per session on the app.
Text
How To Prevent Future Water Stains After Fixing The Leak
So, you’ve fixed the leak—but now you’re left with the lingering worry that it might happen again. After all, a water stain on the ceiling isn’t just unsightly—it’s a red flag that moisture found way into your home. And for many homeowners, the appearance of new white circles on the ceiling can be a frustrating reminder of past damage. Fortunately, with the right prevention strategies, you can stop stains from returning.
Here’s how to keep your ceilings dry and looking fresh long after the leak is gone.
1. Confirm the Leak Has Been Fully Resolved
It’s tempting to patch the ceiling and move on, but unless the root cause of the water stain on ceiling has been completely addressed, the problem could reappear. Common culprits include roof damage, plumbing leaks, HVAC condensation, or window flashing failures. Ensure that:
Roof shingles and flashing are intact and sealed
Plumbing pipes are free from drips and corrosion
HVAC drip pans and condensate lines are clear and functioning
Attic or crawl space is free from signs of moisture
Bring in a professional for a second opinion if you’re unsure the leak is fully fixed.
2. Improve Home Ventilation
Poor airflow contributes to moisture buildup that may cause white circles on ceiling surfaces. This is especially true in areas like bathrooms, kitchens, and laundry rooms.
Use exhaust fans while cooking or showering
Keep attic ventilation clear and unobstructed
Consider a whole-home dehumidifier if indoor humidity stays high
Ventilation reduces humidity levels and prevents condensation from forming on ceilings.
3. Use a Stain-Blocking Primer Before Painting
Even after the ceiling has dried, a residual water stain on ceiling can seep through fresh paint. The solution? Use a high-quality, stain-blocking primer.
Apply primer specifically designed for water stains
Let it dry fully before applying a topcoat
Use a mildew-resistant ceiling paint for added protection
This helps prevent white circles on the ceiling from reappearing and keeps the ceiling finish clean.
4. Clean Gutters and Downspouts Regularly
Overflowing gutters are a hidden cause of leaks that lead to ceiling stains, especially near exterior walls. When water has nowhere to go, it can back up under shingles and into your attic.
Clear leaves and debris from gutters at least twice a year
Check that downspout direct water away from your home’s foundation
Install gutter guards for added protection
Clean drainage pathways reduce the risk of future water intrusion.
5. Schedule Routine Roof Inspections
Tiny roof issues can lead to major water damage over time. Many leaks that cause a water stain on the ceiling start as small problems that go unnoticed.
Inspect your roof at least once a year
Look for missing or curling shingles, cracked flashing, or sagging gutters
Address minor issues before they escalate
A professional roof inspection helps ensure your home’s first line of defense stays secure.
6. Monitor for Signs of Moisture
Don’t wait for white circles on the ceiling to alert you to a problem. Get ahead of issues with these simple monitoring tips:
Install a humidity sensor in rooms prone to moisture
Check your attic or upper walls regularly for mold, musty smells, or soft spots
After heavy rain, look for damp patches or discoloration on ceilings
Early detection means faster resolution and fewer repairs.
Final Thoughts
Once you’ve repaired the leak that caused a water stain on the ceiling, the next step is prevention. From improving ventilation to using stain-blocking paint and scheduling regular maintenance, these proactive measures will help ensure that white circles on ceiling don’t make another unwelcome appearance.
Need help sealing up your roof or inspecting moisture issues? Contact Absolute Construction for expert solutions that keep your home safe and your ceilings spotless.
1 note
·
View note
Text
How to Build a Container Home Step by Step in 2025
Container homes have become a groundbreaking trend in sustainable architecture, offering affordability, eco-friendliness, and versatility. In 2025, the process of building a container home has become even more streamlined, thanks to advanced materials and innovative designs. This comprehensive guide outlines every step to create your dream container home while ensuring compliance with modern standards.

Step 1: Planning and Design
Define Your Goals and Budget
Before starting, determine your purpose for the container home. Is it a permanent residence, a vacation property, or an investment rental? Establish a realistic budget, considering land acquisition, permits, materials, labor, and unforeseen costs.
Research Local Building Codes
Container homes must comply with local regulations, including zoning laws and building permits. Research thoroughly or consult a professional to avoid legal issues later.
Select the Right Design
Modern container homes range from minimalist single-container structures to luxurious multi-container designs. Collaborate with an architect experienced in container home construction to optimize space utilization and aesthetics.
Step 2: Choosing and Preparing Containers
Select High-Quality Containers
Opt for ISO-certified shipping containers to ensure structural integrity. Containers come in two standard sizes: 20 feet and 40 feet. Choose new or lightly used containers to avoid dealing with rust and damage.
Inspect and Clean the Containers
Thoroughly inspect the containers for dents, corrosion, or chemical residues. Once inspected, clean them using pressure washers and non-toxic cleaning solutions to eliminate contaminants.
Modify Containers for Your Design
Cut openings for windows, doors, and ventilation according to your design. Reinforce edges with steel beams to maintain structural strength during modifications.
Step 3: Securing the Foundation
Choose the Right Foundation
The type of foundation depends on your site conditions and budget. Common options include:
Concrete slab foundation for flat surfaces.
Pier foundation for uneven or sloped land.
Crawl space foundation for additional storage or ventilation.
Prepare the Site
Level the ground, remove debris, and compact the soil. Install drainage systems to prevent water pooling, which could compromise the foundation over time.
Step 4: Assembling the Structure
Position the Containers
Using cranes or heavy equipment, place the containers on the foundation as per your design. Align them carefully to ensure structural stability.
Weld and Secure Containers
Weld the containers together for a unified structure. Seal any gaps to improve insulation and prevent water leaks.
Install Structural Reinforcements
For multi-story container homes, add steel columns or beams to support the weight of the upper containers. Reinforce the roof if necessary for load-bearing purposes, such as solar panels or rooftop gardens.
Step 5: Insulation and Weatherproofing
Insulate for Comfort
Steel containers are excellent conductors of heat and cold, making insulation crucial. Popular options include:
Spray foam insulation for superior thermal performance.
Rigid foam panels for cost-effective solutions.
Natural materials like wool for eco-friendly insulation.
Weatherproof the Exterior
Apply anti-corrosion coatings to the steel surface. Seal joints with waterproof caulking to protect against moisture. Add cladding or siding for aesthetics and additional protection.
Step 6: Installing Utilities
Electrical Systems
Hire a licensed electrician to install wiring, outlets, and circuit breakers. Plan for energy-efficient systems, such as LED lighting and solar panels, to reduce your carbon footprint.
Plumbing Systems
Install water supply lines, drainage systems, and sewage connections. Consider using a tankless water heater or rainwater harvesting system for efficiency.
HVAC Systems
Choose compact and efficient heating, ventilation, and air conditioning systems to maintain comfort throughout the year.
Step 7: Interior Finishing
Walls, Floors, and Ceilings
Walls: Cover the interior with drywall, plywood, or reclaimed wood for a polished look.
Floors: Install durable flooring materials such as vinyl, laminate, or bamboo.
Ceilings: Use suspended ceilings to conceal wiring and ductwork while adding insulation.
Furniture and Fixtures
Optimize space with built-in furniture and multi-functional designs. Use modular kitchen units and compact bathroom fixtures for maximum efficiency.
Step 8: Exterior Enhancements
Landscaping
Enhance your container home’s surroundings with landscaping features such as pathways, gardens, and outdoor seating areas.
Decks and Patios
Extend your living space with a deck or patio. Use reclaimed wood or composite materials for sustainability.
Solar and Energy Systems
Install solar panels, wind turbines, or battery storage systems to power your home sustainably.
Step 9: Final Inspections and Permits
Conduct Professional Inspections
Before moving in, have professionals inspect the structure, electrical systems, plumbing, and overall safety. Address any deficiencies to ensure compliance with building codes.
Obtain Occupancy Permits
Submit all necessary documentation to local authorities and secure an occupancy permit to finalize the project.
Step 10: Maintenance and Upgrades
Regular Maintenance
Inspect your container home periodically for rust, leaks, or structural issues. Repaint and reseal the exterior as needed to maintain its durability.
Future Upgrades
Consider adding features like rainwater harvesting systems, additional solar panels, or a green roof to enhance sustainability.
Building a container home is an exciting and rewarding endeavor that combines functionality, sustainability, and modern design. By following these detailed steps, you can create a comfortable and eco-friendly living space tailored to your needs.
Tags:
2 notes
·
View notes
Text
What are the Basic Steps involved in House Construction?
House construction is a big process. It involves many steps and requires careful planning. Building a house is more than just putting up walls and a roof. It is about creating a safe and comfortable space. A strong foundation is crucial for sturdy house construction. Let’s learn about the basic steps involved in building a house.
Planning is Key
The first step in house construction is planning. This involves creating a design for the house. Architects and designers help with this. They make sure the house will be functional and attractive. Planning also includes setting a budget. Knowing how much money you can spend is important. It helps avoid overspending during construction.
Getting Permits
Before House Construction can start, you need permits. These are legal documents from local authorities. Permits ensure that the construction meets safety standards. Without them, you might have to stop construction or pay fines. It’s important to get all the necessary permits before beginning.
Preparing the Site
After planning and permits, the construction site needs to be prepared. This involves clearing the land and removing trees, rocks, and debris. The ground is then leveled, providing a solid foundation for the house.
Laying the Foundation
The foundation is the base of the house. It supports the entire structure. Different types of foundations exist, such as slabs, crawl spaces, and basements. The choice depends on the soil type and climate. A strong foundation is crucial for a sturdy house.
Building the Frame
Once the foundation is ready, the frame is built. This is like the skeleton of the house. It gives the house its shape and supports the roof and walls. The frame is usually made of wood or steel. It is important to make sure the frame is strong and well-built.
Installing the Roof
The roof comes next. It protects the house from weather elements. There are different types of roofs, such as flat, gable, and hip. The choice of roof depends on the house design and local climate. Proper roof installation is important to prevent leaks and other issues.
Adding Windows and Doors
Windows and doors are then installed. They allow light and air into the house. They also provide security and privacy. The placement of windows and doors is carefully planned. This ensures good ventilation and natural lighting.
Electrical and Plumbing Work
After the roof and windows, electrical and plumbing systems are installed. These are the house's vital systems. Electricians run wires for lights and outlets. Plumbers install pipes for water and sewage. Proper installation is crucial for safety and functionality.
Insulation and Drywall
Next, insulation is added. Insulation keeps the house warm in winter and cool in summer and helps reduce noise. After insulation, drywall is installed on the walls and ceilings. Drywall creates smooth surfaces for painting and finishing.
Finishing Touches
The final stage of house construction involves finishing touches. This includes painting walls, installing flooring, and adding fixtures. Cabinets, countertops, and appliances are also installed. These elements make the house livable and add style.
Final Inspection
A final inspection is conducted before moving in. Inspectors check that everything meets building codes and ensure that the house is safe and ready for occupancy. Passing the final inspection is a crucial step in house construction.
Moving In
Once the house passes inspection, it’s time to move in. This is the most exciting part of house construction. It marks the end of a long process. A well-constructed house provides comfort and security for years to come.
Conclusion
House construction is a complex process. It requires careful planning and skilled work. Each step is important for building a safe and comfortable home. Whether it’s planning, framing, or finishing, every detail matters. Understanding these House Construction steps can help make the process smoother and more enjoyable.
2 notes
·
View notes
Text
What to Know Before Relocating or Upgrading Your HVAC System

Whether you're remodeling your home, repurposing a space, or simply looking to improve energy efficiency, relocating or upgrading your HVAC system is a major decision. Done right, it can boost indoor comfort, reduce utility bills, and even increase property value. But without proper planning, it can lead to unexpected costs and suboptimal performance.
This article explores what Bay Area homeowners and property managers should consider before relocating or upgrading their HVAC systems—from layout logistics to efficiency gains and local code compliance.
🧭 Why Relocate Your HVAC System?
There are several valid reasons to move your HVAC equipment:
Freeing up living space (e.g., converting a closet into a laundry room)
Adding square footage (e.g., home expansions or ADUs)
Improving system performance (shorter duct runs, better airflow)
Reducing noise by moving the furnace or air handler further from bedrooms
Protecting equipment from environmental hazards (like flooding or sun exposure)
Relocating HVAC units—whether a furnace, heat pump, or rooftop unit—requires careful planning to avoid disrupting air distribution or violating local building codes.
🔁 When to Consider an HVAC Upgrade Instead
If your system is more than 15 years old or struggling to maintain comfort, a replacement or upgrade may be more beneficial than just a relocation. Here’s why:
Newer systems are up to 50% more efficient
Modern HVAC equipment supports zoning and smart controls
Older ductwork may not be compatible with high-efficiency systems
Switching from gas to electric (heat pumps) aligns with California's decarbonization goals
📋 Key Factors to Evaluate Before Relocating or Upgrading
1. Space Requirements
Moving a furnace, AC unit, or air handler requires adequate clearance and ventilation. Consult your contractor about:
Attic or crawl space capacity
Code-mandated clearance around the unit
Access for future maintenance
2. Ductwork Adjustments
Relocating the HVAC system will almost always affect duct routing. Ask:
Will the new location reduce or increase duct length?
Is your current ductwork compatible with high-efficiency systems?
Does the layout require new return or supply vents?
Poorly configured ductwork can negate the benefits of a high-end HVAC unit.
3. Structural and Electrical Modifications
You may need to:
Reinforce flooring or roof trusses for rooftop installations
Upgrade electrical panels for heat pumps or electric furnaces
Create new venting or drainage lines for condensate management
These changes can significantly impact cost and project timelines.
4. Permits and Code Compliance
California’s Title 24 energy code is strict—and local Bay Area jurisdictions (e.g., San Mateo, Santa Clara, and San Francisco Counties) often have their own add-ons.
Always verify if your project needs a building permit
Make sure your contractor conducts load calculations (Manual J/S/D)
Confirm that all ductwork meets leakage and insulation standards
💸 Budgeting for an HVAC Relocation or Upgrade
ComponentEstimated Cost Range (Bay Area)HVAC system upgrade$5,000 – $15,000+System relocation (only)$2,000 – $8,000+Electrical panel upgrade$1,500 – $4,000Ductwork modifications$1,000 – $5,000+Permits and inspections$300 – $1,000
These costs vary based on system type, building complexity, and jurisdiction.
🏢 Rooftop Units: Pros and Considerations
For multi-unit properties and commercial spaces, rooftop HVAC units offer:
✅ Pros:
Saves ground-level space
Easy access for maintenance
Minimal indoor noise
Better air distribution in large buildings
❌ Considerations:
Structural load requirements
Longer refrigerant and electrical line runs
May require crane installation
Rooftop systems are common in urban Bay Area buildings but require expert coordination between HVAC, roofing, and electrical professionals.
♻️ Should You Switch to a Heat Pump?
If you’re relocating your HVAC unit anyway, it may be the perfect opportunity to transition to a heat pump system. Heat pumps offer:
Heating + cooling in one unit
Higher energy efficiency
Reduced greenhouse gas emissions
Eligibility for rebates and incentives
Look into BayREN, TECH Clean California, and local utility programs for potential rebates on heat pump installations and duct upgrades.
✅ Final Tips Before You Begin
Get a full home energy audit before making HVAC decisions
Choose a licensed contractor familiar with your city’s codes
Request a Manual J load calculation to size your new system correctly
Verify duct compatibility if upgrading to a high-SEER or heat pump system
Budget for unexpected repairs like leaky ducts or mold remediation
🧠 Final Takeaways
Relocating your HVAC system can free up space, reduce noise, or improve airflow—but it must be planned with care.
Upgrading your HVAC during relocation may save money long-term, especially if your system is old, inefficient, or incompatible with your remodeling plans.
Consult professionals to assess ductwork, insulation, and code requirements before you begin.
Don’t overlook rebates for high-efficiency systems, especially heat pumps, which are increasingly encouraged throughout California.
Investing in the right HVAC layout and system can dramatically enhance the comfort, value, and efficiency of your home or business for years to come.
0 notes
Text
How Homeowners Can Prevent Mold Growth with Water Damage Repair

Water damage is a common problem that can lead to unwanted mold growth in your home. Mold can grow within 24-48 hours of water damage, so it's important to act fast. Taking quick action and following the right steps of water damage repair can prevent mold and keep your home healthy.
Act Fast: Clean and Dry Quickly
In the event of water damage, it's important to clean and dry affected areas promptly. Use a mixture of water and detergent to scrub the area, and ensure it is thoroughly dried with fans or dehumidifiers.
Dry out water-damaged areas within the first 24-48 hours to significantly reduce the risk of mold growth.
Begin water cleanup as soon as possible, as keeping things dry can prevent mold growth.
Use towels to dry wet floors and furniture.
Touch, don’t just look to determine if carpet or paneling is wet.
Remove Standing Water
Remove any standing water from the affected area as soon as possible 5. You may use a wet/dry vacuum to do water extraction. A wet-dry vacuum can pump 5-10 gallons of water per minute.
Dehumidify and Ventilate
Remove moisture from the air after removing standing water and provide proper ventilation.
Open windows and run fans and dehumidifiers to dry the affected areas.
Use dehumidifiers and air conditioners, especially during humid seasons, to control humidity levels.
Ensure proper ventilation in bathrooms, kitchens, and laundry rooms.
Ventilate humid areas like bedrooms and bathrooms by opening windows and turning on fans.
Remove Damp Materials
Remove damp carpet or flooring.
Remove any belongings such as furniture or carpets, to help speed up the drying process.
If ceiling tiles and drywall have been water damaged, remove or replace them.
Address the Source
Since mold requires moisture to grow, immediately address any leaks or water issues.
Repair plumbing leaks, check your roof for damage, and ensure proper drainage around your home’s foundation to mitigate water intrusion.
Plug up leaks around the windows and doors with weatherstripping.
Install new gutters and gutter guards to funnel rainwater away from your property.
Maintain and Monitor
Keep indoor humidity levels below 60% using a hygrometer. If levels exceed this threshold, employ dehumidifiers and improve ventilation by opening windows and doors .
Regularly check problem areas like bathrooms, kitchens, and basements .
Install vents in moisture-prone areas, such as bathrooms and laundry rooms, and keep them clean for optimal function.
Properly insulate attics and crawl spaces to prevent moisture buildup. Consider installing vents or fans and regularly inspect these areas for signs of leaks or water damage.
Other Tips
Use mold-resistant materials when renovating or building, especially in moisture-prone areas like kitchens and bathrooms.
Reduce clutter to improve airflow and prevent hiding spots for mold, especially in moisture-sensitive areas.
Install moisture detection sensors and leak detection systems to provide early warning signs of water leaks .
In addition to these steps, regular home inspections can help catch water damage early before mold can grow. Pay special attention after heavy rains or storms, as water can enter through small cracks or damaged roofs. Remember, mold damages your home and can cause health problems like allergies and asthma. Taking water damage repair seriously is the best way to protect your family and property long-term.
In Conclusion
By acting quickly to address water damage, removing moisture, and maintaining your home, you can prevent mold growth and keep your home safe and healthy. If you suspect a significant leak, it is best to consult a professional for water damage repair .
0 notes
Text
Energy-Saving Insulation for Modern Homes
Introduction to Home Insulation
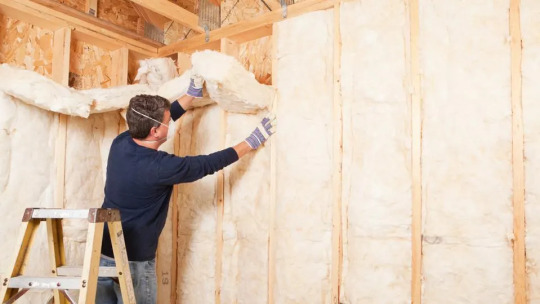
In today’s world, where energy efficiency and sustainability are at the forefront of homeowners’ minds, choosing the right insulation for your home is more critical than ever. Insulation not only enhances comfort but also significantly reduces energy costs and environmental impact. Among the various options available, two methods stand out for their effectiveness and versatility: spray foam insulation and blown-in insulation. These solutions, provided by skilled professionals, offer unique benefits tailored to different needs. Understanding their advantages, applications, and the expertise required for installation can help homeowners make informed decisions to improve their living spaces.
Understanding Spray Foam Insulation
Spray foam insulation contractors specialize in a cutting-edge insulation method that involves applying a liquid foam that expands and hardens into a solid barrier. This process creates a seamless layer that fills gaps, cracks, and hard-to-reach areas, ensuring superior thermal resistance. The foam’s ability to expand makes it ideal for irregularly shaped spaces, such as attics, crawl spaces, and wall cavities. Once applied, it forms an airtight seal, significantly reducing air leakage, which is a common cause of energy loss in homes. This insulation type is particularly effective in extreme climates, as it maintains consistent indoor temperatures, reducing the strain on heating and cooling systems. Additionally, spray foam provides excellent soundproofing, making it a popular choice for urban homes or those near busy roads. The expertise of contractors is crucial, as improper application can lead to inefficiencies or costly repairs.
The Benefits of Blown-In Insulation
Another highly effective option is blown-in insulation, installed byblown in insulation contractors who use specialized equipment to blow loose-fill materials, such as fiberglass or cellulose, into walls, attics, or floors. This method is particularly suited for retrofitting older homes or adding insulation to existing structures without major renovations. The loose-fill material conforms to the shape of the space, filling gaps and creating a dense barrier that enhances energy efficiency. Blown-in insulation is also eco-friendly, as many materials, like cellulose, are made from recycled products, appealing to environmentally conscious homeowners. Contractors skilled in this technique ensure even distribution, preventing settling or gaps that could compromise performance. This method is often more cost-effective than other insulation types, making it an attractive option for budget-conscious homeowners seeking to improve energy efficiency.
Comparing Installation Processes
The installation processes for spray foam and blown-in insulation differ significantly, each requiring specialized skills. Spray foam insulation demands precision, as contractors must mix chemicals on-site and apply them using high-pressure equipment. The foam expands rapidly, so timing and technique are critical to achieving a uniform layer. Contractors must also ensure proper ventilation during application due to the chemicals involved. In contrast, blown-in insulation involves blowing loose material through hoses into designated areas. This process is less invasive and faster, particularly for attics or open spaces. However, contractors must carefully calculate the amount of material needed to achieve the desired R-value, which measures thermal resistance. Both methods require professional expertise to avoid issues like uneven coverage or moisture buildup, which could lead to mold or structural damage over time.
Energy Efficiency and Cost Savings
Both insulation types offer substantial energy-saving benefits, though their applications vary. Spray foam’s airtight seal minimizes heat transfer, potentially reducing energy bills by up to 50% in some cases. Its durability means it rarely needs replacement, providing long-term savings. Blown-in insulation, while slightly less effective at sealing air leaks, still offers excellent thermal performance and is often more affordable upfront. Homeowners can expect noticeable reductions in heating and cooling costs, particularly in regions with harsh winters or scorching summers. Additionally, both methods contribute to a home’s overall energy efficiency rating, which can increase property value and appeal to eco-conscious buyers. Consulting with experienced contractors ensures that the chosen insulation meets the home’s specific needs, maximizing both comfort and savings.
Environmental and Health Considerations
Beyond energy savings, insulation choices impact the environment and indoor air quality. Spray foam insulation, when properly installed, is inert once cured, posing no health risks. However, during application, proper ventilation is essential to avoid exposure to chemical fumes. Some spray foam products use eco-friendly blowing agents, reducing their environmental footprint. Blown-in insulation, particularly cellulose, is often made from recycled materials, making it a sustainable choice. It also has natural moisture-resistant properties, reducing the risk of mold growth. Both insulation types, when installed by qualified contractors, contribute to healthier indoor environments by stabilizing temperatures and reducing humidity. Homeowners should verify that contractors follow industry standards to ensure safe and effective installation.
Choosing the Right Contractor
Selecting the right professionals is critical to the success of any insulation project. Spray foam insulation contractors must be certified in handling the specialized equipment and chemicals involved, ensuring a safe and efficient installation. Similarly, blown-in insulation contractors should have experience in assessing a home’s insulation needs and using blowing machines to achieve optimal coverage. Homeowners should seek contractors with strong reputations, verified credentials, and a track record of successful projects. Asking for references, checking reviews, and requesting detailed quotes can help ensure the chosen contractor delivers high-quality results. Additionally, contractors should provide clear explanations of the insulation’s R-value, expected energy savings, and maintenance requirements to help homeowners make informed decisions.
Long-Term Value of Insulation Upgrades
Investing in professional insulation services offers long-term benefits that extend beyond immediate energy savings. A well-insulated home enhances comfort, reduces noise, and improves indoor air quality, creating a healthier living environment. Both spray foam and blown-in insulation increase a home’s resale value, as energy efficiency is a top priority for modern buyers. Furthermore, these insulation methods contribute to sustainability by reducing energy consumption, aligning with global efforts to combat climate change. By working with skilled contractors, homeowners can ensure their insulation is installed correctly, maximizing its lifespan and performance. Whether choosing the airtight seal of spray foam or the eco-friendly versatility of blown-in insulation, the right choice depends on the home’s structure, climate, and budget.
0 notes
Text
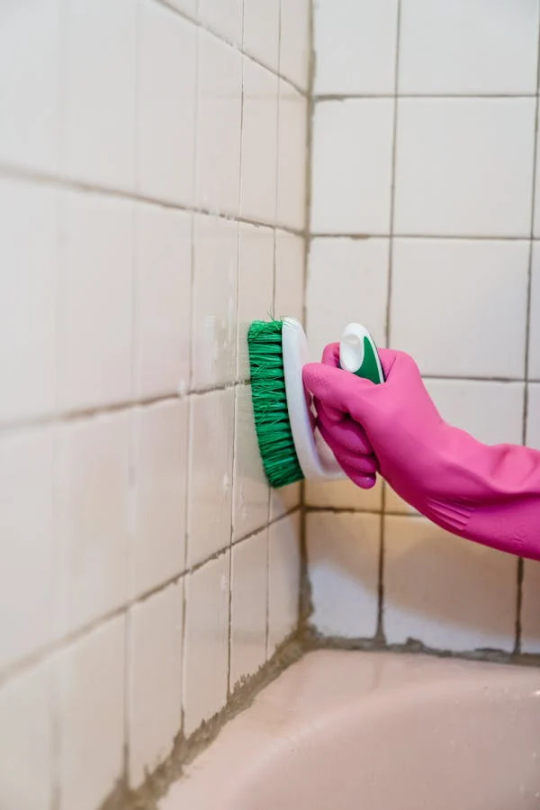
The Complete Guide to Ventilation: How to Prevent Mold and Improve Air Quality in Your Bathroom

Proper bathroom ventilation is essential for maintaining a healthy, comfortable, and mold-free home environment. Without adequate airflow, excess humidity can lead to mold growth, unpleasant odors, and even structural damage over time. This guide will help you understand the importance of ventilation systems, explore the different types of fans, and learn best practices for maintaining excellent indoor air quality in your bathroom.
Key Points of the Blog
Understand why bathroom ventilation is crucial for health and home integrity.
Choose the right type of fan for your bathroom’s size and layout.
Install and position your fan for optimal moisture removal.
Run the fan during and after showers or baths to minimize humidity.
Combine mechanical ventilation with natural airflow when possible.
Keep your bathroom clean and dry to prevent mold and odors.
Communicate your ventilation needs with your contractor or designer.
Celebrate small upgrades every improvement helps.
Stay flexible and open to new ventilation solutions.
Enjoy the benefits of a fresh, healthy bathroom environment.
Why Bathroom Ventilation Matters
Bathrooms are hotspots for moisture, thanks to showers, baths, and even sinks. This humidity creates the perfect environment for mold and mildew to thrive, which can cause health issues and damage your home’s structure. Proper ventilation removes excess moisture, prevents condensation, and keeps the air fresh and clean.
Types of Bathroom Ventilation Systems
There are several effective ways to ventilate your bathroom:
Ceiling-Mounted Exhaust Fans: The most common and effective solution. These fans pull moist air out of the bathroom and vent it directly outside, preventing moisture from lingering in your home.
Wall-Mounted Exhaust Fans: Ideal for bathrooms without attic access. These fans are installed on an exterior wall and vent moisture directly outside.
Inline Exhaust Fans: Installed within the ductwork, these fans are quieter and can serve larger bathrooms or multiple rooms.
Windows and Natural Ventilation: Opening windows can help, but is often not enough in humid or cold climates. Natural ventilation is best paired with a mechanical fan for consistent results.
Humidity-Sensing Fans: These automatically turn on when humidity levels rise, ensuring moisture is removed without you having to remember to flip a switch.
Ventilation with Heaters: Some systems combine a fan with a heater for added comfort and improved moisture removal.
Best Practices for Bathroom Ventilation
To get the most out of your ventilation system, follow these tips:
Run the Fan During and After Showers: Turn on the exhaust fan before you start your shower and leave it running for at least 30 minutes after you finish to remove excess moisture.
Keep the Bathroom Door Closed: This helps contain humidity in the bathroom and makes the fan more effective at removing it.
Open Windows When Possible: Allow fresh air to circulate, especially on dry days.
Clean and Maintain Your Fan: Regularly clean the fan and check for obstructions in the vent to ensure it works efficiently.
Choose the Right Fan Size: Select a fan with the appropriate CFM (cubic feet per minute) rating for your bathroom’s size to ensure effective moisture removal.
Vent Outside, Not Into the Attic: Always vent your fan to the outdoors, not into an attic or crawl space, to prevent mold and moisture problems elsewhere in your home.
How to Improve Indoor Air Quality
Good ventilation is just one part of maintaining healthy air quality in your bathroom:
Keep It Clean: Regularly clean surfaces to prevent dust, dirt, and mold from accumulating.
Use Eco-Friendly Cleaning Products: These reduce chemical fumes and are better for your health and the environment.
Consider an Air Purifier: A compact air purifier can help filter out allergens and odors, especially in bathrooms with limited ventilation.
Monitor for Signs of Poor Air Quality: Persistent odors, mold growth, and excessive humidity are indicators that you need to improve ventilation.
Communicate with Your Contractor
If you’re renovating or upgrading your bathroom, discuss your ventilation needs with your contractor or designer. They can help you choose the right system, ensure proper installation, and recommend additional features like humidity sensors or heat recovery ventilation for maximum comfort and efficiency.
Celebrate Progress and Stay Flexible
Every improvement, no matter how small, helps create a healthier bathroom environment. Stay open to new technologies and solutions, and don’t hesitate to upgrade your system as needed.
Frequently Asked Questions
Q: How long should I run my bathroom exhaust fan? A: Run the fan during your shower or bath and leave it on for at least 30 minutes afterward to remove excess moisture.
Q: What is the best type of fan for my bathroom? A: Ceiling-mounted exhaust fans that vent outside are the most effective for most bathrooms. For smaller spaces or those without attic access, wall-mounted or inline fans are good alternatives.
Q: Can I rely on a window for bathroom ventilation? A: Windows can help, but they are not always sufficient, especially in humid or cold climates. A mechanical exhaust fan is recommended for consistent moisture removal.
Q: How do I know if my fan is working properly? A: If your bathroom remains damp, foggy, or smells musty after a shower, your fan may not be powerful enough or may be venting improperly. Check for obstructions and consider upgrading to a higher CFM fan.
Q: What should I do if I see mold in my bathroom? A: Clean the affected area with a mold-killing solution, improve ventilation, and address any leaks or persistent moisture issues. If the problem persists, consult a professional.
Looking for Expert Bathroom Ventilation Solutions?
If you’re in the Greater Toronto Area and want to upgrade your bathroom’s ventilation, our team specializes in modern, effective ventilation systems tailored to your needs. Contact us for a free quote and enjoy a fresher, healthier bathroom.
Disclaimer: The information in this article is for general guidance only. Every home and bathroom is different, and results may vary. Always consult with a qualified professional before making major renovation decisions. For optimal results, collaborate with experienced contractors who understand your specific needs.
0 notes
Text
Process of Professional Mold Removal in Detroit and Lansing, MI
Residing in an old home that is infested with mold and mildew can be a serious concern, as it adversely affects the health of the home occupants. Trying to remove them singlehandedly or with the aid of domestic cleaners is not going to be effective. Instead, it makes sense to hire professionals for mold mitigation in Detroit and Lansing, MI, so that the menace is wiped out once and for all. Moreover, the homeowner/resident must be convinced about the efficacy of the mold removal experts. Asking for credentials is vital as well. It is advisable to hire professionals with IICRC certification to be sure of a quality service.
The process of mold mitigation is diverse and is done in stages. The entire procedure includes taking the following measures:
Fixing the leaks- Molds thrive and foster in moist areas. All spots with water accumulation and dampness must be addressed and plugged in as soon as possible. The professional team will inspect the entire home to discover such areas and ensure that all the leaks found in the roof, pipes, and/or windows have them fixed.
Dehumidification—Good-quality dehumidifiers will be used in the bathroom, basement, and other damp areas to reduce humidity levels significantly.
Ventilation—Enhancing the property's ventilation also restores airflow. Exhaust fans may be installed to improve air circulation, and the windows may be opened wide to facilitate proper ventilation in the damp areas of the property.
Quality Cleaning—The professionals may undertake the task of deep cleaning and advise the residents about ensuring regular cleaning of the entire property, including the moist corners and damp areas. This will go a long way in preventing the further development of molds.
Storage—Residents are also advised to remove stored items from dark wardrobes and damp exterior walls. This will reduce the risk of spread and prevent mold from accessing the items.
Enzyme Treatment—Professionals often utilize enzyme treatment to eliminate existing mold and prevent its spread. Such treatment is more effective in crawl spaces, basements, and attics.
Containment—Merely preventing the development of molds is not enough. The professionals also address the existing molds by putting up barriers to prevent the spread of spores that may remain airborne or lurk in damp areas.
Air Filtration—The pros will also take adequate measures to clean the air circulating through the property. Air scrubbers equipped with HEPA filters are often used to capture and trap mold spores in the air, thereby preventing cross-contamination by molds.
The expenses of hiring certified professional mold removal in Detroit and Lansing, MI, are fully justified due to the usage of proven techniques and quality equipment such as the following: -
l Containment of the affected area to prevent cross-contamination of molds l Use of proper filtration systems capable of removing the mold spores l Effective identification of the moisture sources and elimination of them to prevent mold regrowth
The professional team also does a post-remediation evaluation to confirm that the problem has been resolved successfully.
0 notes
Text
Why Timely Foundation Services in Tallahassee Protect Your Home
A solid foundation is the bedrock of a safe and secure home. When foundation problems arise, delaying repairs can lead to a cascade of costly and potentially dangerous structural issues. In Tallahassee—where shifting soils, high humidity, and frequent rainfall are common—foundation problems are not just possible; they are expected. That’s why timely Foundation Services Tallahassee residents trust are essential to protecting both the value and safety of their homes.
This article explains why addressing foundation issues early is crucial and how professional Foundation Services Tallahassee can save you money, stress, and structural damage in the long run.
The Hidden Dangers of Foundation Damage
Foundation damage often starts subtly—with minor wall cracks, sticky doors, or slightly uneven floors. However, beneath the surface, serious issues may be brewing. Over time, a shifting or settling foundation can lead to:
Cracked walls and ceilings
Water infiltration and mold growth
Warped flooring
Structural instability
Decreased property value
In Tallahassee’s wet and humid climate, moisture plays a significant role in foundation damage. If not addressed promptly, water intrusion and soil movement can cause rapid deterioration of the foundation’s integrity.
Why Timing Matters in Foundation Repairs
1. Problems Get Worse Over Time Foundation issues never fix themselves—they only worsen. What starts as a small crack can widen and affect the entire structure. Timely intervention from Foundation Services Tallahassee can halt the progression and prevent expensive damage down the line.
2. Cost-Efficiency Early repairs are almost always less expensive than major structural restoration. When caught in the early stages, solutions like crack sealing or minor leveling can cost a fraction of what major pier installation or full foundation reconstruction would require later.
3. Protects Your Property Value Foundation problems can significantly reduce your home’s market value. Buyers are wary of homes with unresolved structural issues. With timely professional repairs from Foundation Services Tallahassee, you maintain or even increase the value of your home, especially when backed by repair warranties.
4. Improves Safety and Stability A shifting or unstable foundation is more than a structural concern—it’s a safety hazard. It can compromise the integrity of load-bearing walls and create tripping hazards due to uneven flooring. Acting quickly ensures your home remains a safe place for your family.
5. Prevents Moisture and Mold Problems In Tallahassee, excess moisture is a serious threat. Foundation cracks and crawl space gaps allow water and humidity to seep in, creating ideal conditions for mold. Mold not only damages property but also poses health risks. Timely sealing and waterproofing stop the problem at its source.
Common Causes of Foundation Problems in Tallahassee
Expansive clay soil: Expands when wet and shrinks when dry, causing movement beneath the foundation.
Heavy rainfall: Waterlogged soil exerts pressure against the foundation walls.
Poor drainage: Leads to standing water around the foundation.
Humidity and poor ventilation: Affect crawl spaces and basements, weakening wood supports.
Tree roots: Roots from nearby trees can disturb or dehydrate soil beneath the foundation.
All of these factors highlight the importance of fast action and expert evaluation from professionals who understand the local landscape.
What Timely Foundation Services Include
Timely Foundation Services Tallahassee include a comprehensive approach to inspection, repair, and prevention:
Thorough inspections using advanced technology to detect early signs of damage
Crack sealing and injections to prevent expansion and water intrusion
Foundation leveling and pier installation to stabilize shifting structures
Drainage correction to redirect water away from your home
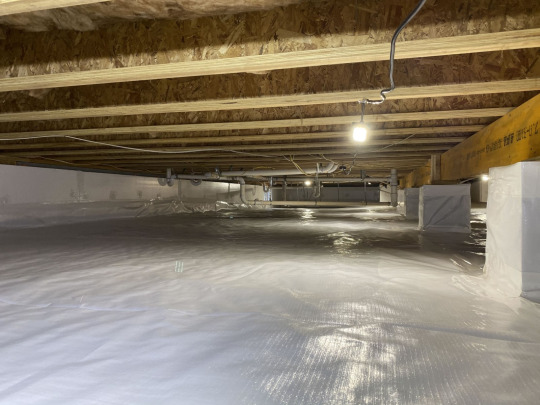
Crawl space encapsulation and basement waterproofing to control humidity
These services not only fix existing problems but also help prevent future issues from arising.
Choosing the Right Local Experts
When selecting a foundation repair company, it’s essential to choose experienced professionals familiar with local soil and climate conditions. The best Foundation Services Tallahassee providers offer:
Proven local experience
Comprehensive inspections and honest assessments
Custom repair plans
High-quality materials
Warranties for long-term peace of mind
Always read reviews, check for licensing and insurance, and ask for references before making a decision.
Final Thoughts
Your home is one of your most valuable investments. Ignoring early signs of foundation problems can result in extensive damage, high repair costs, and a serious decline in property value. Fortunately, with timely Foundation Services Tallahassee, you can catch problems early, take action quickly, and enjoy peace of mind knowing your home is structurally sound.
If you notice cracks, uneven flooring, or moisture issues—don’t wait. Contact a trusted foundation expert in Tallahassee and protect your home from the ground up.
0 notes
Text
Improve Indoor Air Quality with Certified Residential Ventilation Contractors
What comes to your mind when you think about home safety? Smoke detectors, CCTV cameras, or advanced locks, maybe. But have you thought about air? The very thing you and your family breathe every single day? For many homeowners, indoor air quality is an integral concern that can have real health consequences.
Homes across the region, especially older ones, often suffer from poor ventilation. Damp basements, stale air, or condensation on windows might seem like small issues, but they’re often signs of bigger underlying problems. One major risk is radon gas—an odourless, invisible radioactive gas and the second leading cause of lung cancer after smoking.
This is where residential ventilation contractors come in. Their job isn’t just to “move air ”around”—they improve airflow, reduce health hazards, and install smart solutions like HRV (heat recovery ventilation) systems to keep your home safe and breathable. At Radon Atlantic, our mission is to make homes healthier by improving the way air moves and by ensuring radon and other airborne threats are kept in check.
What Do Residential Ventilation Contractors Really Do?
Residential ventilation contractors are more than just HVAC installers. Their role is specialized and focused on the quality of the air inside your home. Here’s what we typically offer:
Assessment of airflow and ventilation patterns in your home.
Installation of HRV systems to ensure balanced air exchange.
Identification of ventilation blockages or inefficiencies.
Radon mitigation support, especially in high-risk zones.
Compliance with Health Canada and EPA guidelines.
At Radon Atlantic, we understand the local climate, housing structures, and radon risks specific to Atlantic Canada. Our team brings deep experience to every job, ensuring safe and code-compliant solutions.
Indicators Your Home Needs Better Ventilation
It is not necessary that you be a professional to understand that something must be wrong. The following signs may indicate your home needs better ventilation:
Stale or stagnant odor that lingers.
Fogging of windows or mirrors, particularly during winters.
Damp spots or mold growth in basements or bathrooms.
Uneven temperature in different rooms.
Enhanced allergic complaints or respiratory difficulties.
The results of the radon test are beyond the safe levels.
Each of these is a red flag. And while air purifiers and dehumidifiers can help in the short term, the real solution often starts with ventilation and with experienced residential ventilation contractors.
Why Ventilation Matters More in Atlantic Canada?
Life in Atlantic Canada means facing cold winters, muggy summers and houses that are highly insulated. The same keeps energy bills low but also manages to trap pollutants within.
Older houses are not equipped with good mechanical ventilation.
New houses are more air tight, but require some form of regulated airflow.
A long heating season means the windows are closed for months.
Crawl spaces and basements have a tendency to retain moisture, and humidity is prevalent therein.
Radon-prone areas need special attention and mitigation systems.
It is therefore recommended to hire professional residential ventilation contractors that are familiar with the local conditions.
Radon Atlantic: More Than Just Ventilation
At Radon Atlantic, our services are not just about fans and ducts. We provide comprehensive solutions for indoor air safety:
Mitigation and certified testing of radon.
HRV system installation for homes and small businesses.
Indoor air quality inspection with actionable results.
Audits on ventilation aimed at identifying weak areas.
Builder consultations for code-compliant ventilation in new homes.
We strictly follow Health Canada and EPA standards and proudly serve all of Atlantic Canada as an expert and transparent service. We don’t just install systems, we improve lives.
Benefits for Homeowners and Builders
Whether you’re a homeowner trying to improve your family’s comfort or a builder planning a new property, the benefits of proper ventilation are massive:
Healthier air and fewer allergens.
Lower radon levels and reduced cancer risk.
Less condensation and mold prevention.
Energy efficiency through modern HRV systems.
Peace of mind knowing your home meets national air quality standards.
Builders, especially, can avoid costly redesigns or radon-related legal issues by involving residential ventilation contractors from the start. And for homeowners, improving ventilation is often one of the most affordable ways to enhance overall living quality.
Why Choose Radon Atlantic?
Choosing the right partner for your ventilation needs is important. Here’s why Radon Atlantic is the trusted choice in the region:
Certified and experienced technicians.
Local expertise, based in Halifax and serving Atlantic Canada.
Trusted by homeowners, builders, and realtors alike.
Fully compliant with national radon and air quality standards.
Transparent assessments with no scare tactics—just facts and solutions.
CONCLUSION
Don’t leave your air quality to chance. If your home has stale air, excess moisture, or high radon levels, it’s time to take action. The right ventilation can transform your living space and your health.
With Radon Atlantic, you’re not just hiring residential ventilation contractors. You’re choosing a team that understands the science, the standards, and most importantly, your safety. Book your indoor air quality assessment today. Breathe cleaner, sleep better, and feel the difference that expert ventilation can make.
0 notes
Text
🛡️ “Shield Your Home: Expert Crawl Space Mold Removal & Encapsulation by Triangle Radiant Barrier” 🌟
At Triangle Radiant Barrier & Crawl Space Encapsulation, we know how moisture fosters mold below your home—threatening health, structure, and value. Here's our definitive guide to crawl space mold remediation, mold removal near you, crawl space mold remediation cost, and how encapsulation protects what matters most.x
1. What Is Crawl Space Mold & Why It Matters 🌱
Crawl spaces are prone to moisture due to poor ventilation, plumbing leaks, ground moisture, or blocked vents—creating a perfect habitat for mold spores to thrive. Indoor molds like Aspergillus, Cladosporium, Penicillium, and the notorious Stachybotrys chartarum (black mold) can grow under the right conditions—warmth, moisture, and organic materials
Why all the fuss?
Health risks: Mold can trigger allergies, respiratory problems, and asthma.
Structural damage: It degrades wood and insulation, weakening foundations.
Property value: Mold issues can scare buyers and hurt appraisals.
2. Signs You Need Crawl Space Mold Removal 🔍
Look out for:
Musty odors near floor vents
Visible mold growth on joists, insulation, or vapor barriers
Allergies worsening when heating or cooling runs
Humidity levels above 60%, especially below 75%
Ignoring these signs can lead to mold spreading into walls, HVAC systems, and other interior spaces—making early intervention key.
3. Professional Crawl Space Mold Remediation Steps
At Triangle Radiant Barrier & Crawl Space Encapsulation, we follow proven remediation protocols:
Inspection & Assessment Determine mold density, identify moisture sources, and decide between DIY or full-scale remediation.
Containment Setup Employ plastic sheeting, negative air machines, and HEPA filters to avoid spore cross-contamination.
Mold Removal
Scrubbing & detergent cleaning for accessible areas.
HEPA vacuuming for surface spores.
Advanced soda blasting for stubborn spots—this gentle baking soda method is effective and wood-safe.
Disinfection Apply antimicrobials (like Concrobium, peroxide, borax) to kill spores and inhibit regrowth.
Removing Contaminated Materials Dispose of mold-infested porous materials (e.g., insulation, wood) in sealed, professional-grade waste bags.
Drying & Moisture Control Install dehumidifiers, fix leaks, seal vents, and apply vapor barriers or encapsulation to maintain <60% relative humidity.
Encapsulation & Repair Seal foundation vents, line floors/walls with heavy-duty liners, wrap support pillars, and insulate rim joists for long-term protection
Final Clearance Testing Conduct air or surface tests to confirm mold spore levels are within safe, industry-recommended limits.
4. Costs: Crawl Space Mold Remediation & Removal 💰
a) Mold Remediation Cost in Crawl Spaces
According to This Old House, crawl space mold remediation typically costs between $500–$2,000 se.com+14angi.com+14. Angi reports comprehensive crawl space cleanings (including mold, debris, pests) averaging $1,000–$3,500
Triangle Radiant Barrier offers transparent pricing:
Inspection/quote: FREE
Mold remediation: $10–$25 per sq ft, averaging around $1,200–$3,000 depending on infestation level angi.com.
b) Encapsulation & Remediation Combo
Complete services—mold removal + encapsulation—range $1,500–$15,000 depending on crawl space size and scope . Encapsulation often saves you money long-term by halting recurring mold and repairing insulation.
c) DIY Costs vs. Professional Trade-offs
Simple DIY:
Hydrogen peroxide, vinegar, borax, baking soda, PPE, HEPA shop vac: $100–$500
Professional:
Higher upfront cost, but includes labor, proper containment, patented methods, and warranty-backed work. Value pharmaceutical returns via prevention and expertise.
5. DIY Mold Removal Techniques (Limited Cases) 🧪
If you have a small patch (<10 sq ft), these DIY remedies work—but professionals always wanted for larger or toxic infestations:
Hydrogen Peroxide (3–7%): soak, rest 10 min, scrub, dry thoroughly
White Vinegar (1:1 with water): spray, wait 60 min, scrub
Baking Soda Paste: apply overnight, scrub
Borax Solution: no rinse needed
Concrobium: kills spores and prevents regrowth
Important: Always wear PPE—respirator, goggles, gloves, coveralls—and ensure adequate ventilation . DIY is only safe for low-level mold; avoid tackling black mold or large infestations without pros.
6. Preventing Mold from Returning 🛡️
Seal & Encapsulate crawl space with liners, insulating walls, and vapor barriers
Control humidity using dehumidifiers or HVAC adjustments, maintaining RH <60%.
Seal foundation vents in winter to reduce humid outdoor air intrusion; reopen in summer if needed southernliving.com.
Fix leaks & grade soil to divert water away from foundation.
Routine inspections twice yearly to catch recurrences early.
Why Choose Triangle Radiant Barrier & Crawl Space Encapsulation?
Local expertise in the Triangle region’s humid climate
Advanced containment, HEPA filtration, and antimicrobial treatments
Encapsulation specialists offering long-term mold prevention
Transparent pricing & free inspections
Warranty-backed service and same-day quotes
👏 Our top priority is protecting your family’s health, improving home resale value, and avoiding costly repairs. We're fully certified, insured, and a trusted name in crawl space care.
Crawl Space Mold Remediation Cost Summary
Service
Typical Cost
Professional inspection
Free
Small-scale mold remediation
$500–$2,000
Average remediation
$1,200–$3,000
Full encapsulation + remediation
$1,500–$15,000
DIY basic treatment
$100–$500
7. Your Next Steps ✅
Reach out to our Triangle team for a free assessment.
We’ll inspect, identify mold causes, and recommend a tailored solution.
Schedule service—from mold removal up to full crawl space encapsulation.
Breathe easy as rumors of mold and musty odors vanish, and your crawl space becomes a clean, dry, and valuable part of your home.
Ready to Banish Mold for Good?
📞 Call Triangle Radiant Barrier & Crawl Space Encapsulation today at (XYZ‑123‑4567) or visit trianglecrawlspace.com to schedule your free mold inspection!
Let us handle the crawl space mold removal near you, giving you peace of mind and a healthier home environment. 💪🏡
Final Thoughts
Mold in crawl spaces isn’t just unsightly—it’s a health and structural hazard. Whether you’re dealing with minor spores or serious black mold, it deserves attention. With transparent pricing of $10–$25/sq ft, expert remediation, and full encapsulation options, Triangle Radiant Barrier offers everything you need to remove mold, control moisture, and keep your foundation dry.
Safeguard your home and family: act now—before mold spreads.✨
0 notes
Text
Leading Residential Insulation Contractors in Madison, CT
For homeowners in Madison, CT, and the surrounding shoreline, insulation is one of the most important investments you can make for your home. With unpredictable New England weather, from humid summers to frigid winters, effective insulation not only protects your property but significantly improves comfort, air quality, and energy efficiency year-round. That’s where Lighthouse Spray Foam stands out—as a local, reliable expert in residential spray foam insulation.
With years of dedicated experience and a reputation built on quality and trust, Lighthouse Spray Foam offers customized Residential insulation services tailored to the unique challenges of Connecticut’s coastal climate. Whether you’re upgrading an older home or insulating a newly built one, their team delivers precise, high-performance solutions that serve the entire home—attic to basement, walls to garage.
Comprehensive Insulation Solutions
Lighthouse Spray Foam focuses exclusively on residential insulation, ensuring that each job is handled with in-depth knowledge of building science and real-world performance. Their service portfolio covers every key area of the home:
Attic Insulation
Attics are a primary source of heat loss in many homes. Lighthouse Spray Foam addresses this by sealing air leaks around vents, chimneys, and framing before applying spray foam insulation to rafters or ceiling planes. This creates a thermal barrier that minimizes heat escape in winter and heat gain in summer, helping stabilize indoor temperatures and reduce HVAC workload.
Wall Insulation
Exterior walls play a major role in overall thermal performance. Lighthouse Spray Foam uses spray foam insulation to fill wall cavities, effectively blocking drafts and reducing energy transfer. This not only helps lower heating and cooling costs but also contributes to quieter, more comfortable indoor living.
Crawl Space and Basement Insulation
Moisture infiltration in crawl spaces and basements is a common issue in shoreline homes. The team at Lighthouse Spray Foam professionally seals and insulates these areas to prevent moisture intrusion, reduce the risk of mold, and safeguard the home’s foundation and structural integrity. These improvements also help improve indoor air quality, particularly important for families with allergies or respiratory concerns.
Garage Insulation
Garages—whether attached or detached—can become sources of energy loss if left uninsulated. Lighthouse Spray Foam upgrades these spaces by insulating walls, ceilings, and overhead doors, transforming garages into more functional, temperature-stable environments. Whether used for storage, work, or as additional living space, insulated garages provide greater value and comfort.
What Sets Lighthouse Spray Foam Apart
Several qualities distinguish Lighthouse Spray Foam as a top choice for insulation services in Madison and nearby communities:
Customized, Climate-Aware Solutions
Every project begins with a comprehensive evaluation to determine the right insulation approach for the space. Technicians assess moisture levels, ventilation, existing insulation, and structural conditions to recommend the best spray foam type—open-cell for sound absorption and flexibility, or closed-cell for high R-value and moisture resistance. This ensures that the solution aligns with the local climate and the unique demands of each property.
Professional, Detail-Oriented Process
The team’s process is both efficient and meticulous. From pre-installation preparation—including sealing penetrations and protecting living areas—to the careful application of spray foam and a thorough post-installation walkthrough, Lighthouse Spray Foam maintains the highest standards of workmanship and safety.
Tangible Energy and Comfort Benefits
Homeowners often see noticeable improvements immediately after installation. These include:
Lower monthly energy bills due to reduced heat transfer
Improved indoor comfort with fewer temperature fluctuations
Enhanced air sealing and noise reduction
Better indoor air quality, thanks to reduced infiltration of allergens and pollutants
These benefits not only improve day-to-day living but also increase the long-term value and resilience of the home.
A Local Team With Deep Regional Knowledge
Lighthouse Spray Foam has been serving the Connecticut shoreline since 2015. Their understanding of Madison’s seasonal shifts, humidity levels, and coastal weather patterns allows them to design insulation systems that perform reliably year-round. From winter storms to summer humidity, their foam applications are crafted to endure, making them a trusted insulation partner for coastal homeowners.
Trusted by Madison Homeowners
Clients consistently praise Lighthouse Spray Foam for their:
Punctual and respectful service
Transparent, competitive pricing
Clear communication throughout the project
Clean and professional jobsite conduct
Many homeowners report immediate gains in comfort and energy savings after their services—an indication of the company’s consistent results and client-focused approach.
Insulation That Supports a Healthier, More Efficient Home
Whether you are insulating a new build, retrofitting an older home, or tackling problem areas like a damp crawl space or drafty attic, Lighthouse Spray Foam brings the experience, tools, and local knowledge to get the job done right. Their mission is to create healthier, more efficient homes through high-performance insulation that lasts.
For Madison homeowners looking to make meaningful improvements in comfort, energy efficiency, and air quality, Lighthouse Spray Foam is a dependable partner. With a team committed to craftsmanship, climate-conscious solutions, and lasting results, they help homeowners build a better living environment—one insulated space at a time.
#1950s#60s#70s#911 abc#aesthetic#alternative#animals#anime and manga#Lighthouse Spray Foam#Residential insulation contractors#contractors#Madison#CT
1 note
·
View note
Text
Crawl Space Mold Removal Company: Why It Matters and What to Expect

When it comes to home maintenance, the crawl space is often overlooked. Hidden beneath the flooring and out of sight, this area can become a breeding ground for mold due to poor ventilation, humidity, and moisture intrusion. Hiring a crawl space mold removal company is essential for addressing mold issues at the root, preserving your home’s structural integrity, and ensuring a healthy living environment.
This blog explores why crawl space mold removal is critical, what professional companies offer, and how homeowners can benefit from expert mold remediation.
Why Mold Grows in Crawl Spaces
Crawl spaces are notorious for harboring mold. The conditions in these areas—darkness, high humidity, and limited airflow—are ideal for mold growth. Common causes include:
Leaking pipes or poor drainage
Ground moisture seeping through the foundation
Improper or missing vapor barriers
Inadequate ventilation
Flooding or water damage
When left untreated, crawl space mold can spread into your home’s walls, flooring, and HVAC system, triggering allergies, respiratory issues, and structural damage.
Signs You Need Crawl Space Mold Removal
It’s not always easy to detect mold growth in the crawl space without an inspection, but there are several warning signs that may indicate a problem:
Musty or earthy odors indoors
Increased allergy symptoms or respiratory discomfort
Visible mold spots on subflooring or insulation
Warped floors or signs of moisture damage
Higher-than-normal humidity levels inside the home
Pest infestations that thrive in moist environments
If you notice any of these indicators, contacting a crawl space mold removal company for an evaluation is a smart and proactive step.
What Does a Crawl Space Mold Removal Company Do?
Professional mold removal companies follow a systematic and thorough process to ensure the mold is completely eradicated and does not return. Here’s what you can typically expect from their services:
1. Initial Inspection and Assessment
Certified technicians perform a detailed inspection of your crawl space to identify the type and extent of mold growth, locate moisture sources, and evaluate damage to insulation, wood, or support beams.
2. Moisture Source Identification
Removing mold without addressing the moisture problem is a temporary fix. Professionals will determine the root cause of moisture—whether it’s a plumbing leak, groundwater seepage, or poor drainage—and recommend solutions to stop it.
3. Containment
To prevent mold spores from spreading to other areas of the home during cleanup, the affected area is sealed off using containment barriers, negative air pressure machines, and air scrubbers with HEPA filters.
4. Mold Removal and Cleaning
Depending on the materials affected, professionals use a variety of techniques to eliminate mold:
Scraping or sanding contaminated wood surfaces
Removing and replacing insulation
Using biocides or antimicrobial solutions
Dry ice blasting or soda blasting for hard-to-reach areas
5. Drying and Dehumidification
Once the mold is removed, industrial fans and dehumidifiers are used to dry out the crawl space and restore safe moisture levels.
6. Encapsulation (Optional but Recommended)
Encapsulation involves sealing the crawl space with a heavy-duty vapor barrier, insulating walls, and sometimes installing a dehumidifier. This step helps prevent future mold growth by controlling humidity and creating a clean, dry environment.
7. Post-Remediation Inspection
A final inspection ensures the mold is completely gone, and the space is safe and dry. Some companies may also offer air quality testing for added assurance.
Benefits of Hiring a Crawl Space Mold Removal Company
While DIY mold removal might seem tempting, mold in a crawl space can be more extensive and dangerous than it appears. Professional mold remediation offers several key benefits:
1. Expertise and Safety
Trained technicians understand mold behavior, safety protocols, and proper containment procedures. They use specialized equipment and PPE to protect both you and themselves.
2. Thorough and Lasting Results
Professionals don’t just clean visible mold—they eliminate hidden mold colonies and treat affected materials to prevent regrowth.
3. Structural Protection
Mold can compromise wooden joists, beams, and insulation. Professional removal helps preserve the structural integrity of your home.
4. Healthier Indoor Air Quality
Mold spores in the crawl space can circulate through the home via the HVAC system. Proper remediation ensures cleaner, healthier air for your family.
5. Moisture Control Solutions
A reputable company will not only remove mold but also implement long-term moisture control strategies such as encapsulation and drainage improvements.
How to Choose the Right Crawl Space Mold Removal Company
Choosing a qualified and trustworthy company is crucial to ensuring your crawl space is treated properly. Consider these tips when selecting a mold removal service:
Check Certifications: Look for certifications from organizations like the IICRC (Institute of Inspection Cleaning and Restoration Certification).
Ask for References and Reviews: Positive customer feedback and testimonials can help you gauge the company's reliability.
Get a Written Estimate: A detailed, written estimate should outline the scope of work, costs, and timeline.
Inquire About Warranty: Some companies offer warranties or guarantees on mold removal and encapsulation work.
Verify Insurance and Licensing: Ensure the company is properly licensed and insured to protect against liability.
Preventing Mold in Your Crawl Space
After professional remediation, ongoing maintenance is key to keeping mold at bay. Here are some tips:
Install a vapor barrier and consider full crawl space encapsulation.
Use a dehumidifier to control humidity levels.
Insulate pipes and ducts to prevent condensation.
Maintain gutters and downspouts to direct water away from the foundation.
Regularly inspect for plumbing leaks or standing water.
Schedule periodic crawl space inspections, especially after storms or flooding.
Final Thoughts
Mold in the crawl space is not just an eyesore—it’s a potential health and structural hazard that requires expert attention. A professional crawl space mold removal company offers the tools, training, and experience needed to completely eliminate mold and prevent it from coming back.
From thorough inspections to advanced remediation techniques and moisture control solutions, hiring professionals is a wise investment in your home’s health and longevity. If you suspect mold in your crawl space, don’t delay—take action now to protect your property and peace of mind.
1 note
·
View note
Text
Mould and Musty Smells Taking Over? Why You Might Need Sub Floor Ventilation in Northern Beaches
When that musty, damp smell starts seeping into your home — and mould begins to appear seemingly out of nowhere — it’s easy to feel overwhelmed. These aren’t just unpleasant inconveniences; they’re signs of deeper issues affecting the health of your home and your family. One of the most overlooked causes of these problems is poor airflow beneath your floors. That’s where the importance of Sub Floor Ventilation in Northern Beaches comes in. At Northern Beaches Drainage, we offer expertly designed systems that address the root cause and restore your home’s freshness and structural integrity.
What Is Sub Floor Ventilation and Why Does It Matter?
Sub Floor Ventilation in Northern Beaches refers to the process of improving airflow underneath your home, particularly in spaces like crawl areas or basements. These sub floor areas often trap moisture due to poor air circulation. When left unaddressed, that trapped humidity creates a breeding ground for mould, mildew, dust mites, and even structural decay in timber flooring or joists.
At Northern Beaches Drainage, we install purpose-built ventilation systems that actively remove this excess moisture, replace it with dry air, and maintain a healthy, balanced atmosphere below your home.
Common Warning Signs You Need Sub Floor Ventilation
If you’re experiencing any of the following issues, it may be time to invest in Sub Floor Ventilation in Northern Beaches:
Persistent musty smells, especially in lower levels of the house
Mould appearing on walls, ceilings, or furniture
Warped floorboards or lifting tiles
Excess condensation on windows
Cold, damp indoor environments even during dry seasons
These symptoms are more than just aesthetic concerns — they can trigger respiratory problems, worsen allergies, and silently damage your home’s structure. With Northern Beaches Drainage, you’ll get a customised solution that targets your home’s specific moisture challenges.

How Our Ventilation Systems Work
At Northern Beaches Drainage, our systems are designed with the local climate in mind. We install high-efficiency fans and ducting networks that either extract moist air from the sub floor or introduce fresh, dry air from outside. Depending on your home’s orientation, construction, and airflow dynamics, we may use passive or active ventilation techniques.
The result? A continuously balanced underfloor environment that prevents damp buildup and eliminates the need for costly repairs caused by long-term water damage.
The Local Edge: Why Choose Us?
Choosing Sub Floor Ventilation in Northern Beaches isn’t just about installing a fan — it’s about trusting a local team that understands the unique challenges of our coastal environment. Moisture from sea breezes, combined with shady backyards and older building foundations, makes ventilation a critical part of home health in this region.
Northern Beaches Drainage brings years of experience, local knowledge, and proven results. We don’t offer cookie-cutter fixes; instead, we assess your property thoroughly and design a tailored solution that guarantees long-term success.
Peace of Mind, Rain or Shine
When you address your sub floor issues properly, you’re not just eliminating mould — you’re also protecting your home’s value and your family’s wellbeing. A fresh-smelling, dry, and structurally sound home is always a worthy investment.
So, if musty odours or stubborn damp patches are creeping into your living space, it’s time to take action. With professional Sub Floor Ventilation in Northern Beaches from Northern Beaches Drainage, you can breathe easy — literally and figuratively.
Don’t let hidden moisture damage your home. Talk to Northern Beaches Drainage today and discover how Sub Floor Ventilation in Northern Beaches can restore comfort, health, and peace of mind.
0 notes
Text
Mold Prevention Tips for Carmel Homeowners After Heavy Rain
Heavy rain can bring much-needed relief to your lawn and garden, but for homeowners in Carmel, NY, it can also trigger a less welcome visitor: mold. Persistent rain and moisture create the perfect conditions for mold to take hold inside your home—particularly in basements, attics, crawl spaces, and anywhere ventilation or drainage is poor.
Once mold starts growing, it can damage your home’s structure and lead to health issues like allergies, respiratory problems, and asthma. That’s why Carmel’s Mold Removal Experts strongly advise proactive prevention—especially after major storms or extended periods of rainfall.
In this guide, we’ll break down the best mold prevention tips for Carmel homeowners and explain how you can protect your property before mold becomes a costly issue. If mold is already a concern, we’ll also share when to seek professional mold inspection in Carmel NY and how mold remediation works.
Why Heavy Rain Increases Mold Risk
Before jumping into prevention tips, it helps to understand why heavy rain is a major mold trigger in the Carmel area:
Soaked Foundations: Rainwater can seep into basements or crawl spaces if exterior drainage is poor.
Roof Leaks: Damaged shingles or clogged gutters can allow water into attics and ceiling cavities.
High Humidity: Prolonged damp conditions raise indoor humidity, which fuels mold growth.
Power Outages: Rainstorms that knock out power may disable sump pumps or dehumidifiers.
If your home stays wet for more than 24-48 hours, mold spores in the air can begin to colonize surfaces—often in hidden spots like wall cavities, behind furniture, or under flooring.
1. Inspect for Water Intrusion Immediately
After any heavy rainfall, inspect your home’s interior and exterior for signs of moisture. Don’t wait until you see mold—early detection can save you thousands in repairs.
Key places to check:
Basements and crawl spaces for standing water or damp walls
Attics and ceilings for water stains or musty smells
Windows and doors for leaking seals or condensation
Around the foundation for pooling water or soft soil
If you notice signs of water intrusion, contact Carmel’s Mold Removal Experts right away for a professional mold inspection in Carmel NY.
2. Dry Wet Areas Within 24 Hours
Time is critical after water exposure. Mold can begin growing within just 24 to 48 hours. Act fast to dry wet surfaces and materials.
Steps to dry effectively:
Use fans and dehumidifiers to accelerate drying.
Remove and hang out rugs or carpets that got wet.
Open windows when humidity outside is lower than inside.
Wipe down wet surfaces, including windowsills and walls.
If you suspect that water seeped behind walls or under flooring, call professionals for an inspection. Hidden moisture is a common cause of delayed mold remediation in Carmel NY.
3. Keep Gutters and Downspouts Clear
Rain needs a clear path to drain away from your home. Clogged gutters and short downspouts can send water spilling into your foundation or siding—setting the stage for mold.
Maintenance tips:
Clean gutters at least twice per year or after major storms.
Ensure downspouts extend at least 4 to 6 feet from the foundation.
Check for cracks or sagging that could divert water into your home.
Install gutter guards if debris buildup is frequent.
Prevention outside the home is just as important as managing moisture inside.
4. Check Your Roof for Leaks
After a heavy rain, your roof is the first line of defense. Even small leaks can allow enough moisture into attic insulation or drywall to cause major mold problems over time.
Post-rain checklist:
Look for missing or curled shingles.
Inspect the attic for damp insulation or discolored beams.
Examine ceilings for water stains or peeling paint.
Use a moisture meter if you suspect trapped water.
If you find issues, fix them immediately to avoid the need for mold removal Carmel NY later.
5. Maintain Indoor Humidity Levels
Rainy weather naturally raises indoor humidity. Mold thrives when humidity levels stay above 50%. Monitor your indoor environment closely, especially during the rainy season.
How to manage humidity:
Use a hygrometer to measure indoor humidity.
Run a dehumidifier in basements, bathrooms, or any damp rooms.
Avoid overwatering indoor plants or drying clothes inside.
Use exhaust fans while showering and cooking.
By keeping humidity in check, you make your home far less hospitable to mold spores.
6. Improve Ventilation
Proper airflow helps dry moisture and reduces condensation that leads to mold growth. This is especially important after days of closed windows and damp air.
Tips to increase ventilation:
Open windows and doors when safe to do so.
Use ceiling fans and bathroom exhaust fans regularly.
Move furniture away from walls to allow air to circulate.
Consider installing a whole-house ventilation system.
Ventilation, paired with moisture control, creates an environment that mold finds difficult to survive in.
7. Schedule a Professional Mold Inspection
Even with the best prevention efforts, some mold problems hide behind walls or under surfaces. If you’ve had a flooded basement, leaking roof, or musty smells after rain, it’s time for a mold inspection in Carmel NY.
Carmel’s Mold Removal Experts use thermal imaging, air quality testing, and moisture detection tools to identify mold hotspots—often before they become visible. Early detection prevents small problems from becoming full-blown mold remediation projects.
8. Know When to Call for Mold Remediation
If mold is found, swift action is key. DIY methods like bleach or vinegar often don’t solve the root problem—and can even spread mold spores. For thorough, safe mold remediation in Carmel NY, trust certified professionals.
Carmel’s Mold Removal Experts follow industry-standard protocols:
Contain the affected area
Safely remove contaminated materials
Dehumidify and treat the space with antimicrobial agents
Restore damaged areas and prevent future growth
Prompt remediation not only restores your home but also safeguards your family’s health.
Final Thoughts
Heavy rain is a fact of life in Carmel, NY, but mold doesn’t have to be. By taking preventive steps after storms, maintaining good ventilation, and acting fast when moisture strikes, you can keep your home dry, safe, and mold-free.
Still, if mold does become an issue, don’t take chances with DIY solutions. Call in Carmel's Mold Removal Experts for fast, professional mold removal Carmel NY homeowners can trust.
Carmel's Mold Removal 95 Gleneida Ave Suite 1, Carmel Hamlet, NY 10512, United States 1-845-552-1726 https://moldremoval-carmelny.com/
0 notes
Text
How Alexandria Homeowners Can Prevent Water Damage with Proper Waterproofing
Water damage is one of the most common and costly issues homeowners face. In Alexandria, Virginia, where historic homes, clay-rich soils, and seasonal rainfall are part of the landscape, protecting your home from moisture is critical. Proper waterproofing isn’t just a maintenance task—it’s a long-term investment in your home’s structure, safety, and value.
Let’s explore how Alexandria homeowners can prevent water damage through smart waterproofing solutions.
Why Waterproofing Matters in Alexandria
Unique Local Challenges
Homes in Alexandria often sit on older foundations that may not meet modern waterproofing standards. Combine that with heavy summer storms or melting snow in winter, and it’s easy to see how basements and crawl spaces become vulnerable to leaks and moisture buildup.
Water damage doesn’t just lead to cosmetic issues like peeling paint—it can cause mold growth, wood rot, and even foundation cracking.
Key Areas to Waterproof
1. Basement and Foundation
The basement is the most common entry point for water. Whether it's seeping through walls or coming up through the floor, water in your basement is a clear sign that your foundation needs attention. Solutions may include:
Exterior waterproofing membranes
Interior sealants and vapor barriers
French drains and sump pumps
Regrading soil around the foundation
2. Crawl Spaces
Homes with crawl spaces should have vapor barriers installed to prevent moisture from rising into the home. Proper ventilation is also essential to avoid mold and mildew buildup.
3. Exterior Surfaces
Driveways, patios, and retaining walls all contribute to how water flows around your home. Cracks in concrete can let water in and should be sealed. A full service concrete contractor like KLN Construction LLC can assess and repair these surfaces to ensure water is properly redirected away from your foundation.
Signs Your Home May Need Waterproofing
Musty odors in the basement or crawl space
Water stains on walls or flooring
Efflorescence (white mineral deposits) on masonry
Warped wood, peeling paint, or mold
Cracks in the foundation or concrete surfaces
If you notice any of these signs, it's time to consult a professional for a waterproofing assessment.
Preventative Tips for Homeowners
Clean gutters and downspouts regularly to keep water flowing away from your foundation.
Ensure your yard slopes away from your home—this reduces pooling near the structure.
Seal cracks and gaps in your exterior walls, window wells, and driveway.
Schedule regular inspections, especially after heavy rainfall or thawing snow.
Final Thoughts
Waterproofing is a crucial step in protecting your home, especially in a city like Alexandria where historic structures meet unpredictable weather. A proactive approach can prevent thousands of dollars in future damage, protect your indoor air quality, and preserve your property’s value.For expert guidance and comprehensive solutions, trust a full service concrete contractor like KLN Construction LLC to help you safeguard your home from water damage—now and for years to come.
#bathroom remodeling#bathroom renovation#construction#deck builder#home improvement#home improving project#home remodeling#kitchen remodeling#kitchen renovation#patio installation
0 notes