Don't wanna be here? Send us removal request.
Text
Week 7 - We are just about there!
Sorry I haven’t checked in here for awhile! Unfortunately I have had some very busy work issues and it has affected me keeping this blog current.
This was kind of a tough week for class. This lab had tons of typing and opportunity’s to make mistakes. I certainly did that and had to restart several times in order to get the host commands to work.
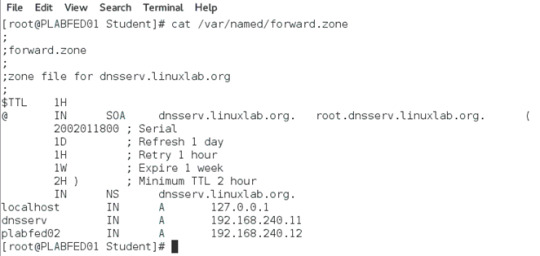
The main issues I ran into was regarding the files we needed to create, the forward.zone file and the reverse.zone file. These were edited using the command vi /var/named/forward.zone and vi /var/named/reverse.zone. Using these commands would bring up a completely blank screen, and we needed to add a bunch of commands. The key here is that we need to use the tab button in most places instead of the space bar. This is kind of hard to see in the lab instructions but after watching our lecture video, it seems clear. Once we are finished, that blank screen we started out with now looks like this:

This may look simple but believe me it was very easy to make typo’s and then the host commands later would not work. Another common mistake to watch for is make sure to use a period after the address such as dnsserv.linuxlab.org. I first thought this was a typo on our lab, but we definitely need this period in order for the host commands to work. If we complete this lab successfully we can run host commands and check results by typing:

Thank you all for tuning in to this blog over this session! I am looking forward to wrapping up this class and my course project. I still have a lot of work to do on this project. Thanks again and see you next session!!
Tim
0 notes
Text
Week 3 - We finally start progressing on our course project!
Ok Ok, I know we are off to a bit of a late start. It has been a busy time for me, but we can do this!
To get started on this course project, I decided that I did want to work with a virtual machine in order to get hands on experiencing this stuff. Some friends recommended I use the free version of VMWare Workstation, so I will be using that. So let’s get rolling!
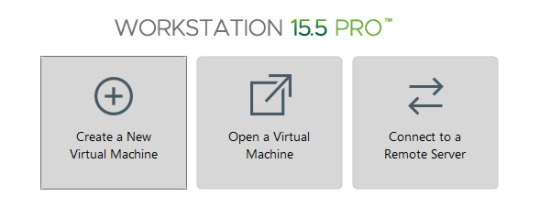
Ok so I have opened up VMWare Workstation after the install and so far it looks very user friendly. I will click the button, Create a new virtual machine.

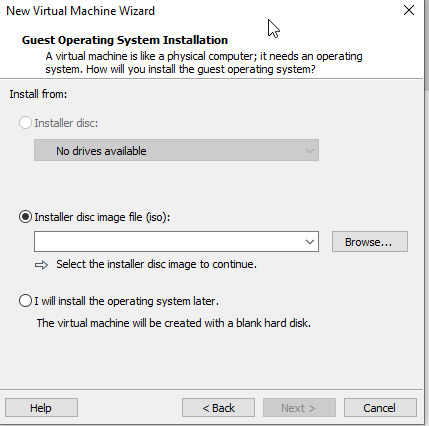
This opens a wizard where I choose Typical (Recommended) configuration then click next. This screen would like the OS installer disc image:

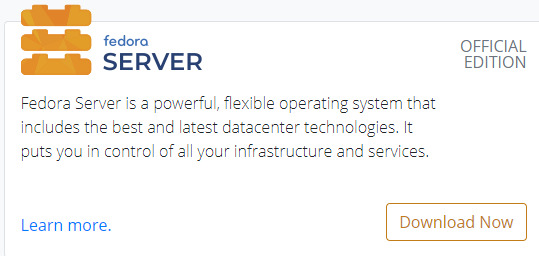
I don’t have this yet, so I will head over to getfedora.org and download the server edition of fedora:

After this finishes downloading, I select the iso file in VMWare and click next. This brings me to some simple fill in the blank info to personalize Linux. I enter my name, a username and a password and click next. Here we get to name the virtual machine, I name it WEB375 Course Project and click Next. Here we get to decide how much space to allocate for the virtual machine:

I choose the recommended size of 20gb and press next. This brings me to a summary window and I click finish to complete this install wizard. This apparently means I have my first virtual machine! I will now click the green button that says Power on this virtual machine:

Unfortunately trying to turn on this VM causes an error to pop up:

My preference is to not mess with my BIOS right now for this without doing some more research, so unfortunately I think I will wrap this post up for now and look at the Oracle Virtual Box and see if I have luck there. Thanks for your patience but we will get this thing installed somehow and get cooking on our course project.
Tune in for my next post where I should have this up and running and we start to setup our course project (For real this time!)
Cheers!
0 notes
Text
Week 2 - Configure DNS errr learn about iptables and Linux firewalls?
Hi everyone! I am back with another exciting course blog post. This time we are getting into some more details so buckle up!
I started out this week working on the week 2 lab in our skillsoft lab environment. The main task seemed to be configuring a DNS server in Linux. I was cruising along on this lab when I realized...this is not actually our assignment for the week! I noticed on our lab report template that we were supposed to be working on configuring a Linux firewall. I also checked our week 2 lesson and we definitely had a mistake somewhere. It turns out we need to do skillsoft week 7 lab in order to practice with Linux firewall.
Now that we are working on the proper lab, let’s talk about Linux firewalls. This stuff was pretty basic, I just needed to get familiar with all of the commands. The main command to use was iptables, and we needed to do this as the root user. We could also add some modifiers to display additional information or change the formatting of the information. We mostly used the --line-numbers display to make it easy to recognize the rule numbers for our firewall. The other - modifiers gave us additional information:
#iptables --line-numbers -n -L
#iptables -L -n -v
-n displays the ip address and port in numeric format
-L lists the rules
-v displays detailed information
--line-numbers adds line numbers to the rules which can be used to modify rule
So when we put all this together and type the command:
iptables --line-numbers -n -L we get a nice numbered display of rules like:

We were also able to create and modify and delete some of our firewall rules which we will definitely need to do. The main concern here was turning off telnet connections as this can be dangerous and lacks encryption. In order to turn off telnet connections, we used this command:
#iptables -A INPUT -p tcp --dport 23 -j DROP
which results in a rule that will not allow telnet connections to connect. As soon as a telnet connection is made it is dropped. This is what the rule that we typed in looks like in the iptable:

Then as I stated, the telnet connection will be refused:

I think that is about it for this week! This was an interesting lab and will definitely be needed as we work on our course project and look to secure our servers.
Thanks for joining me, see you all next week!
Tim
0 notes
Text
Week 1 - Introduction
Hi everyone! My name is Timothy Light and this will be my course blog as required by my WEB375 course at Devry University. I look forward to keeping you all updated on my progress this session right here on my blog. So let’s get started!
First up, I needed to set up a blog for the course, I decided to do that here on tumblr.com. I have never really kept a blog before so hopefully I get the hang of this and can make this somewhat entertaining or informative to read.
My next task this week was to get our lab done. Our lab uses skillsoft and we basically log in to virtual machines and practice our material for this course. This specific week 1 was basically just a linux commands refresher. This was very good for me though as I have not used much linux, especially recently. We basically just practiced signing in and out, creating and deleting directories and files, looking at the calendar function, etc. All of it was quite basic.
Lastly, I need to get started on my course project. This week I will be writing the introduction for the course project and also setting up the Linux administrator account. I am about to start working on that stuff and will update you all next week with some progress!
Thanks for stopping by, see you next time :)
1 note
·
View note