#http //www.routerlogin.net
Text
Setting Up Access Control on Your Netgear Nighthawk Router to Allow/Block Devices From Accessing the Internet

To set up access control on your Netgear Nighthawk router, follow these steps:
1. Open a web browser and navigate to your router's login page. This is typically located at http://www.routerlogin.net.
2. Enter your router's login credentials. If you have not changed these from the default, the username is usually "admin" and the password is usually "password."
3. Once you have logged in, navigate to the "Advanced" tab and then select "Security" from the left-hand menu.
4. Under the "Security Options" section, click on "Access Control."
5. Click on the switch to enable access control. This will allow you to start creating rules.
6. Click on the "Add" button to create a new rule. You will be prompted to enter the device's name and MAC address. The MAC address can usually be found on the device itself or in its network settings.
7. Once you have entered the device's information, you can choose whether to allow or block its access to the internet, as well as specify a schedule if you want to restrict access during certain times.
8. Click on "Apply" to save your changes.
9. Repeat steps 6-8 for any additional devices you want to create rules for.
With access control set up on your Netgear Nighthawk router, you can now ensure that only authorized devices are able to access the internet through your network. If you have any issues or questions about setting up access control, you can refer to Netgear's support resources or contact their customer support for assistance.
To know about the following details visit How to setup Access Control on Netgear Nighthawk Router to Allow/Block Devices
How to Allow/Block Devices Using Access Control on Your Netgear Nighthawk Router?
How to Create an Access Control List?
How to Add Devices to The Access Control List?
Managing Access Control on Your Netgear Router Login
Troubleshooting Access Control on Your Netgear Router
The article referenced from https://mynetgearrouterlogin.com/how-to-allow-block-devices-on-router/
Read the full article
#netgear#nighthawk#router#accesscontrol#wifi#networksecurity#network#internet#technology#modem#wireless#networking#vpn#cybersecurity#security#firewall#routing#wifirouter#ethernet#tplink#cisco#internetaccess
0 notes
Text
The Quickest & Easiest Way To How to Connect Wifi Extender to Router Without WPS
Wifi extender is used to extend the wifi coverage and improve the signal strength of your existing network. We can connect wifi extender to router without WPS. WPS is a feature that connects devices to the network easily and quickly. This feature is considered insecure and leaves your network vulnerable to attack.
Steps How to connect wifi extender to router without WPS:
Connect wifi extender: Connect wifi extender to a power outlet and wait for it to power on.
Connect your device to the extender: After the extender is turned on then connect your computer and mobile to the network.
Open your router admin interface in the web browser: Open the web browser and go to the address bar and type http://www.routerlogin.net and press enter.
Enter login id: Enter your username and password in the login prompt. Password for most of the routers is “admin” and “password”.
Click on add wifi extender: After logging in, find the section that allows adding a new wifi extender. This might be called a wireless setting or network setting.
Add wifi extender details: After finding the correct section enter the name of your extender and password. Now your wifi is connected to the router.

1 note
·
View note
Text
www.routerlogin.net admin password
Open any web browser on your laptop or computer that is connected to your network. Enter www.routerlogin.com on to your url address bar. After that enter the router admin username and password. The user name is admin. The password is the one that you specified during setup. Remember that your user name and password are always case-sensitive.
0 notes
Text
Satellite connection settings for Netgear WiFi router
Netgear wifi router devices are very stylish and very easy to maintain. When you choose any Netgear router model for wifi connections, make sure that you can easily make the wireless advance settings for your devices. When you need to make satellite connection settings for your Netgear router device, you can make these settings using routerlogin net genie setup page. This is the page that you can access from your computer or mobile device.

Complete Steps for Making Satellite Connections for Netgear Devices
1. Connect your Netgear wifi router device to a computer and for this you will need to disconnect your Netgear router from your modem. Easily change the name of the Netgear Nighthawk router with the help of blog here.
2. When your device gets power supply, you can open web browser and fill routerlogin net genie address.
3. After that type Netgear login user name and password for accessing Netgear router setup page.
4. After that click “Advanced” button.
5. After that click on “LAN IP Setup” button.
6. There you can change the IP address settings for Netgear devices. You can choose or type “192.168.10.1” IP address for your device.

7. For starting IP address you can choose “192.168.10.2” IP address.
8. After that click on “Apply” button from the Netgear setup window.
Once you follow all these steps, you can close the web browser because all settings are done for your devices. You can then power cycle your devices. Switch Off power supply for your devices and once again power ON power supply after few seconds. Other settings you can make by accessing Netgear setup page from computer device. If you can’t make these settings then you can contact Netgear support team for help. You can also get remote access for these advance settings and make satellite settings for your devices.
#www.routerlogin.net#http //www.routerlogin.net#routerlogin.net 192.168.0.1#Netgear router sign in#Netgear router setup
0 notes
Link
Get help to setup my Netgear Nighthawk Router
To setup the Netgear Nighthawk router, get on the Netgear router setup page. Here you would have to enter the asked fields and with a few steps you would reach to the settings panel. Apply the settings and your router would be all set. To get extensive information about the Netgear Nighthawk Router Setup process, call on toll free number and contact our experts.
1 note
·
View note
Link
On a Windows (7/XP) environment, and your router is a Netgear WGR614GR Wireless Cabel/DSL Router, then you should Connect the router via a wired Ethernet cable from your computer and the web browser go with routerlogin.net to unlock the login page of your router.
#www.routerlogin.net#routerlogin.net#http://routerlogin.net#http://www.routerlogin.net#routerlogin.net setup#routerlogin.net netgear
1 note
·
View note
Link
There’s so much to be achieved than simply supplying your guests with boring WiFi and the slow internet. Supportive Portal tools such as http://routerlogin.net setup allow users the option to log in to guest Wi-Fi with Facebook, Instagram, and YouTube.
#www.routerlogin.net#routerlogin.net#http://routerlogin.net#http://www.routerlogin.net#routerlogin net admin#routerlogin.net setup
1 note
·
View note
Link
You’ve seen various guest portals before or might have tried also to log into a “Guest Wi-Fi” that is open, but before being allowed to actually use the internet at the window http://www.routerlogin.net, some sort of login, password or usage agreement must be required to fill in the window.
1 note
·
View note
Link
If you are trolling for a brand new and stable Wi-Fi connection, you should consider a move to Wi-Fi 6 (802.11ax), and upgrade your existing home network to resolve the capacity problems at http://www.routerlogin.net of your Wi-Fi. The firmware of this router can also be upgraded through the automatic feature.
1 note
·
View note
Text
NETGEAR Router Login | Routerlogin.net | Routerlogin.com
NETGEAR Router Login | Routerlogin.net | Routerlogin.com
Routers admin page of newer Netgear router can be simply accessed using routerlogin.com or routerlogin.net. You don't need to remember the default IP of the Netgear router anymore. The recent range of Netgear routers is configured in such a way that when you go to the www.routerlogin.net login page from your home network, it redirects automatically to the router admin or configuration page.Here in this article, we shall discuss how to access the NETGEAR router login page (www.routerlogin.net or routerlogin.com) and all the problems and their respective solutions you may encounter while logging in to your NETGEAR router, especially for the first time.
You may be unable to access the www.routerlogin.net login page because of your router's faulty software. Furthermore, a misconfigured browser cache or mismatched browsers may be to blame for the issue in question. The problem occurs when you, as the afflicted user, attempts to access the router's administration panel through www.routerlogin.net login. The issue then is not limited to a particular operating system or model of NETGEAR router. Some customers face a problem while configuring the router for the first time as well.
Before proceeding with the troubleshooting method to log in to the NETGEAR router, ensure that you are using the correct password and user name for the router ("admin" and "password" are the default versions). Disconnect your system from any other wired, wireless, corporate, or VPN connections as well (merely a single connection, whether wireless or wired to the NETGEAR router). Furthermore, deactivate all pop-up blockers and ad-blocking browser add-ons.
How to access the NETGEAR router login page to configure router?
Launch a web browser from any device linked to the network of your router.
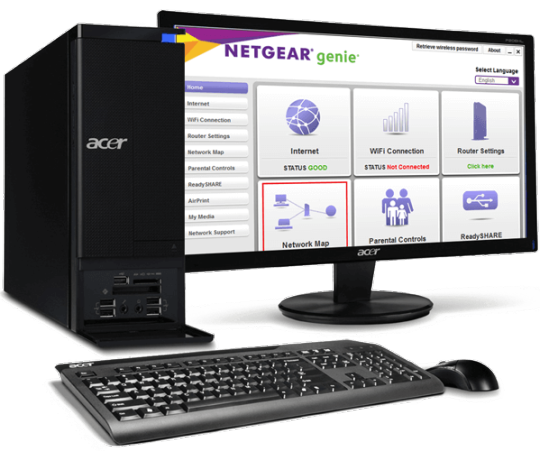
Type www.routerlogin.net or http://192.168.1.1. in the address bar for login page.The router login screen appears.Enter the router administrator’s username and password.‘admin’ is the user name. The password is the one you entered throughout the setup process. The case of user name and password is essential.If you don’t remember your NETGEAR admin password, read. How do I retrieve my NETGEAR admin password?The BASIC Home screen is visible.Referenced from https://mynetgearrouterlogin.com/
Read the full article
#router#wifi#internet#technology#tplink#network#modem#wireless#networking#vpn#cybersecurity#networkengineer#security#netgear#firewall#routing#wifirouter#ethernet#setup#admin#password
0 notes
Link
You can check out these at www.routerlogin.net to check which bandwidth is good for your Wi-Fi device. If your devices are competing for more bandwidth, then you should opt for NETGEAR Wi-Fi 6 router, which will be able to handle all of them in the quick start.
1 note
·
View note
Link
1 note
·
View note
Last Seen Blogs