#garlic scape packets
Text
Barbequed Potato and Garlic Scape Packets Recipe

Garlic scapes, the flower stalks of the garlic plant, give a straightforward barbecued potato dish a delicious twist. The garlic scapes almost have the consistency of young asparagus stalks and give the potatoes a wonderful garlic flavor without being overpowering. An interesting side dish for any early summer barbecue, the potatoes and scapes have a satisfying texture.
0 notes
Photo

Barbequed Potato and Garlic Scape Packets
A basic barbecued potato dish takes on a delicious twist thanks to garlic scapes, the flower stalks of the garlic plant. The garlic scapes add a wonderful garlic flavor to the potatoes without being overpowering and they almost have the consistency of young asparagus stalks. The texture of the potatoes and the scapes is interesting and makes a satisfying side dish to any early summer barbecue.
0 notes
Text
I can't believe it's been a month since I posted the May garden update. A lot of things has happened. Loads of wins and also plenty of failures. I guess I'll start with the progress of the ones I featured last month.
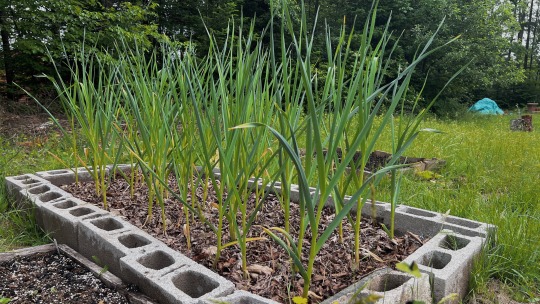
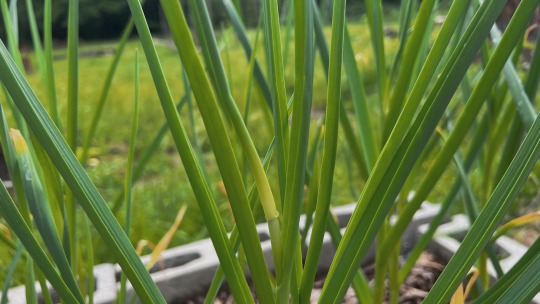
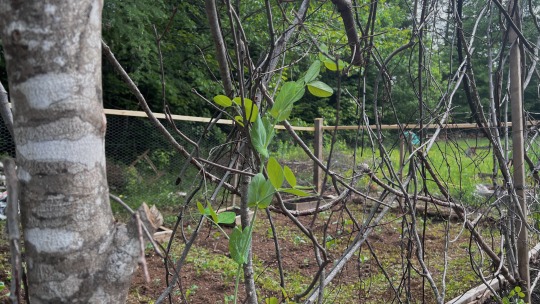
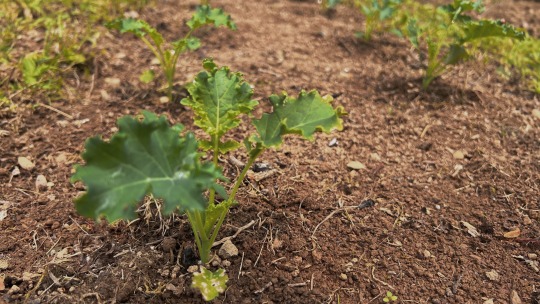
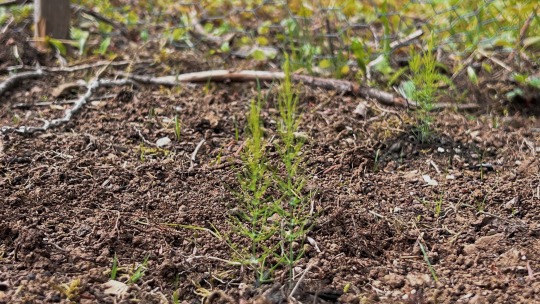
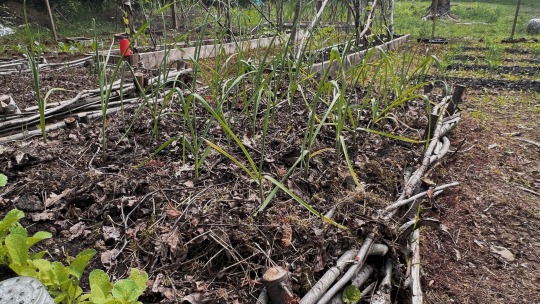
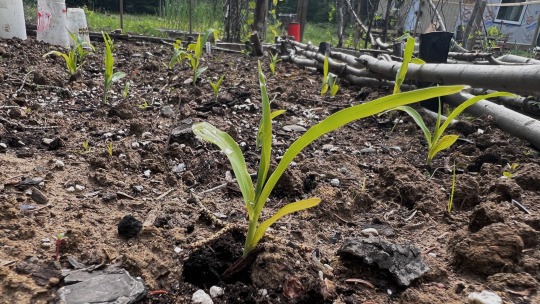
The hardneck garlic that overwintered are just about ready to be harvested. According to online sources, garlics can be harvested about a month after the scapes emerges. I was delighted to see the scapes as I was taking pics this morning. Can't wait to collect and make something out of them.
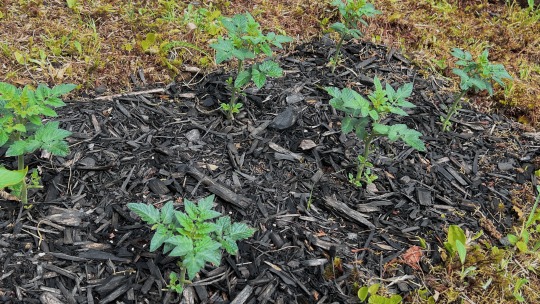
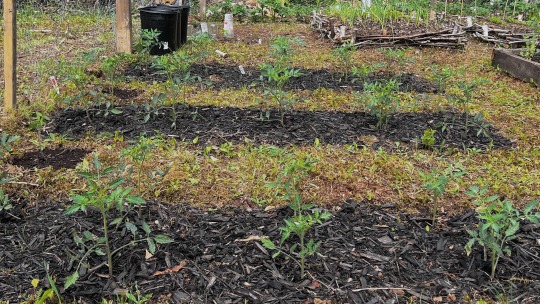
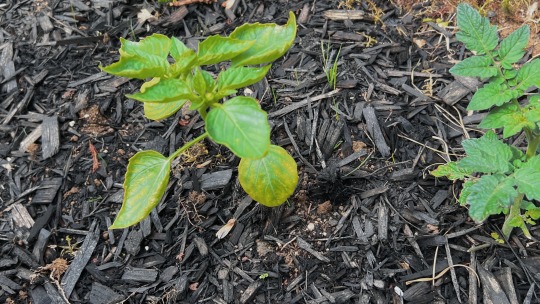
Oh tomatoes. I talked about how our weather has been awful many of times on this blog. After the dry May, they started showing some damaged on their leaves, and since they barely saw the sun this month, they did not grow very much. I panicked so I bought 30 more roma seedlings and 6 more cherry tomatoes. After a few days of sun, all of them are bouncing back to life and looking very healthy. Now I'm stuck with 60 romas and 12 cherries. Not the worst problem to have, really. All corners of the garden have tomatoes planted in them.
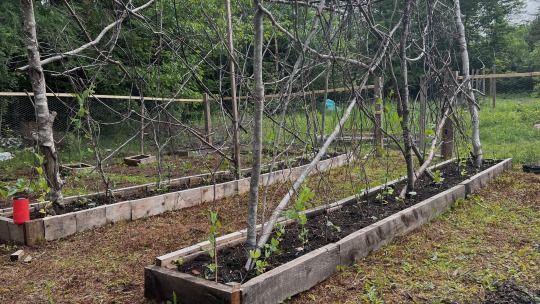
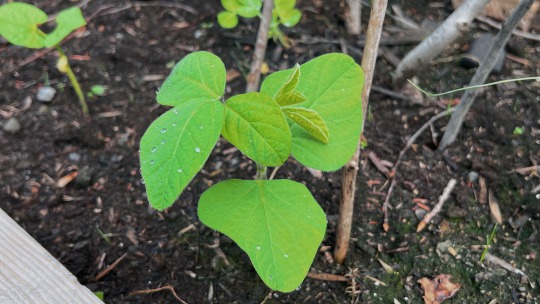
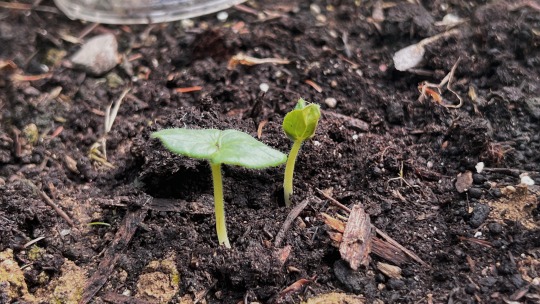
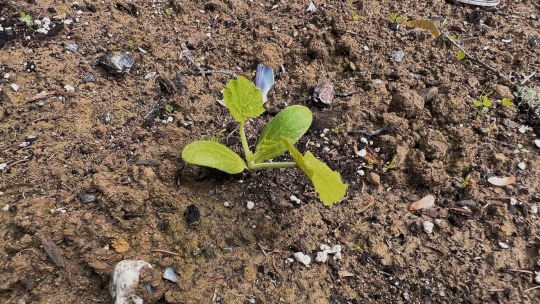
The beds where the trellis is sitting is now filled with plants. All of the beans and peas are looking great. The snow peas are about 4 ft tall and there's plenty of beans on the ground. The luffa that I was so excited about, none of them showed up. I bought a packet of 10 seeds for a whopping $4.99 and only 1 germinated. I'm currently babying it and waiting for the perfect time to transplant it. The cucumber is the other one I'm totally having hard time with. So far I've already used up the whole packet, and so far I have seen none. I planted the last 6 seeds yesterday but I'm not holding my breath. We have a neighbour (I'm using the word neighbour very loosely here, they're about 5km from us) who have a small road-side stand and in the summer they sell cucumbers. I think I'm just gonna have to rely on them for cucumbers.

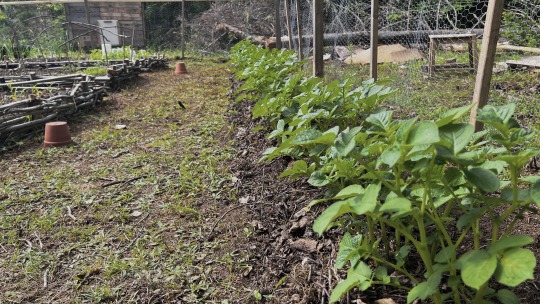
The potatoes (all 30ft row) are doing extremely well. Some of them suffered from light frost and their early leaves died but they all bounced back. I think next year, I'll plant them even earlier.
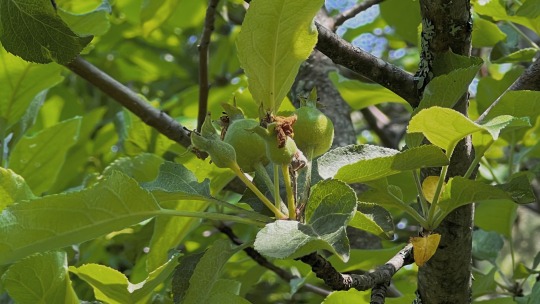
It looks like the apple or crabapple (I still don't know) tree had a couple of successful pollinations. I think the reason for the lack of blooms is because the tree has been neglected and unkept for a long time. I've already been researching and watching a ton of videos on how to properly prune apple trees so I can prune it next spring in hopes that it will put out more blooms next year.

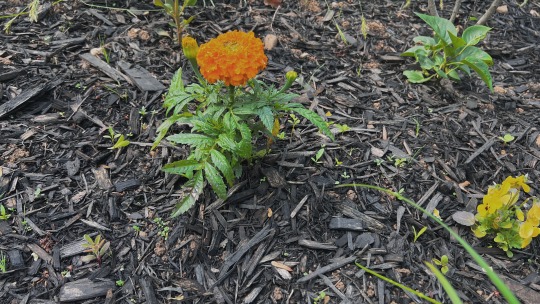
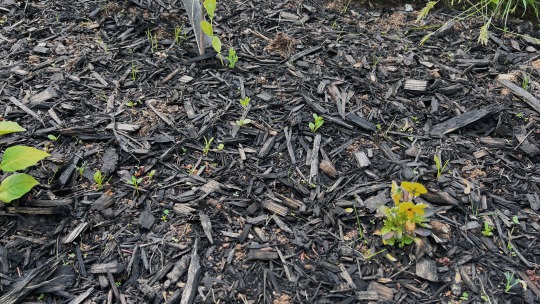
The border is looking a bit sad. Something to be expected on the first year due to the fact that most of the plants I have in it are perennials. I think they'll live though, I can only hope that they come out stronger next year. Looking closely, the wildflowers that I broadcasted are out. I see hundreds of them.
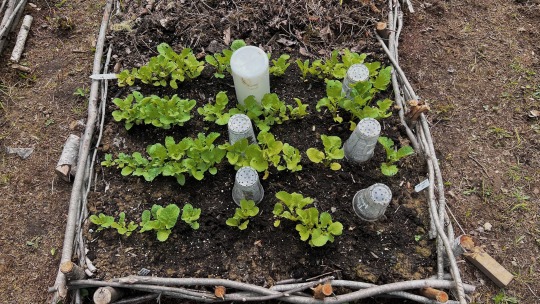
I've added two smaller beds, I'm hoping to fill them up with the annual seedlings I'm currently growing. No progress at all on the potted garden in the background.
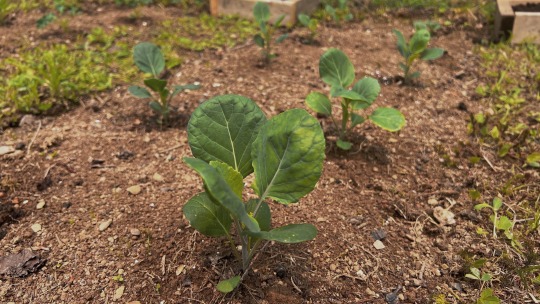
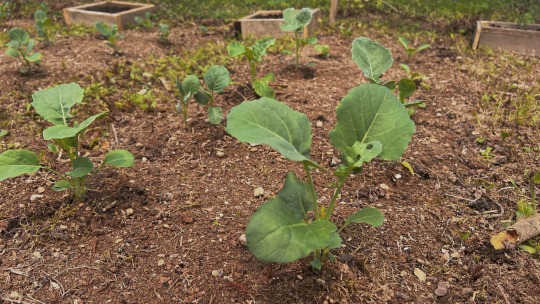
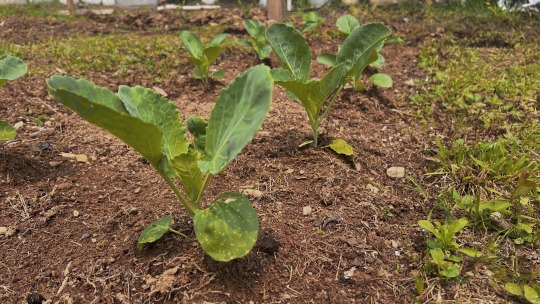
The brassicas are my favourites but also the main cause of my headaches. Thank god I have seeded a good amount of extras because these bitches have plethora of enemies!
The first to attack was slugs. They destroyed a handful of seedlings (100% my fault coz I decided to plant them too young). I battled this with non-stop weeding and slug hunting. So far it's been working, I just go in early in the morning, remove all of the slugs and the weeds they hide into.
Then the rabbits. I did not plan to build a fence this year but after the rabbit attack that ate almost half of the original plants, I decided to build a fence around the garden. Again, so far it's working.
Then just when they start actually growing, the damn flea beetles happened. Yesterday, I ordered some food grade diatomaceous earth. I'm aware that it will kill all of the insects it will come across with whether they're good or bad but I guess I'll just have to be careful not to put it on any of the flowering crops so it doesn't kill the pollinators. Next year, to avoid using such measure, I plan to install netting on all of the leafy veggies. I don't wanna do that now because it will just trap in the ones I already have in.
Speaking of flea beetles and brassicas, these godforsaken creatures killed all of the arugulas and boy choy I planted at the end of April. I then replanted them a couple of weeks ago and lo and behold, all of them are damaged again. I'm leaving them on the bed for now to hopefully serve as food for the pests and in hopes that I'll be able to trap and kill them once the diatomaceous earth arrives. I'll try to grow them again in the fall when the temperature starts going down with netting. But for now, I planted some of my extra tomatoes to keep this spot occupied.
To my surprise, the asparagus are doing exceedingly well. Can't wait for 2025 when I can finally harvest some.
I have 3 tomatillos that survived and they're doing well. They're planted with the original cherry tomatoes and celery.
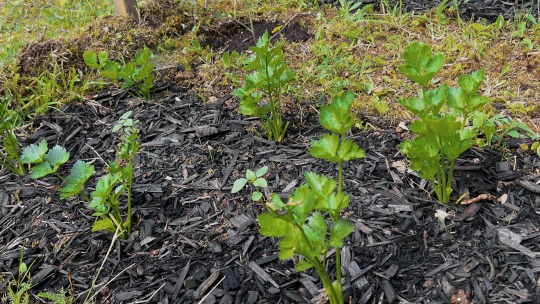
3 weeks ago, I though these celery plants were dead, but they managed to come back.
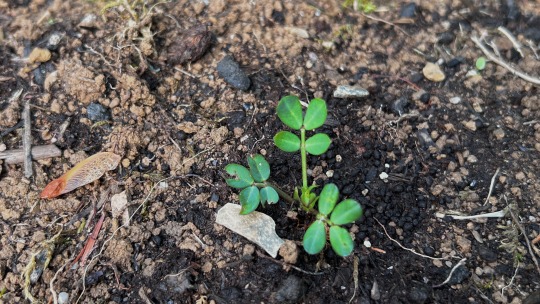
Peanut, another big failure. I planted a whole row of peanuts parallel to the row of potatoes. 30 ft of it and roughly 40 seeds, 3 germinated, 2 out of those 3 got devoured by slugs. So now I have ONE peanut plant. I scattered few sage and pepper seeds in the area as replacement. Let's see what happens.
After the small radish harvest yesterday, these is what's left. I'm gonna give them a week or so until I pull them all out. In preparation for their departure, I have okras and eggplants growing in between rows. I've already replanted the okra and eggplants a couple of times because slugs and birds keep on eating them. To avoid that, I just covered them with recycled plastic cups as protection for now.
On the same bed as the radish, okra, and eggplants are the softneck garlic. It's more or less an experiment. I was just curious if they actually produce garlic bulbs at the end of growing season. The garlic cloves I used are from Costco. They're not looking too bad.
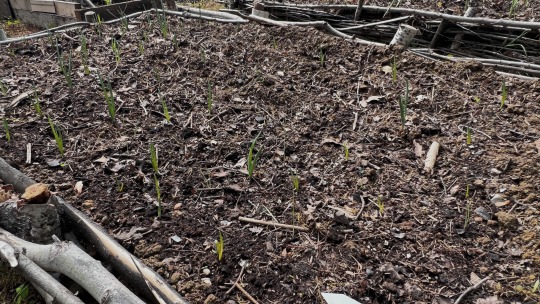
Next bed over (where I have the failed arugula and bokchoy) are onions. I bought a pack of a hundred bulbs and shoved all of them in this bed. They just started emerging.
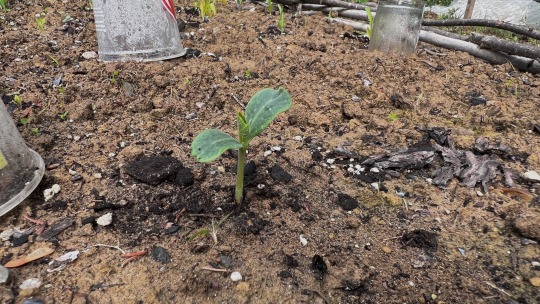
Next bed after that (my biggest one) are corn, zucchini, and butternut squash. The corns are doing alright. I dealt with poor germination with both of the squashes and when they show up, birds eats them. Nothing much I could do other than keep replanting seeds and protecting the seedlings with plastic cups. Looks like the ones I have at the moment are gonna make it.
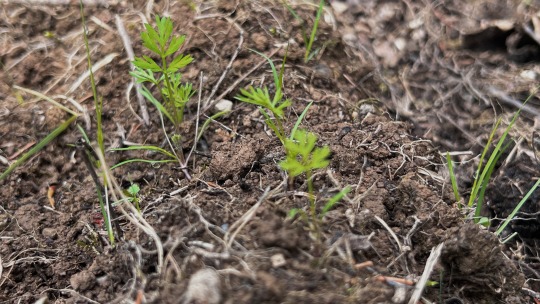
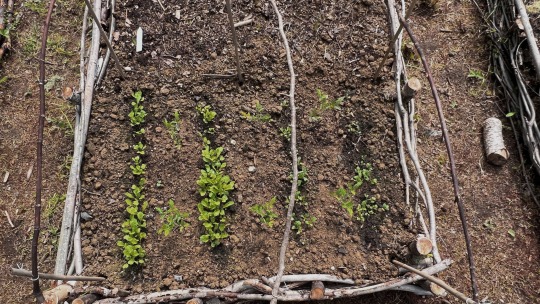
Next bed after that are carrots. I planted these back in April, and this is what they look like now. They sure to take their sweet time to germinate.
25-Jun-2023
#ryanscabinlife#plantblr#plant community#garden blog#gardening#vegetable garden#garden#garden journal#garden diary#garden diaries#garden 2023#my garden#gardencore#what's growing
38 notes
·
View notes
Photo

Potato - Barbequed Potato and Garlic Scape Packets Recipe
A basic barbecued potato dish takes on a delicious twist thanks to garlic scapes, the flower stalks of the garlic plant. The garlic scapes add a wonderful garlic flavor to the potatoes without being overpowering and they almost have the consistency of young asparagus stalks. The texture of the potatoes and the scapes is interesting and makes a satisfying side dish to any early summer barbecue.
0 notes
Photo

Recipe for Barbequed Potato and Garlic Scape Packets
Garlic scapes, the flower stalks of the garlic plant, give a straightforward barbecued potato dish a delicious twist. The garlic scapes almost have the consistency of young asparagus stalks and give the potatoes a wonderful garlic flavor without being overpowering. An interesting side dish for any early summer barbecue, the potatoes and scapes have a satisfying texture. 20 garlic scapes cut into 1 1/2-inch pieces, 8 red potatoes cut into 1-inch cubes, kosher salt and pepper to taste, 1/4 cup extra-virgin olive oil
0 notes
Text
15 Easy Vegetables to Grow in Your Garden This Year

fotolinchenGetty Images
Fresh vegetables are never better than when they’re harvested right from your own backyard. Juicy tomatoes, snappy green beans, and crisp cucumbers are just some of the best vegetables to grow in your garden this year. Best of all, you don’t need a huge yard to learn how to start a vegetable garden! Containers on your patio, deck, or balcony are great homes for your plants too. If you’re feeling really ambitious, you can even grow seeds indoors a month or two before you plan on planting them in the ground to get a head start.
You're reading: 15 Easy Vegetables to Grow in Your Garden This Year
To get the best harvest possible, you’ll want to make sure your garden or pots receive eights hours of direct sunlight, or they won’t produce. Also, remember that some plants like different temperatures! Peas, for instance, like chilly weather and can be planted in early spring. But if you’re wondering how to grow tomatoes, these heat lovers can’t be set out until after the last frost. (If you’re not sure when that is, check with your local university coop extension service so you won’t put your young plants out too soon!) And if you’re growing plants such as squash, which need pollinators to form fruit, don’t forget to plant some flowers too. There are plenty of spring flowers and even edible flowers to add to your garden!
Now, pull on your gardening gloves and break out your gardening tools for these easy vegetables to grow.
1 of 15
Lettuce
Gourmet greens often get icky fast in the fridge. Instead of picking them up at the store, plant your own and you can harvest some leaves right before dinner. Lettuce likes cool weather and grows well when planted as seeds. It’s also a great choice for planting in pots and window boxes because the roots are shallow. Keep the plant moist as the seeds sprout, then harvest when leaves are a few inches long. If you like variety, choose a mesclun mix which includes several different types of lettuce in one seed packet.
When to plant: Early spring or late summer for a fall harvest.
SHOP NOW
2 of 15
Tomatoes
You can grow heat-loving tomatoes from seed, or if you prefer, you can choose transplants, which you’ll find at local nurseries or online. Pay attention to what type you’re buying: Indeterminate types keep growing and producing until a frost, so their sprawling vines need to be staked—this means they’re not great in containers because they get top-heavy. Determinate types have fruit that ripens in a short period of time—they’ll stay about three to four feet tall. Cherry tomatoes are best for beginners, and many new varieties stay nice and compact so they’re ideal for planting in containers.
When to plant: After all danger of frost is past.
SHOP NOW
3 of 15
Beans
Beans come in tons of varieties, and they’re prolific (plus, the more you pick, the more they produce!). Sow seeds directly in the ground because transplants don’t usually do well. Look for pole beans, which need plenty of space and a trellis to climb, or bush beans, which grow in a more compact form, so they’ll work in containers. Read the seed label to find “days to maturity” so you know when to harvest specific types—you don’t want to wait too long because they’ll get tough.
When to plant: After the last frost.
SHOP NOW
4 of 15
Peppers
Read more: Different Types Of Gardening Forks: Information On Garden Fork Uses In The Landscape
Peppers love the heat, and they grow well in beds, containers, or on sunny patios and decks. Transplants are a better choice unless you have time to start them indoors about six to eight weeks before the last frost. Most peppers need staking, so make sure you have enough space.
When to plant: After the last frost.
SHOP NOW
5 of 15
Strawberries
Even though strawberries aren’t a vegetable, you’ll want to plant them in your garden too! Strawberries are a perennial crop, so they’ll come back year after year. Make sure the type you buy is suited to your USDA Hardiness Zone and is considered ever-bearing, meaning it will produce fruit all summer long. Strawberries are a great choice for containers. There also are new compact, thornless varieties of raspberries and blueberries, which are small shrubs that keep a nice, tidy shape yet yield tons of fruit. Berries are easiest to grow when they’re from transplants.
When to plant: Early spring.
SHOP NOW
6 of 15
Herbs
Even if you only have a tiny balcony, you can still grow fresh herbs! It’s so much fun to snip off a few leaves for every meal, and it’s much cheaper than buying those pricey packages at the store. Herbs grow equally well in containers or beds. You can grow most from seed, but if you’re in a hurry, they’re not super-expensive to purchase as transplants. Better yet, some herbs, such as chives, sage, and thyme, are perennial and will return next spring.
When to plant: Mid-spring.
SHOP NOW
7 of 15
Cucumbers
Most cucumber types are heat-loving vines, so you’ll need some space to grow them. You also can provide a cage or trellis for them to climb vertically, which will take up less room in your garden. Look for round, yellow, miniature, or compact varieties. It’s best to plant seeds directly in the ground as transplants can be fussy.
When to plant: After all danger of frost is past.
SHOP NOW
8 of 15
Swiss Chard
This beautiful green has long, elegant leaves with brightly-colored ribs of red, yellow, orange, or white. Swiss chard is not only delicious—it looks beautiful! It grows well from seed, so you can plant it directly in your garden. In hot climates, if you give it some afternoon shade, it will produce all the way until the first frost. In the rest of the country, you can pick the outer leaves and it will keep producing throughout the season.
When to plant: Mid-spring.
SHOP NOW
9 of 15
Kale
This super-food is incredibly hardy and doesn’t mind the cold one bit. In fact, many types will survive the winter and green up again in the spring. Kale does best in beds, and seeds or transplants are fine (though seeds are cheaper). If you’re tight on space, however, you can plant it in containers and harvest it as baby kale when it’s young and tender.
When to plant: Mid-spring or late summer for a fall harvest.
SHOP NOW
10 of 15
Summer Squash
Most squash are super easy to grow—you’ll probably end up with tons to share with friends and family! Summer squash comes in a variety of sizes and types, but they mostly grow on vines that need room to spread. They do well when planted from seed or as transplants (though young plants don’t like their roots disturbed when planting, so be careful when setting them out). Bear in mind that these veggies love heat! Pick them before they get gigantic or they’ll become too seedy.
When to plant: After all danger of frost is past.
SHOP NOW
Read more: Singapore Botanic Gardens | Homepage
11 of 15
Eggplant
Eggplant is a heat lover, and newer types are more compact and bushy so they can be planted in containers or beds. Look for fun varieties that produce long, slender, or even ball-shaped eggplants. Keep in mind that most need will need staking. It’s best to use transplants unless you’ve started these indoors about eight weeks beforfe the last frost.
When to plant: After all danger of frost is past.
SHOP NOW
12 of 15
Peas
Peas prefer chilly weather, so if you get peas in the ground too late, they’ll often grow but won’t produce. As soon as the ground can be worked, it’s fine to plant pea seeds. Give them something to climb, and plant successive rows so you’ll be able to harvest them for a few weeks before it gets too hot and the plants fade. And one last tip: After you yank out the spent peas, plant a different crop in that space to finish out the growing season.
When to plant: Early spring.
SHOP NOW
13 of 15
Spinach
Spinach is another cool weather lover, so plant these seeds as soon as the ground can be worked—they don’t even mind light frost! But don’t procrastinate: If you sow it too late in the season, it will “bolt” or go to seed in a hurry. If you live in a hot climate, look for more heat-resistant varieties. Pinch off baby leaves from the outside, or let it mature to use for sautéing or in salads.
When to plant: Early spring.
SHOP NOW
14 of 15
Garlic
You won’t believe how easy garlic is to grow until you try it! It’s one of the first things to pop up in early spring. There are two basic types. First is softneck, which consists of many cloves and stores longer. The second is hardneck, which produces curly “scapes” you can harvest in late spring, then bulbs in mid-summer. Plant individual cloves of bulbs in the ground with the pointy-side up in fall. By late spring or early summer of the following year, it’ll be ready to harvest when the greenery has turned yellow and flopped over.
When to plant: Mid to late fall before the ground freezes.
SHOP NOW
15 of 15
Scallions
Scallions, or bunching onions, are easy to grow from seed or bulbs (also known as “sets”), which you can expect to mature more quickly. These do better in the ground than in containers. Make sure to plant them a few inches apart to give the bulbs room to form.
When to plant: Early spring.
SHOP NOW
Source: https://livingcorner.com.au
Category: Garden
source https://livingcorner.com.au/15-easy-vegetables-to-grow-in-your-garden-this-year/
0 notes
Link
Welcome back to Sunday Sustenance, the column highlighting simple meals for lazy days. I’ve recently started making bread for myself, and it is one of the most nerve-wracking-yet-liberating experiences I’ve ever had in the kitchen. There are so many terrifying points of failure, all of which are immediately forgotten when you smell the deliciousness coming from your oven. Or, in some cases, from the grill.
Outside of Tollhouse chocolate chips, I am not an accomplished baker. I am, however, a year-round griller. When a friend suggested to me that I try making naan on the grill, I wasn’t instantly sold. I was worried that the dough would slip through the grates, or that my measly Spirit E-310 couldn’t output the raging heat of a tandoor oven or kettle grill. I was a fool.
I once ate a butter sandwich. Why didn’t I make this sooner?
Prior to working on this, I’d only had store-bought naan. And to my mind, it was pretty good, but it wasn’t worth $5-for-two-pieces good.. So I got to work, and tried a few different variations on the puffy buttery flatbread. For simplicity, I settled on Serious’ Eats offering, with Nigella Lawson’s coming in a very close second. Though I wasn’t able to stretch the dough to the target dimensions listed in SE’s recipe, I ended up with delicious smaller versions—perfect for dips or spreads, folded sandwiches or eating three of them right off the grill.
Grilled Naan
Recipe courtesy Serious Eats
22 ounces (about 4 cups) bread flour
0.25 ounces (1 packet, about 2 teaspoons) instant or rapid rise yeast
0.44 ounces salt (about 2 1/2 teaspoons) salt
0.8 ounces (about 2 tablespoons) sugar
14 ounces (about 1 3/4 cups) full fat yogurt or whole milk
1 stick butter, melted
Combine flour, yeast, salt, and sugar in the bowl of a stand mixer and whisk until combined. Add yogurt and knead with dough hook on low speed until dough comes together into a smooth ball. Dough should stick slightly to bottom of bowl as it kneads (add slightly more yogurt or milk as necessary). Continue to knead for 5 minutes. Cover tightly with plastic wrap and allow to rise at room temperature until roughly doubled in volume, about 2 hours.
Turn dough out onto floured work surface. Using a bench scraper or a knife, cut the dough into 12 even pieces. Roll each piece into a ball, then place on a well-floured surface (leaving a few inches of space between each one) and cover with a floured cloth. Alternatively, place each ball of dough in an individual covered pint-sized deli container. Allow dough to rise at room temperature until doubled in volume, about 2 hours.
Ignite a large chimney full of coals (about 5 quarts of coals) and spread evenly over half of the grill. Set grill grates in place, cover, and allow to preheat for 5 minutes. Scrape grill grates clean with a brush.
Working with two to three balls of dough at a time, stretch with your hands into an oblong roughly 10-inches long and 6-inches across (you can use a rolling pin for this as well). Once you have two or three pieces stretched, lay them out on the grill above the coals. Cook without moving until bottom side is charred in spots and light golden brown. Flip with a large spatula, pizza peel, or with tongs and cook until second side is charred and browned. Remove naan from the grill and immediately brush with melted butter. Transfer the naan to a large plate and cover it with a clean dish towel while you cook the remaining bread.
I am but a one person, and despite my insatiable love of carbohydrates, this is a lot for me. So I asked the man himself if this could be frozen—and to my delight, they can.
Not only can you make this amazing bread, but with planning, you can make it and have it any time you want. But y’know what’s better than bread? Stuffed bread.
Oh yeah. Throw out those Ham & Cheddar two-packs I know you’re guilty of purchasing. Naan can be stuffed with anything you can imagine. I really wanted to try this garlic scape-stuffed recipe, but scape season has long since passed us by. We’re in September, and I wanted something a bit more hearty, warm and comforting. Get out the ground lamb: it’s time for naan pockets.
Keema Naan
1/2 lb ground lamb (turkey, chicken, or lean ground beef are acceptable substitutions)
1 tablespoon olive oil (clarified butter or ghee would be ideal, but don’t go crazy)
¼ cup minced shallot
1 tablespoon tomato paste
1 jalapeno, serrano or other small hot chili pepper
½ tablespoon cumin
½ tablespoon coriander
¼ teaspoon paprika
1 tablespoon garlic, crushed
Kosher salt
Ground black pepper
Keema is a fairly common filling, and basically everything I was looking for. At first glance, I thought “Oh goodness, this is basically Shepherd’s Pie filling with hugely boosted flavor.” And it did not disappoint.
Using the same naan recipe as before, divide the dough into 6 larger pieces instead of 12. During the second rise, add the oil to a 10” skillet over medium-high heat. Once shimmering, add the onion and pepper, sauteing until the onion is translucent. Add the garlic, tomato paste and spices, cooking until fragrant—about 30 seconds.
Crumble the lamb (or ground meat of your choosing) into the pan, and season with salt and pepper. As the lamb cooks, break it down into the smallest pieces you possibly can. This will ensure a more even and “flatbread” in the finished product. I’ve had good results with quickly pulsing finished and cooled ground meats in a food processor, and this was no exception. Whatever route you choose, once the filling has finished cooking, remove it to a bowl to cool.
On a well floured surface, gently roll the larger naan balls out into small circles (or shapes that vaguely resemble them). Scoop a heaping tablespoon of the now cooled filling into the center of each piece, and pinch edges of the dough shut, as shown below.
Flip the now filled dough ball over, and use your hands to form it back into a now filled ball. Using a rolling pin and the gentlest touch possible, roll the dough into a familiar flatbread shape. Don’t be aggressive or go too thin here, we want to keep the filling inside after all.
As before, grill your now filled naan over high heat for 1-2 minutes per side, brush with butter, and serve immediately. Like the dough, these can be frozen as well—after you flatten the stuffed ball, a piece of parchment paper on a half baking sheet will help to prevent sticking. To bring them back, simply thaw in the refrigerator before grilling. Now that you’re armed with the knowledge of grillable stuffed breads, there’s unlimited potential for sweet and savory combinations.
0 notes
Last Seen Blogs

karmaphone
I AM NOT HERE

miyointerno23
RealidadPurpura

secretaccsworld
secret account (don’t report)

thecubiclechick
The Cubicle Chick

vtubers-memoir
Vtubers-Memoir💻