#astronomy guide
Text
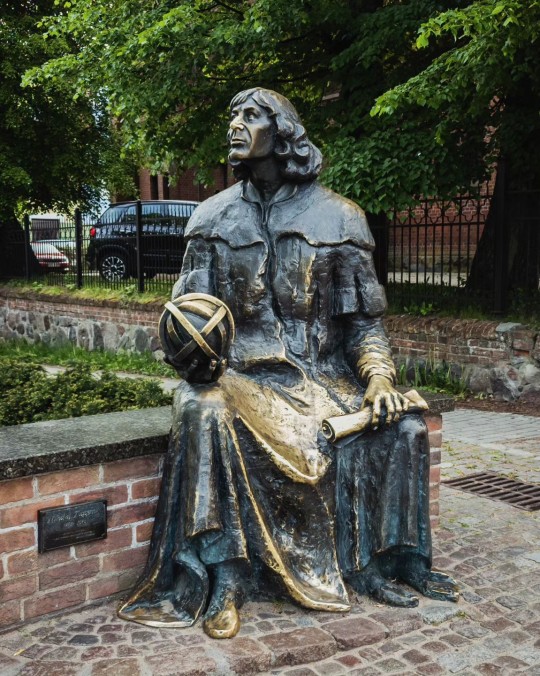
Nicolaus Copernicus' Bench, Olsztyn, Poland by Boguś Borowiak
#olsztyn#nicolaus copernicus#nicolaus copernicus bench#poland#travel#wanderlust#europe#tourist#explore#roadtrip#road trip#travelling#traveling#travel guide#travelblogger#travelblr#science#scienceblr#mikołaj kopernik#astronomy#warmińsko-mazurskie
94 notes
·
View notes
Link
In just about one year from now, on April 8, 2024, one of nature’s grandest spectacles—a total solar eclipse—will be visible from a slice of North America stretching from Mexico to eastern Canada. If you want to make the most of this dramatic event, you’ll need to plan ahead.
A total solar eclipse happens when the moon lies exactly between the sun and the Earth, casting its shadow on a small patch of the Earth’s surface. Those who make their way to the “path of totality” will see the moon gradually slide in front of the sun, reducing it to a thin crescent and then finally blotting the sun out altogether—for a few brief but spectacular minutes. During totality, the sun’s wispy outer atmosphere, known as the corona, becomes visible, while the landscape down below turns nearly as dark as night.
Continue Reading
277 notes
·
View notes
Text
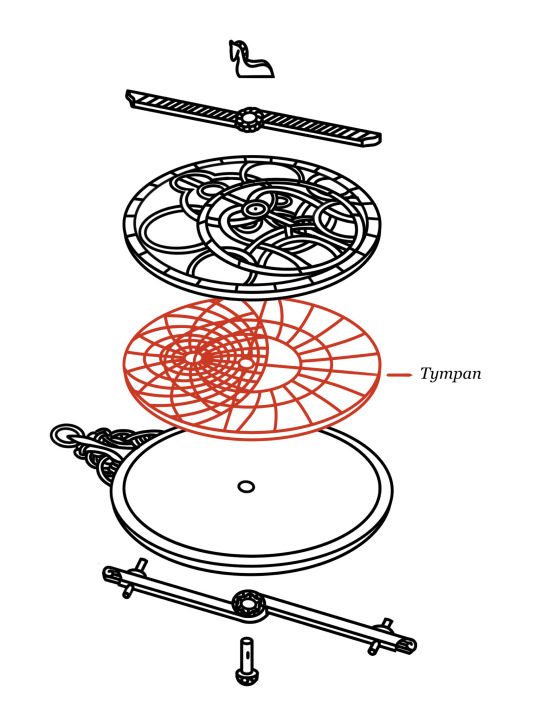
So, How to Build an Astrolabe: Part Two
Plate to represent the Tropics and the Equator


The construction continues into part two!
The middle plate--known as the Tympan--is perhaps the most complex piece of the entire astrolabe, so I am going to be breaking it into a few parts to make it more readable
The first part starts with just three concentric circles for the Tropic of Cancer, Tropic of Capricorn, and the Equator.
No math needed!
This is a step-by-step guide to the complete construction of an astrolabe that I think might exist. At least, in any accessible form.
My goal is for this to be as accessible as possible for any kind of reader, so if there are any question, free free to reach out
🚀 Enjoy! Stay safe and keep learning, fellow chrononauts 🚀
#how to build an astrolabe#astrolabium#astronomy tools#astronomy#learn astronomy#stellar navigation#celestial navigation#history survival guide#historysurvivalguide#how to#diy#spherical trigonometry#history of science#astrolabe#guidebook page#science history
48 notes
·
View notes
Text
Kally here!
So I take Astronomy 101, and it has been very interesting as a demigod. Everyone knows that all the planets except Earth are named after the Roman gods.
But apparently, modern astronomers are determined to keep up with the mythology theme. The planet Jupiter has upwards of 90-95 ish moons that we know of so far. Not all of them are named, but a lot of them that are, are named after obscure figures that even most demigods have never heard of.
For example, Praxidice. Never heard of her before. According to some brief research, she’s the goddess of carrying out justice.
Good to know. Next time something unjust happens, I’ll pray to Praxidice to help me set it straight.
Also, Jason! If you’re reading this, I got another goddess for you to design a temple for!
#Demigod’s Guide#camp half blood#percy jackon and the olympians#percy jackson#blog#camp jupiter#heroes of olympus#astronomy#greek mythology#Praxidice#Praxidike#roman mythology#jason grace#history#planets#moons#moons of jupiter
23 notes
·
View notes
Text
Fave Five: Queer Fiction About Women in STEM
How to Excavate a Heart by Jake Maia Arlow (YA)
Hold Me by Courtney Milan (NA)
Chemistry Lessons by Jae
Honey Girl by Morgan Rogers
The Lady’s Guide to Celestial Mechanics by Olivia Waite

View On WordPress
#Astronomy#Chemistry#Chemistry Lessons#Courtney Milan#Hold Me#Honey Girl#How to Excavate a Heart#Jae#Jake Maia Arlow#Morgan Rogers#Olivia Waite#Paleoichthyology#The Lady&039;s Guide to Celestial Mechanics
21 notes
·
View notes
Text
hello h2g2 fandom. here's something i doodled in english cuz i was bored.

i just realized the perspective is a bit messed up WHOOPS marv is not that tall
#h2g2#hitchhikers guide to the galaxy#marvin the paranoid android#marvin h2g2#zaphod beeblebrox#makes a cameo#i have a drawing of him shirtless somewhere that i drew in astronomy#art#my art#traditional doodle#DoritoDraws
39 notes
·
View notes
Text
Serolsar Lake, also known as Seruvalsar Lake, is a pristine alpine lake nestled in the serene landscapes of Uttarakhand, India. Located near the Jalori Pass in the Kullu district, this shimmering lake is renowned for its crystal-clear waters reflecting the surrounding pine forests and snow-clad peaks. Serolsar Lake offers a tranquil retreat for nature enthusiasts and photographers seeking to capture the essence of untouched Himalayan beauty. Offbeat places near Serolsar Lake (Seruvalsar Lake) add to the allure of this hidden gem, promising secluded spots and breathtaking views.

Exploring places to visit near Serolsar Lake (Seruvalsar Lake) reveals a range of attractions that cater to various interests and preferences. One must-visit destination is the nearby Jalori Pass, offering panoramic views of the Himalayas and opportunities for trekking amidst lush greenery. Adventurers can trek to the nearby Raghupur Fort, an ancient hilltop fortress with commanding views of the valley below. For a spiritual experience, the Jalori Mata Temple stands as a serene sanctuary amidst the mountains, offering a glimpse into local religious traditions.
Further off the beaten path, travelers can explore the charming village of Shoja, known for its peaceful ambiance and apple orchards. Nearby, the Seraj Valley beckons with its scenic beauty and opportunities for birdwatching and nature walks. Each destination near Serolsar Lake (Seruvalsar Lake) promises a unique blend of natural beauty and cultural heritage, making it an ideal getaway for those looking to immerse themselves in the serene Himalayan landscapes of Uttarakhand.
#clearholidays#Serolsar Lake (Seruvalsar Lake)#places to visit near Serolsar Lake (Seruvalsar Lake)#Serolsar Lake (Seruvalsar Lake) tourism#Serolsar Lake (Seruvalsar Lake) travel guide#Uttarakhand#india#indian#travel#india travel#india tourism#incredible india#almora#almoratourism#artists on tumblr#artwork#astronomy#astrophotography#ateez
2 notes
·
View notes
Text
how i take moon photos, and how you can too using the same method (regular camera version)
long post
ok so this is the first of a 2 part thing, one part (this part) will go over how i shoot moon photos with my regular photography camera and the other part will go over how i make larger mosaics with a telescope.
this is a method i've developed over the past 6 months, mainly for getting the most i can out of just a telephoto lens.
going to start by going over the equipment you need/the equipment i use for this:
a basic dslr/mirrorless camera. i use the nikon Z5, but it doesn’t matter which one really. it helps if it can shoot video at full resolution.
a telephoto lens, on a crop sensor camera it should be at least 200mm (and on a full frame, 300mm is preferable). i use a nikon F/4.5-5.6 70-300mm.
a tripod. this is really basic, any tripod works, it’s pretty much irrelevant as long as you have one.
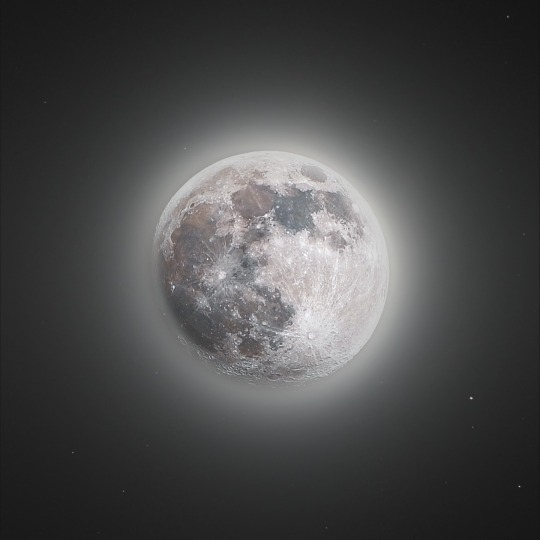
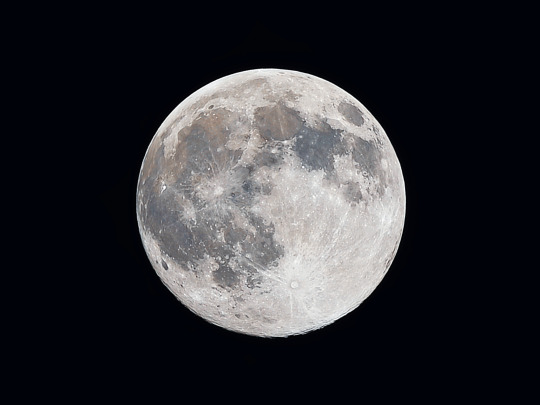
that’s all the equipment you need, to take shots like this:
yes, you can do this with a regular nikon and telephoto lens. i took this with the gear stated above, using the processes i will now describe below.
alright so the first step is what i call gathering data.
this is when you’re actually outside shooting, all the images you’ll need for later processing. assuming the conditions are ok (meaning the moon is out, not blocked by clouds and isn’t right on the horizon), i go out and set up the gear.
during this period of time i’m trying to get 1 thing, but if the moon is full; 2, possibly 3 things.
the first thing is your main moon data. depending on whether you have a camera that can record in higher resolution, this can take the form of either recording a video or snapping a bunch of single shots (if you do the latter, make sure to use an inbuilt intervalometer if the camera has one. or get a regular one if you don't, it's a big help)
i usually do a 10 minute recording, which is about how long it takes the moon to move across my camera frame. at 30fps, this equates to about 18,000 frames.
the point of recording isn't to have a video, but mainly to 𝘯𝘰𝘵 have 18,000 individual photos. a video is just a concise way of producing and containing a TON of images really easily.
so you took a video, or depending on your camera you took a bunch of images, that's the first part done.
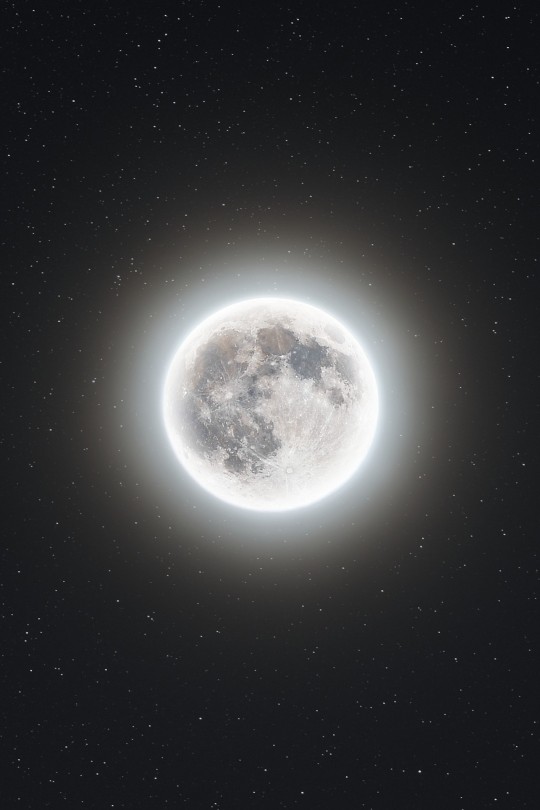
remember how i said, if there's a full moon or closer to it, i'm trying to get 2-3 things here? that's for me personally, because i often shoot composites during a full moon. skip this next part if you don't plan on that.
for reference, here's a composited vs non-composited version
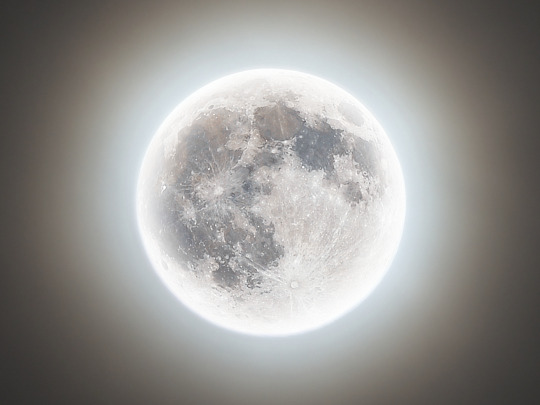
now the second thing i want to get is my composite shot. it's only feasible during a close to full moon, because otherwise the edge in shadow will always look weird with the glow added. the composite shot itself is usually a few overexposed images (all at slightly different settings), to show the moon's glow and/or sometimes a few bright stars.
typically i just change the settings around, and shoot like 5-10 different exposures manually, but exposure bracketing could probably work too here. i haven't tried it.
as long as you can't see any features on the moon, and the sky around it is noticeably brightened, you're good in terms of exposure. just make sure the edge of the moon is still visible, that's necessary for compositing later.
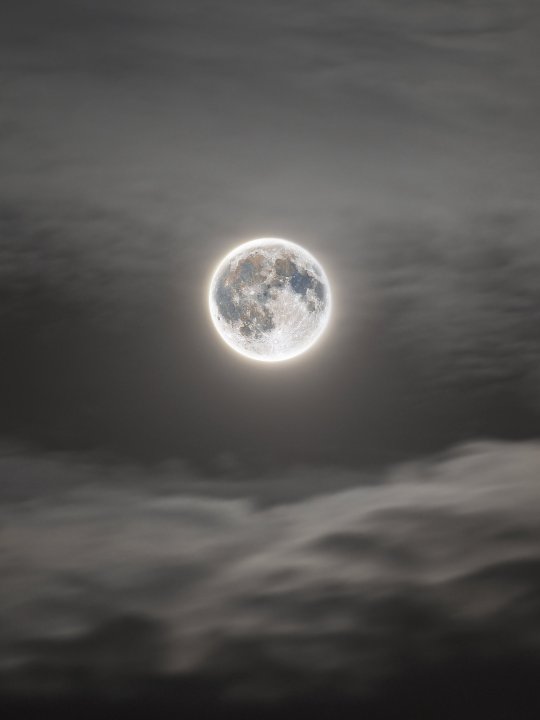
if there are any nice clouds out, i also try to wait and get a few shots with those near the moon.
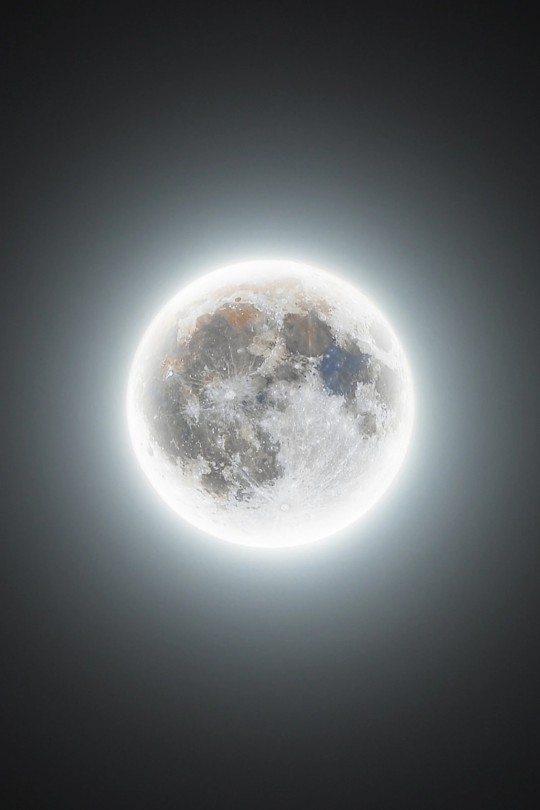
the third optional thing (still under compositing, keep skipping if you aren't) is taking a shot or two of the blank sky with stars, to composite a shot like this:
this is a very quick thing, just point your camera somewhere away from the moon where you see a few stars, and take a couple second exposure to bring them out. you can zoom out more than whatever you're at for the moon shot to get some more stars, or keep it the same. either way works.
alright now we're back to the main part of the guide.
you've got your moon data at this point, your equipment is brought in, now you just have to do the processing.
with this method most of the work is the processing, i'll try to cover it all quickly here
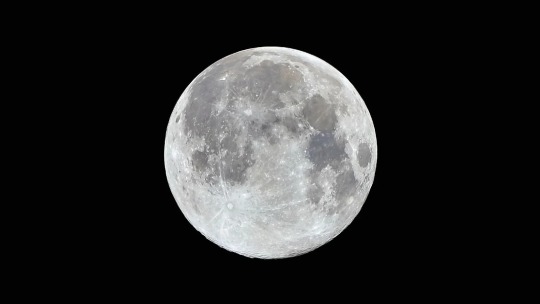
firstly you need to process the main moon data. all i have is a video at this point, i need to turn that into a real finished image
doing this processing requires a couple programs (most of which are windows-only), but are all 100% free. if you intend on doing moon photography often, i would recommend getting a very cheap windows laptop for this purpose. quality doesn't matter whatsoever.
the first program i use is called PIPP (planetary image preprocesser), and this is mainly used to get your video in a state where it can be processed.
i typically upload the video, set it to crop every frame right around the moon (all that black space is extra processing time!), sort the frames by quality and cut out maybe 50% or 75% but this depends on how many frames i took. in my case of 18k, this cuts me down to 9k or 5k or so.
the resulting, processed video (once again using video as an image holding format because it's easy) is then exported to the next program: Autostakkert.
this one is to stack the images, into one really nice image. stacking is why i took so many images in the first place, i won't explain all the logistics of stacking here, but just know that it works and you should do it. stacking is one huge improvement you can make to your shots that's very easy to do.
so in autostakkert, i cull about 50% more of the frames, and stack the remainder of them.
personally i also drizzle 1.5x (drizzling = image upscaling basically) because on a 300mm telephoto lens and full frame camera, the moon is just not that many pixels. you can do whatever on this, if you're at 600mm or 800mm it's probably not as necessary, but it's really helpful at anything below that.
once it stacks, i take the resulting image into a third program: Registax.
this one i use for one sole purpose, wavelets. it's an optional step, and once again i will not explain in any detail how they work, but the result is basically a good sharpening tool. like REALLY good. i recommend trying it.
it's a simple program, i just upload the image and then change the wavelet sliders until it's sharpened to a nice degree.
and lastly, i export that image over to a regular photo editor. photoshop if you have it, lightroom works too only if you aren't compositing, i personally use photopea which is a very nice photoshop clone website that's free. look it up.
what i do here is just basic photo editing stuff first, expand the crop and add black (remember, in my case the stacked image was cropped all the way in), sharpen it a little more, up the saturation maybe for mineral colors, etc.
in here i also usually upscale the image again, this is optional
if you did not intend on compositing, and don't care how i do it, you're done! you should have a very passable moon shot at the moment, or if you're just reading out of curiousity, a very passable understanding of how i take them.
if you do care, here's the process:
so firstly i bring up the final cropped and finished edit of the main moon in the photo editor, and the composite shot on another layer above it. lower the opacity, then line up/resize the glow moon with the regular moon.
next you basically just get a low opacity/low hardness eraser, and erase the center of the glow moon so the regular surface detail shows through in the middle, but the edges stay glowy- and then i increase opacity back to full again.
it can take a few tries and messing around to get this part to look right, but making sure they're lined up perfectly is half the battle.
now you have a composited full moon, that looks something like this!
whether you're using it as a guide with your own shots (if so, good luck on them!) or just wanted to know how i take them, i hope you enjoyed the guide; i like to be transparent with how i make stuff, especially with something like this where most people have no idea how the photo is created behind the scenes.
- all the photos in this post were taken solely on my nikon Z5 camera, F/4.5-5.6 70-300mm lens and tripod.
- part 2 for the telescope mosaics will be coming in the near future most likely
#photography#astronomy#astrophotography#space#night sky#moon#photo#photography thoughts#astrophotography thoughts#astronomy thoughts#guide#long post
9 notes
·
View notes
Photo
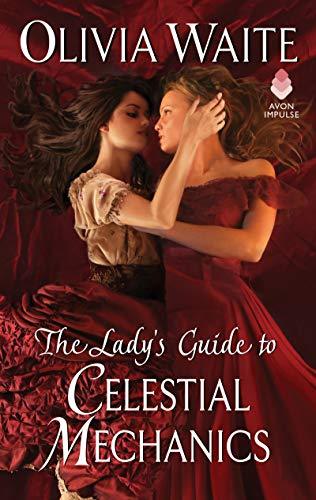

Adult historical romance set in early 19th-century England
A young woman who worked as an assistant for her recently-deceased astronomer father and aspires to become a recognized astronomer herself is hired by a widowed countess to translate a French scientific text and sparks fly between the two of them
In addition to romance, one lead grapples with historical sexism in scientific fields and exclusion from historically male academic spaces while the other recovers from her marriage to her abusive, domineering husband and tries to find her own passion and goals in life now that she’s a widow
Exploration of science vs. the arts and whether there’s truly a divide between the two
Embroidery and astronomy
In addition to the initial falling-in-love section of the romantic arc, the two women also have to navigate being in a long-term relationship that can’t be validated in the eyes of society and how to find satisfaction and community
Both characters have a lot of individual growth outside of the romance, which I liked
Lesbian main character, bisexual main character, F/F romance
#this was good!#first full-length sapphic historical romance i read#would definitely like to continue the series#also it's plenty sexy as well as having good character growth#i really wish there was an author's note though!#i want to know the inspirations for astronomy and embroidery stuff#the lady's guide to celestial mechanics#2022 reads#books#lulu speaks#lulu reads the lady's guide to celestial mechanics#feminine pursuits#lulu reads feminine pursuits#olivia waite
35 notes
·
View notes
Text

floating among stars
#super happy art time#sariel#okay this boy was screaming for a doodle#i love him#he's going to be my ruler for tithoniaaa#altho russ and robin are behind him with it and he counts them as part of his whole thing. he does not see himself as the core ruler#anyway#he's born in tithonia but his family comes from altissima. he's in a super prominent family that moved gens ago to broaden their horizons#they own a megachurch and manage shit like weddings and all#he was raised very close to the royal family and grew up knowing the future prince lorenz and twinsies robin n russ#robin and russ are his bffs and russ is his crush. long long time. he has always harbored a love for him that he proclaims#was written before he himself was born in the skies. anyway. hes gay and very very poetic#but hes lorenz' contract/arranged husband and they HATE each other.#he was raised strict and uncaring by his neglectful parents who mostly want him to push their familys legacy further#meanwhile hes more interested in the growth of things like the country. not his familys church and their reach#i have more notes but theyre all on th and also tumblr has limited tags. i cannot ramble the way i used to AND GOD IS MEAN#but basicaqlly hes a lil gay dude and hes very smooth talking and kind of puts too much on himself but hes super compassionate amd also#LOVES astronomy. hes a big nerd abt the constellations and has put russ to sleep talking about them#he has super powerful holy magic and its pretty unstable but hes working on it. hes kind of reckless and thinks he doesnt need guarding#because of it even tho theres a ton of ppl who want his head for one reason or another#very big dreamer with different ideas than the ppl hes being guided by and he wants the best for his home. hes a sweetie#i pooped this out prety fast despite being intimidated by it. his colors are the countrys colors but with the dark take i used with lorenz#so the royal version? sure-#he made his ribbons on the outfit. he likes threading and stuff and makes braided cords a lot. he based the colors off russ' glasses :3#i wanted to make him look very... i guess nb. he goes by he and they and i wanted him to have a sort of etherally dark color abt him.#shockingly dark hair but very vibrant eyes#and weird skintone#i had it all very mapped out in my head#i love him so much hes my baby
1 note
·
View note
Note
Just had a late night thought and decided to share it with you. Moon/Sun and Gregory going to a planetarium and getting their minds blown
YES
#asks#aahhh this is such a cute idea 🥺🥺#I've had the idea of Moon being like. an astronomy guide and showing kids the constellations under a planetarium for like. ages#it's just so wholesome
16 notes
·
View notes
Text
Exploring Celestial Navigation: Guiding Your Way by the Stars
Navigate by the stars! 🌟 Learn the ancient skill of celestial navigation with our new blog post. Find your way in the wilderness using the night sky. Check it out via the link in our bio! #CelestialNavigation #Stargazing #SurvivalSkills
Introduction
Imagine being deep in the wilderness, your only companions the star-studded sky overhead and your ultimate survival skills. You’re on a top adventure, and your best friend is the cosmos itself. What seems like a daunting situation can actually be a fascinating journey into celestial navigation. In this comprehensive guide, we’ll delve into the ancient art of guiding your way by the…

View On WordPress
#Ancient Navigation Techniques#Astro Navigation#Astrolabe#Astronavigation#Astronomical Navigation#Astronomy#Backpacking#Big Dipper#Celestial Bodies#Celestial Coordinates#Celestial Equator#Celestial Guide#Celestial Landmarks#Celestial Navigation#Celestial Observations#Celestial Sphere#Celestial Tools#Chronometer#Compass Navigation#Constellations#Ecliptic#hiking#Latitude#Longitude#Modern Astrolabe#Nautical Almanac#Navigation Skills#Night Sky#Night Sky Exploration#Night Sky Mapping
2 notes
·
View notes
Text
So, How to Build an Astrolabe: Part Three
Plate to represent the Horizon, Almucantar, and Twilight Arcs

The plate currently shows three concentric circles for the Tropic of Cancer, Tropic of Capricorn, and the equator. This next part builds off the base plate and adds more arcs and circles
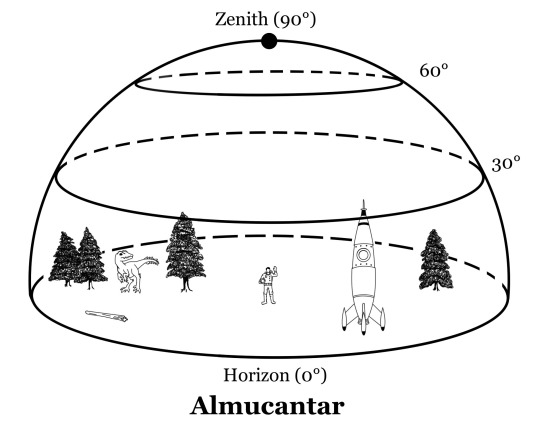
The middle plate--known as the Tympan--is perhaps the most complex piece of the entire astrolabe, so this is part three of constructing the plate and only part two of specifically constructing the tympan plate


The circles on the face of the plate represent “almucantar” and twilight arcs.
This is a step-by-step guide to the complete construction of an astrolabe that I think might exist. At least, in any accessible form.
My goal is for this to be as accessible as possible for any kind of reader, so if there are any question, free free to reach out
🚀 Enjoy! Stay safe and keep learning, fellow chrononauts 🚀
#how to build an astrolabe#astronomy tools#astrolabe#astrolabium#stellar navigation#celestial navigation#learn astronomy#history survival guide#historysurvivalguide#how to#diy#spherical trigonometry#history of science#guidebook page#science history#science art
16 notes
·
View notes
Text

I’m a huge astronomy nerd, and felt really inspired to make this the other day because there's so many things in astronomy that can help build a unique and interesting world. Decided to start off with stars cause there’s so much to them, with them being the main source of energy for a world. I know this seems like the type of thing more for a sci-fi setting, but it honestly can be used in any setting to make it more interesting.
Instead of having a usual old class G star like our sun, switching it up with different types can really open some doors to nifty ideas. Just imagine having a world in a star cluster, where other nearby stars are as bright as a full moon. Or a binary system, which most stars are born into, where one star orbits very close with another. Or maybe a world stranded deep in space with no star, only relying off the planet’s geothermal energy or some kind of magic. Or a planet by a dimmer red-dwarf star that has very dark plants to absorb as much light as possible for photosynthesis. Or maybe a fantasy world that has a bright class O star that is near the end of its life. Maybe even a world that is close to a black hole and experiences time dilation, watching the whole universe evolve on the timescale of a few centuries. There’s a lot of possibilities! I hope you all will find this useful! :)
I plan on doing more in the future on planets and moons, but I’m up for other astronomy related subjects to cover. Also, with this being the first one I’ve made, I’m open to feedback on how I can improve these and make sure they’re more readable.
2 notes
·
View notes
Text


Full moon in Pisces , lunar eclipse momenttttttt.
Didnt know tumblr had these fun filters :)
#full moon#Pisces moon#not me <3#obvs#is it ? lol#libra moon#distortion#love#night sky#astrology#astronomy#sky guide#me
1 note
·
View note
Text
youtube
A deep dive into WD Gann and Tunnel Through The Air | Response to a viewer's questions relating to WD Gann Example Gann Trade | Perspective on Gann Methods | Nominal Model | Hurst and Gann | Planetary Cycles | Gann Fan | Channel Lines | Astro Progression
#WD Gann#Astro Trading#Astronomy#Astrology#Time Cycles#JM Hurst#Hurst Cycle#Law of Vibration#LOV#Gann Explained#Zodiac#Moon#Fourier Transform#Stock Trading#Stock Options#SPX#Forex Trading#Futures Trading#Gann Fan#Fan#Fann#Actual Usage#Ultimate Guide#Freemasons#Freemasonry#The Absolute#Holy Sun Absolute#Gurdjieff#John Keely#Emerald Tablets
0 notes
Last Seen Blogs

mysteriousstrawberrylover
Untitled
mysteriousstrawberrylover
Untitled

mariaugusta-blog
I like

the-last-respectable-gentleman
The Last Respectable Gentlemen

irish-belle
Dream for Forever