#I got myself a paper cutter that makes cutting straight lines so so easy it’s great
Text
I’ve been taking a break from tatting and getting into junk journaling. Someone convince me not to buy a Cricut machine to print out my own stickers and stuff before it’s too late
#I shouldn’t…but I’m considering it…#I got myself a paper cutter that makes cutting straight lines so so easy it’s great#I’ve been using some Etsy print out kits and they’re a delight#honestly one of them is a crafting planner that I’m gonna use to - you guessed it - plan my tatting projects#lmao#ignore me#digital scrapbooking#scrapbooking#junk journal
9 notes
·
View notes
Text
My (Rough) Thoughts on Shipping Self-Inserts With Canon Characters
Obviously, if you’ve read some of my newer works, you’ll know that I don’t mind OCs, and I feel similarly towards self-inserts. In fact, I’m in pretty high favour of them (good published authors have used themselves and their experiences as great inspiration many a time, and with much success--Dostoyevsky did so a lot!).
However...
With self-inserts, I find that shipping can be quite... problematic.
I’d like to start with an experience of my own, a basic one, where I wrote a self-insert ship fic. It was... bad, but bad isn’t always indicative of the self-insert style. I remember the way I imagined it was myself in the story, interacting with the characters just like I would in my head, and how great it was to put it onto paper. I was invigorated, it gave me purpose, and I swore to write a new page every day. It was my first fanfiction, and I still enjoy reading it occasionally (even if no one else would).
But that piece isn’t my current ideal for writing, and there are several things I could’ve done to improve. Like, certain writing conventions served to tear me straight from a story, no matter how I tried to gloss over them in my mind.
Signifiers such as ‘(y/n),’ or ‘(h/c),’ ripped me right out of the screen and back into the room around me. Reading about how, “She looked up with her (e/c) eyes happily,” even if only for half a second, I lost my transfiction, and engagement stuttered as I knew I’d be ripped away again.
Strawmanning was another of these problems. The ‘bully’ characters weren’t anything more than a few cookie-cutter lines (not even stereotypes!), whereas the heroic me had the last word, expertly cutting through their paper-thin insults and winning for myself a glorious victory. Rather than highlight virtuous aspects of my character, however, this win only served to make my writing contrived, which goes with my next point.
Shipping myself with a character was perhaps my downfall. Now, don’t get me wrong, my beloved and I had some awesome dialogue about how we should use the honorific ‘-kun’ to make people think we were dating, but overall, neither of our characters were enhanced by each other. I was still my Holy self, the other character shared in my Light, and everyone else were unworthy heathens below.
So what could I have done differently, and what caused me to take such a self-indulgent turn?
To answer my second question, well, age was definitely a factor. I was ten, I believe, and not highly capable of self-reflection, something which is needed in spades in order to artfully insert oneself. I wanted an easy story, one where I could be with the character I wanted and never be in the wrong, and so that’s what happened, at the expense of both our characters (as I’ll elaborate on further down).
To answer the first, I’ll need to take a slightly deeper dive.
For signifiers, I believe why I used them is the key. There’s a difference between self-inserts and reader-inserts, although the two are often mixed, which makes sense (who’s to be the reader-insert if not oneself, or one’s close friend?).
My story was not a reader-insert, though, nor was it ever in my plans to share it, to make it accessible for a friend. (And not even for the purposes of this discussion will I share it with you now, perish the thought.) The only reason I’d thought to add in signifiers of personal traits, of which I knew very well, was imitation. I noticed that every other person on Quotev wrote their fanfictions that way, and so I followed suit. In hindsight, though, it would have been much better to just describe myself or, if preferred, just leave it vague.
I do believe, by the way, that the distinction between self-inserts and reader-inserts--or where we muddle the line--should be something kept in mind when writing. How do you know what’s in-character if you don’t know which character you’re writing about, after all?
For strawmanning, or making a ‘Mary Sue’ of myself, well, there’s a quick explanation. I loathe being wrong. Don’t you? And yet, it’s a real hinderance if I want to write myself into a story. I can’t stand being wrong, I fear it, but characters with no failings are, frankly, boring to follow.
So if they’re so boring, and I don’t want to be wrong, what can I do? Well, I could not write myself. Or, I could use that as a character flaw, and incorporate it into my writing. Maybe, instead of valiantly slicing through the bullies’ insults, my character could think that’s what they’ve done, while the narrator knows full well they’ve made an arse of themself.
And now... onto my main point as stated in my headline--shipping!
In order to ship myself with a character (let’s say Nikolai), I think, honestly, that a perfect storm is needed. 1) I’d need a deep understanding of Nikolai and 2) an extreme level of self-awareness so that 3) I can know whether or not being with Nikolai would be right for me.
Just because I like a character doesn’t mean that he’d automatically like me.
And in fact, I can say with certainty that, if Nikolai were to come to cross paths with me, he’d think nothing of me and forget me the next day. Such is the sort of realism that’s necessary, I think, if we’re not to mould the characters of our affection into someone entirely different, whom they fundamentally are not. If keeping Nikolai’s full personality is my genuine goal in writing, I cannot, therefore, ship myself with him, and I cannot write a self-insert fic about him loving me with any believability or integrity as a writer.
This isn’t to say that I can’t write a fic with both of us interacting, though. I could, of course, get unexpectedly trapped in a trash can, and there’d be nothing for him to do but generously help me out. The line there, however, is to not try to push him past his limits. If I truly respect him, then I wish for him to stay my truest version of him.
If I do wish to mould his character, however, then all that goes out the window. Suddenly, he’s whatever I want him to be, and we can go have a weekend getaway without complication... but I’d need to be careful.
There’s a fine line between character interpretation and character butchering. Personally, respect is a massive part of my relationship with my character. If I don’t respect a character, I end up misrepresenting them, putting false words and actions in their mouths, and polluting the fic.
So what should I do if I want to mould them to like me (and I can’t change myself without actually changing myself in real life), but I don’t want to disrespect them?
Well, it’s actually pretty easy within Bungō Stray Dogs. In order to change a character, it’s important, I think, to keep some of their core values, and in BSD characters’ cases, the core themes of their namesakes.
(I’ll have to use Fyodor for this next example, by the way, since I cannot for the life of me come up with a situation that would grant me closeness to Nikolai.)
I’d never, ever make Fyodor choose me over his goals, for example (and in fact, very likely, he wouldn’t let me). However, there are still the quiet moments to think of. Were he perhaps a bit more like Alyosha (character from The Brothers Karamazov, by Dostoyevsky), more willing to make time for those he cares about, so long as we had known each other a long time prior, even if my intellect didn’t compare to his, loyal companionship and decent conversation over a good cup of tea is enough, I think, for a decent scene. (This takes some, though not all, inspiration from Dostoyevsky’s relationship with his second wife, as well as Alyosha’s relationship with his love interest.)
I believe the change should be in-keeping with his character, something slight, so that he remains the man I love and respect while still being able to be himself.
(Now, I’m also aware that I can’t come from a place of complete sincerity, since I don’t want to be with Fyodor, but the example still, I think, was necessary.)
To recap how I think I could do self-insert fiction better:
-I’d keep engagement in mind.
-I’d try to watch for unintentional perfection.
-If I don’t want to change a character, then I: evaluate if they’re right for me.
-If I do want to change a character, then I: keep them the truest form of themself at their core, and make only necessary in-character changes.
So... yeah, those are my rough thoughts. None of this is intended to be OC harassment, by the way, and the only fic I ever referred to here was my own. The itch just came, since I’ve been thinking about this for years, to flesh out my thoughts a bit. I hope anyone who managed to make it this far got something out of this, and thanks for reading <3
3 notes
·
View notes
Text
Gluten-Free Chocolate Pecan Shortbread Cookies
Crisp melt-in-your-mouth gluten-free pecan shortbread cookies dipped in dark chocolate. Topped with powdered sugar, toasted pecans, flakey salt, these festive cookies will be the hit of your cookie platter. This recipe is made in partnership with Diamond Nuts.
Be careful – these cookies should come with a warning. I’ve cut out these pecan shortbread cookies into little two-bite coins, which makes it incredibly easy to eat a dozen in less than five minutes. And a whole batch in less than an hour. On any normal night when I eat cookies, I portion myself to keep from recklessly eating all the cookies. When there’s a holiday cookie plate involved, though, I aimlessly grab a cookie each time I walk past the table. In my opinion, that’s how holiday cookies are meant to be enjoyed. These chocolate pecan cookies are the perfect cookie for just that. Before you know it, you’ll have eaten the whole plate without even realizing.
This butter pecan shortbread recipe is the third in a year-long partnership with Diamond Nuts. All of my Diamond Nut recipes so far are great for the holidays. First I made poppy seed almond flour muffins – to make them for the holidays, sub in cranberries for the peaches or just leave the peaches out all together. Next I made smokey maple roasted rainbow carrots with walnuts and feta. And now, my true love: cookies. Buttery, melt-in-your-mouth pecan shortbread cookies dipped in chocolate and sprinkled with more toasted pecans and flakey salt.
The other day at the market, a man and his daughter put a box of gluten-free chocolate almond cookies on the conveyor belt in front of me. They caught my eye because, well, cookies. Making conversation, I asked if he’d bought them before and if they were good. He shrugged, “I think so. We’re buying them again, so I guess we liked them.” MEDIOCRE REVIEW AT BEST.
He took it a step further though, and before I realized what was happening, he’d ripped open the box and handed me a cookie right there in the check-out line, “now you won’t leave wondering.”
Guess what? I bought a box. He’s a hero.
I wish I could rip open a box of these homemade gluten-free chocolate pecan shortbread cookies for you to taste right now. You’d rush to the kitchen to make a full batch. They’ve got a crisp bite while still melting in your mouth. With loads of toasted pecans, they taste a lot like snowball cookies (or Mexican wedding cookies) except even better because they’re dipped in dark chocolate and sprinkled with more crunchy pecans.
Tips for making melt-in-your-mouth crunchy pecan shortbread cookies
Give the pecans a quick toast in the oven before adding them to the cookies will intensify their flavor and make them crunchy when baked up in the cookies .If you skip this step, the pecans won’t get crispy while they bake in the cookies, leaving a less than desirable soft texture. Toasting takes Diamond Nuts buttery smooth pecans and gives them an irresistible depth of flavor you’ll want to put on all the things.
To toast them, I take a bag of Diamond Nuts chopped or whole pecans and toast them as is. When they’re nice and toasty, chop the nuts up even more finely. Chopping the pecans up after baking will make sure any of the super fine dust pieces don’t get too toasty or burn in the oven.
My favorite time-saving tip is to toast more nuts than you need for the recipe. While I’m at it, I toast up a whole bag or two of pecans at a time and then just return whatever I don’t use to the bag for later use. This method also means I always have toasted nuts on hand for other recipes (browse other recipes for pecans here!). Perhaps most importantly, it ensures I’ll have enough pecans when I inevitably taste a handful before they go into the cookies.
How to keep gluten-free shortbread cookies from spreading
The key to getting perfectly fluted shortbread cookies without spreading is to chill the dough before baking. I am very impatient though and hardly ever plan enough in advance to deal with long chill times, so I’ve got two shortcuts that cut that time down significantly!
Chill the dough after rolling it out. This pecan shortbread dough is not too soft and sticky. It’s firm enough to be rolled out between two sheets of parchment paper right after mixing. Slide the rolled out dough still in the parchment paper onto a baking sheet, stacking one dough oval right on top of the other. Chill the whole baking sheet. They’ll chill much faster if they’re rolled out and the metal baking sheet helps too!
If you’ve got space for it, chill the dough in the freezer. I have a pretty packed freezer, but I almost always chill my dough in the freezer. I just slide the baking sheet right on top of my freezer drawer of nuts. Like I said, I have no patience. Especially when I want cookies. Chilling the dough in the freezer cuts the chill time in half.
Make your gluten-free holiday cookie plate in advance
The holiday dessert table in our house always has a cookie platter with no fewer than four types of cookies on it. That’s a big commitment! Baking four types of cookies all at once? Who has time for that? Especially when you’re probably also cooking a holiday meal. That’s where making cookies in advance and freezing them comes in handy.
You can bake these gluten-free chocolate-dipped butter pecan shortbread cookies up to a month in advance and freeze them in an airtight container until the big day. I tested the method for Thanksgiving this year and they tasted exactly the same as the day I made them! Just let them come to room temperature for 20 minutes before serving.
For other cookies that are best warm from the oven, you can make, shape, and freeze the dough so all you have to do is plop them on a baking sheet and bake. To keep the cookie dough balls from sticking together, put the cookie dough balls on a baking sheet in the fridge or freezer for 30 minutes before putting them in a container or bag for longer-term freezing. Then just bake them straight from the freezer.
Bake-ahead gluten-free cookies
Freeze-ahead gluten-free cookie dough
Disclosure: Special thanks to Diamond Nuts for providing the ingredients for this recipe and sponsoring this post! And thanks to you for supporting the companies that keep Snixy Kitchen cooking!

Crisp melt-in-your-mouth gluten-free pecan shortbread cookies dipped in dark chocolate. Topped with powdered sugar, toasted pecans, flakey salt, these festive cookies will be the hit of your cookie platter.
Ingredients
3/4 cup Diamond Nuts chopped pecans, divided
3/4 cup + 1.5 tablespoons (102g) finely ground blanched almond flour
1/2 cup + 1 tablespoon (68g) gluten-free oat flour
1/4 cup + 2 tablespoon (48g) cornstarch
¼ teaspoon kosher salt
1/2 cup unsalted butter, room temperature
1/4 cup + 2 tablespoons (56 grams) powdered sugar
1/2 teaspoon pure vanilla extract
4 ounces bittersweet dark chocolate
2 tablespoons powdered sugar
Optional: Flakey salt
Instructions
Preheat the oven to 350°F. Spread the chopped pecans on a baking sheet and toast for 6-10 minutes until toasty and fragrant. Pour the pecans onto a cutting board to cool. Once cool, finely chop the pecans - you don't want the pecans as fine as dust/flour, but the finer they're chopped, the easier your dough will be to roll out. Measure out 1/2 cup of the finely chopped pecans to put into the cookie dough. Set the rest aside for sprinkling on top.
Whisk together the 1/2 cup finely chopped pecans, almond flour, oat flour, cornstarch, and salt in a medium bowl. Set aside.
In the bowl of a stand mixer fitted with a paddle attachment or a medium bowl with a hand mixer, beat the butter on high until light and fluffy, 3-5 minutes.
Slowly add the powdered sugar and beat until incorporated. Add the vanilla extract and mix until smooth.
With the mixer on low, slowly add the dry ingredients to the butter and beat until completely smooth, scraping down the sides as necessary.
Roll the dough out between two parchment sheets into a 1/8 -1/4-inch thick oval. Place on a baking sheet and chill in the fridge for 30 minutes or freezer for 10 minutes.
Use a 2-inch round or fluted cutter to cut out cookies. Using a knife or bench scraper as needed to lift the cookies, transfer cookies to a parchment lined baking sheet, 1-2 inches apart. Repeat, rolling out the dough again as needed. Chill the cookies in the fridge for 20 minutes or in the freezer for 10 minutes.
Bake cookies, one tray at a time, on the middle rack for 10-12 minutes, until the edges just begin to turn golden. Let cool on the baking sheet for at least 5 minutes before using a fine metal spatula to transfer to a wire rack to cool completely. Repeat with remaining baking sheets.
While the cookies bake, Melt the chocolate. You can melt the chocolate in a double broiler, or do as I do and place it in a small microwave safe bowl. Microwave for 30 seconds, stir. Repeat until the chocolate has completely melted.
Dust the cooled cookies with powdered sugar. Gently dip them halfway into the chocolate, tilting the cookie to get a clean chocolate line. Set the dipped cookies on a parchment lined baking sheet to set. While the chocolate is still melted, sprinkle the cookies with the remaining finely chopped toasted pecans and a few flecks of flakey salt. Let the chocolate firm up before serving (you can speed this process up with a quick chill in the fridge!
Notes
Store cookies in an airtight container for 3-4 days on the counter or freeze the cookies for up to a month. Let come to room temperature before serving

Source: https://www.snixykitchen.com/gluten-free-chocolate-pecan-shortbread-cookies/
0 notes
Photo
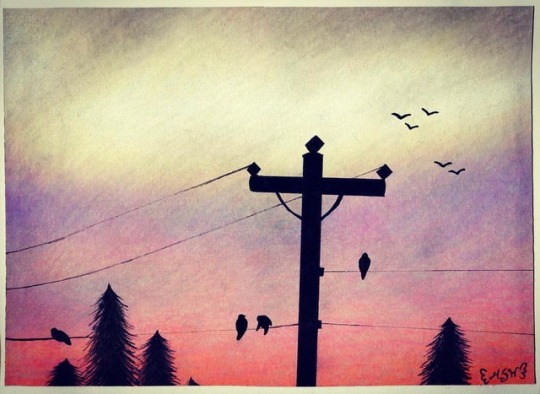
Wire Sunset (+ Time Lapse!)
An attempt at a speed draw/time-lapse number 3! Link: youtu.be/BllxcQOvWQg
I'm trying to get myself into something of a habit with these, just to see how it goes over time.
This one is a bit different though, as this isn't exactly a typical drawing for me. The drawing is more fitting with my little collection of sky hexagons I did a while back. So what gives? Well, before I did my Happy dAnniversary to Me! piece on the tan paper, I had actually planned to do it on my gray paper, and I got as far as most of the line art...Except I had already run into the problem of the gray paper being unusually difficult to see my sketch through when using my lightbox (which is still exceptionally weird to me, considering the tan paper does just fine ) and then to top that off my own hand was just not cooperating with me. So I decided to save myself some frustration and just use the tan paper instead.
I wasn't really sure what to do with the gray paper after that. It was already a "scrap" piece, leftover from cutting a piece down for Applet, and now it was being scrapped again.
I couldn't very well try tracing another sketch, as I'd partially already learned my lesson with that (it is possible, as I've done it before with mild success, it's just that the sketch needs to be dark/have a layer of pen on top and my hand needs to be in the mood to be steady) and now I had pre-existing lines that would get in my way. That reality didn't leave me with a ton of options.
For a little while, I toyed with the idea of doing a galaxy/sky piece before going through my camera roll to see if I had any sunset pictures I wanted to try my hand at. And more than ever I wished for a set of tree/leaf stamps to make my life easier because there's something just really appealing to me about having the pretty sunset colors broken up by stark black tree branches and stuff, and trying to draw those details out has just always felt like way too much work that never turns out quite right to me. (And very very easy to screw up.) But ultimately I did a bit of practicing and decided to just go for it and hope for the best.
To be fair, the majority of my time was actually spent building up the color for the sunset in the background. I started with Faber Castell Polychromos, and that might have been a mistake? For whatever reason, despite them working just fine on the tan paper on my first test piece with them and on my Stellaluna picture, miraculously, they just weren't turning out very pigmented on the gray paper. Like I really needed the white and lighter yellows to be bright and pop and they just refused.
I tried not to; I really did. But I ended up having to pull out my Prismacolors for the majority of the good color payoff. The Polychromos did make a good base and gave me something of a starting point, but as far as the pigment, on the gray paper, they couldn't touch Prismacolor.
Side note: Originally, I hadn't planned on using the Neon Orange Prismacolor, but the bottom portion of the sunset was supposed to be really bright and I wasn't sure how to get any of the pencils to do what I wanted, so I tried it on a whim and over the pink it actually looked really nice!
Also, I ended up using this blender pencil by Derwent when I noticed I was seeing too much of the pencil strokes for my liking. I've had the blender for a while; I just haven't given myself much opportunity to use it. When doing reviews/first impressions/tests for colored pencils, I try to keep it fair and not use the blender to see how the pencils stand on their own, and half of the time I just don't think to use it otherwise. And, if I'm being completely honest, I've always still had a bit of a bad taste in my mouth (metaphorically speaking) left from the Prismacolor blender pencil.
That's actually part of why I bought the Derwent blender in the first place: I had to see if all blender pencils were that difficult to work with. The Prismacolor blender technically does its job, but I feel like I always have to press way too hard to get it to work properly, and even then it doesn't always do what I want. Just after I got the Derwent one, I did a small side-by-side comparison with just some little circles and color swatches, and IT WAS SO MUCH BETTER LET ME TELL YOU. It doesn't take nearly as much presser, and I would argue it's just better overall. And I think it has to do with the Derwent one having just a little bit of a white/neutral pigment in it, as you can kind of tell that if you sample both blenders on a non-white paper. It's not enough to really notice when you're actually using it to blend, though. I'm not sure how that science works out, but hey, it's saving me hand pain and making my drawings look smoother, so I'm happy.
Many layers of colored pencil and blender later, it was time to add something so it looked like more than just blobs of color on a page.
I used a ruler to get a few lines, but beyond that, I was mostly free-handing everything (I did look up some extra reference for the birds, but I wasn't super picky about them) and I was trying not to be too picky about symmetry and everything be perfect and all that. (Hence why the power line pole might look a bit wonky). I learned pretty quickly my black markers didn't seem to like going over all the colored pencil wax at all. This worked out in my favor for the actual power lines, as even in my photo reference they looked a bit spotty like this, but those trees...
Both of my Copic Multiliners, my Prismacolor liner I used on the pole, my black Sakura gelly roll I used for the birds, even my ultra-fine tip black Sharpie...NONE of them wanted to do those trees! You can see me constantly having to scribble on my scratch paper in the video to get through them. Ultimately, the Prismacolor liner worked the best, but that wasn't saying much.
I think I would've been okay if I had stuck to just using the Polychromos, as they're oil-based and I've noticed my gel pens don't fight over top of them alone that much, and I have definitely had plenty of problems with my gel pens trying to go over wax-based pencils like the Prismacolors in the past.
And dare I say the Derwent blender pencil probably did not help with that, either.
Either way, I did manage to get through it.
After that, I cut the edges off where my pencil strokes didn't go quite all the way, then had to cut a bit more to kind of straighten it a little. Then I grabbed my metallic cardstock and cut a piece down to mount the picture on. Neither are particularly straight because I was using an Exacto knife and my own judgment rather than a paper cutter, but eh, I'll live. (I have since borrowed my mom's paper cutter for future endeavors.)
In the video you can see me applying mod podge to the back on the picture semi-off screen because I was trying to hide my jacked-up, unused line art.
Then I decided I needed one more bird to cover up a small smudge that was bothering me and signed it with my purple gelly roll, hoping my signature would blend in a bit more that way. (Not entirely sure that succeeded, but whatever.)
Overall, I am quite happy with how it turned out Though I'm not sure how this managed to be the longest video since I felt like it took the shortest amount of time, yet looking back I guess it actually didn't
Next up, I've been toying around with some watercolors, so there's that. No clue what I'm going to do for the next Time Lapse, but we'll see.
____
Artwork © me, MysticSparkleWings
____
Where to find me & my artwork:
My Website | Commission Info + Prices | Ko-Fi | dA Print Shop | RedBubble | Twitter | Tumblr | Instagram
0 notes
Text
Month 1
Item completed Camicia
pair of handkerchiefs accessory
The camicia was based on an extant historical item held in the Prado museum which features a squared neckline with attached lace and very full sleeves that are tightly gathered at the cuffs, again with lace added. The extant example shows goes added to give the fullness in the body however the fabric I chose was wide enough that I could simply cut the width rather than add it in.
I have attempted to stay as true to the extant example as I could.
The pair of handkerchiefs were simply off cuts from the camicia, and some of the lace that was left over. It is seen in a number of 16th century portraits that ladies did use lace edged hand kerchiefs.
Items completed in month 2
Sottana with optional removable sleeves in the style of Eleanora di Toledo
Beaded girdle belt- accessory 2
This sottana serves multiple purposes. It will be worn as an under gown as it is padded and boned as a supportive layer to wear with the veste and giubonne over the top in the style Lavinia Fontana’s self portrait of 1575. The sottana can also be worn with it’s optional removable paned sleeves in the style of the portrait Eleanora di Toledo of 1545. This style of Sottana spanned a number of years and styles in the 16th century ladies styles, beginning as an under gown, then becoming a gown in it’s own right with removable, optional and interchangeable sleeves, and then it moved back to being an under gown again with the incoming veste and giubonne styles later in the century. I look forward to wearing this very comfortable gown with or without sleeves, and also under it’s over layers, it will be a very flexible addition to my ever growing renaissance wardrobe. The design and pattern was originally based upon an Alcega that I adapted over time to best fit my ample proportions ans alter over different gowns to be most comfortable but still in keeping with the period design, with it’s side back lacing being reachable and able to be laced on my own without assistance when necessary. The skirt on this gown was not cut with the additional side gores as per Alcega due to the minimal amount of fabric I had, however the skirt if still very full and in keeping with the style I was trying to achieve. The skirt has been hand gathered onto the bodice and carefully enclosed between layers as it was very frayable and was worried it may give way without support. The hem has been thickened with an added layer of felted wool and some beige fabric I had on hand. I have always found this to be very helpful in keeping moisture from wicking up skirts and also to keep skirts from wrapping around ankles causing tripping which I am inclined to do. Both the front and back of the bodice were boned and padded to given the nice flat stiffed look and be very supportive giving a good base for the over layers to come.
The sleeves were created by using a normal straight sleeves pattern which was divied into several pieces, cut and sewn together with it’s lining. These panes are then turned in the right way and ironed, then the long process of hand sewing these panes together and adding the beading at each catch point. There is also lace with hand beaded added at the wrists and the tops of the panes are gathered onto tapes and then again sewn to each other to create the scrunchy baragoni. The ties for the sleeves are made from folded hand cut silk bias tape, I prefer these on the sleeves not the gown,they also feature lovely cast brass aiglets from the style of the 16th century, these pass through brass rings sewn on the underside of the straps of the gown, making them very easy to put on and take off and very secure once on. The construction and beading of these sleeves took a lot of hand work and tie but they are certainly work the effort.
#gallery-0-17 { margin: auto; } #gallery-0-17 .gallery-item { float: left; margin-top: 10px; text-align: center; width: 33%; } #gallery-0-17 img { border: 2px solid #cfcfcf; } #gallery-0-17 .gallery-caption { margin-left: 0; } /* see gallery_shortcode() in wp-includes/media.php */
Items completed month 3
giubonne with much handworking
accessories 3 Jewellery set consisting of two short necklaces, one pair of earring and a long coral necklace. One necklace to be worn with the sottana and sleeves option, the other two, being the real pearl and real coral ones, for the multi layered outfit. Earrings obviously can be worn for both
The third, but not final layer of my Lavinia Fontana inspired outfit is the giubonne (doublet) layer. It is based on a blend of a Alcega pattern and the waist coat pattern from the Tudor Tailor.I made a giubonne in last years IRCC and I started with that pattern but then I went on drafting several patterns to get this one sitting just as I wanted it to but without being overly tight as I find it too constricting due to health issues. It also needs to to be able to be buttoned up completed or left with the collar open depending on which style I am opting for on that day. For this outfit it will be worn collar open. The sleeves in the Fontana portrait are shown with quite full tops coming down to tight forearm so I added flare to my sleeve pattern and made the forearm into a style that is buttoned almost to the elbow.
The sleeve pattern was drawn up onto a piece of calico and I then drew the cutting pattern onto this. It features diagonal cuts in a star pattern and small holes in lines. It was difficult to make out the actual pattern from the portrait but this seemed fairly close. I cut the silk for the sleeves, NOT on the bias but on the straight grain this time. The three pieces were pinned down to a sheet of plywood and I cut the slashes with a small wood chisel, new so that it was very sharp. The small hole were punched through with a paper hole cutter I had in my kit from paper crafting days. It did not cut very well but enough that I could then careful trim the holes with small scissors. I then hand beaded small groups of seed beads into the middle of the slashing pattern. This was a very long piece of hand working but again very worth the time and effort. he more the silk has been manipulated during the sewing process the more the slashes and hoes have started to fray and open up showing the lovely cutting pattern and also the gold silk I used as a middle layer in the sleeves. The internal layer is simply a cotton. The cuffs of or the giubonne feature hand made slashed binding in the same silk as the body of the piece. this just gives a nice finish to the cuffs and reflects those shown in the portrait. the buttons for the sleeves and front are small pearl buttons carefully chosen to tone in with the ivory silk. This layer is very comfortable and I am glad I took the extra time to get the fit as I wanted it as another tight layer would have not worked for me. I am especially pleased with how the hand working had added subtle interest to this middle layer, those many hours were worth it.
The giubonne does not fit over the optional sottana paned sleeves these have to be removed when the outer layers are worn, so two outfits in one really depending on how many layers you want to wear.
The giubonne took a lot of my limited hand strength so in between layers I played making up the jewellery sets fro this outfit. I have a collection of jewellery making supplies which include old pieces that I pull apart and remake in renaissance styles. The necklace and earring for the sottana alone set were made in this fashion. I disassembled some items and played around until I got the look I was after. The short real two colour pearls and very long real coral pieces were simply strung from pearls and coral I bought for this particular purpose. They are strung on very strong wire to ensure no breakages.
I did begin on the put layer veste by starting the cutting out and making the hand cut bias for the edging.
So the final parts of my outfit
The overgown or veste- extra layer
the lace collared partlet – extra layer
the woven garters acessory 4
The outer most layer of this ensemble is the pinkish silk veste, with it’s two layered ruffled and pointed baragoni and very long hanging sleeves. This is a mixture of two portraits, the Lavinia Fontana one and one by Zuccari of alady seated in a yellow veste. The two portraits ar of a very close time frame and both artists were active in the same area so it stand to reason the styles are very similar, both have the ruffles but one has the long sleeves and the other the second row of baragoni, I have simply added both extra features into one gown.The Zuccari veste shows a loose back to the gown but it is hard to make out the fit in the Fontana portrait but it looks like a fitted back, for my own comfort and preference I have opted for the loose mongil style back as I already made this style and had previously drafted my pattern from one in Alcega I simple use this rather than reinvent the wheel. I had also previously mage the hanging sleeves and had a pattern for those saving myself a lot of time. Time that I sued to careful hand bead and attach the many many metres of trim that went onto this veste. The beading took a couple of days of many hours to complete but really made the trim much nicer. Again though the extra time and pain I put my hands through is well worth the effort and it really adds interest to the piece.
The baragoni themselves did not take too long to actually create. The ruffles were simple box pleated and the points were cut in half oval shape, sewn turned, ironed and more beading. I sewed the two layers together to stablise them before fitting them in the armhole along with the hanging sleeves, this did give many layers to sew through but thankfully my machine is made for the heavier duty sewing. This year I chose to completely line the veste and I hand sewed this lining in with invisible stitches. The body is lined with a cotton/linen blend that tones in with the silk, the handing sleeves are lined with a golden silk. All the edge seams also feature hand made and slashed binding. The top front of the sleeves have a hanging pearl where they finish in a point.
I had intended on make silk button for the veste but on making a few I did not like the ook of them, so I went rummaging around my stasha nad found some pearl cluster beads, caps and eye pins, and created 42 buttons for the front of the gown, As these are purely decorative they did not need to be be very strong. The gown is closed in front with hidden hooks and eyes.I really enjoyed hand making the buttons and already have plans to make more for future projects. The veste has very small openings in the side seams to allow the belt to be worn without holding the loose back in.
IRCC9 All the final write up Month 1 Item completed Camicia pair of handkerchiefs accessory The camicia was based on an extant historical item held in the Prado museum which features a squared neckline with attached lace and very full sleeves that are tightly gathered at the cuffs, again with lace added.
0 notes
Text
How Expectations Can Drive People Away and How to Let Go of Control
“I’m not in this world to live up to your expectations and you’re not in this world to live up to mine.” ~Bruce Lee
About five years ago, I had a falling out with a close friend. I was irritated because she didn’t do the things I thought she should and she didn’t give as much as I did. I felt I had been very generous with her, and I expected her to do the same. I felt she owed me.
My anger became unmanageable and started seeping into pretty much every interaction we had. She began cancelling dinner plans and camping trips. She wouldn’t call me back after days of me leaving a message. It happened out of nowhere, and of course everything was her fault.
Except that it didn’t. And it wasn’t.
Not too long ago, I was a bit of a control freak. I didn’t know it, of course, and I would have described myself as open-minded and easy going. In reality, I was tormented by my own expectations.
Since I was a child, I had an image in my head about who I was supposed to be. What my family was supposed to look like. What house I was supposed to live in. What career success was supposed to mean. That’s a lot of supposing! I had always assumed these expectations were my future.
I am an artist by trade, and in my art studio, I have many tools. Paintbrushes, sanders, stencil cutters, and paper punches fill shelves up to the ceiling. However, I tell people that the most important tools I use are flexibility of mind and a practice of not having expectations as to the outcome. This allows new and amazing techniques to be discovered and yields paintings that continuously surprise and delight me. I find these tools are useful outside of the art studio as well.
As time went on and distance grew between me and my friends, I began to feel enraged by her apparent apathy toward me and everything that I “had done for her.”
I thought to myself, “I would never treat anyone that way. How dare she do that to me?” and “After all I’ve given her, she should want to give back!” Every thought I had praised me for all the good deeds I had done and blamed her for ruining our friendship. I was the victim and she was the wrong doer.
One day, I sat down to enlighten her about how she had negatively impacted our relationship. Her reaction was horrifying to me. She said she was going to take a step back from our friendship.
I couldn’t believe what I was hearing. I mean, I was telling her how she could singlehandedly improve things. What was wrong with her that she didn’t understand that? We stopped speaking and I didn’t see her for a long time.
Then something life changing happened—sobriety. In the first year after I quit drinking, I learned a lot about myself and my need to control just about everything in order to meet my expectations.
I learned how my expectations of others (unexpressed, by the way, because “I shouldn’t have to say it!”) and the anger that followed when people didn’t act the way I thought they should, actually drove people away.
The entire time our friendship was breaking down, I thought that if she would just do the things I wanted her to do, not only would our friendship be fixed, but everyone involved would be better off. I knew better than she did. My way of living was better than hers. She, of course, ran away from me like I was on fire.
My need to control others was unfounded, unrealistic, and unattainable. It was a hard thing to admit that my way wasn’t better than her way and, in fact, people weren’t abandoning me. I was driving them to leave. I saw that other relationships in my life were also going down this path. I had to change.
One day after surfing, I went to sit on a bench overlooking the water. One of the “old guys” we surfed with, who lived across the street, came and talked with me as the sun was setting over the ocean and I was lamenting about the stresses in my life. He said one of the most important things anyone has ever said to me: “I don’t do stress. Stress is optional.”
WTF? How on earth does one not get stressed? Teach me, Oh Wise One. I thought deeply about this and about my issues with expectations and control. I needed control in order to meet my own expectations. When those expectations were not met, anxiety, anger and depression followed. Where does stress fit in?
The stress comes from trying to control actions that I think can bring my expectations to fruition. Have you ever seen the YouTube video of the zoo keeper trying to take a photo of all the baby pandas together? He expected a cute shot. All he got is a video of him trying to put baby pandas in a line, as one by one they continuously wandered off.
I know that’s kind of a cut and dry example, and life isn’t always cut and dry. However, the primary reason that I would get so pissed when my expectations were not met is rather simple: “My way is superior to everyone else’s way. How can people be so stupid and disrespectful?”
I don’t want to be an angry person. I don’t want to be unhappy with the people in my life. At some point, I realized that all of the control I was attempting to put on others was really me trying to make others meet my own expectations. That doesn’t work. Like ever. And it creates a huge amount of stress and frustration akin to trying keep baby pandas in line.
The real questions are: Who do I think I am? Why do I think I can control anything? What does it really matter if people are late, or my flight is cancelled, or my hat got lost when it flew off the top of the car.
Do these things affect my life? Sure, they can. Is it worth having an explosive hissy fit and making myself and everyone around me miserable? Uh, that would be a no. (Embarrassingly, the loss of that damn hat came close to ruining our evening.)
Advice from an Artist—Three Ways to Let Go:
1. Have zero expectations about how anything is going to turn out in the end.
It’s easier said than done, but if I went into the art studio expecting a certain painting to be created, I would be disappointed all the time. It’s so much easier to have an open mind and go with the flow.
This is also true when it comes to other people. By accepting the fact that people are not predictable, I am not attached to outcomes about how they “should” be.
2. Stop trying to control everything.
My passion is creating, but I can’t always get in the studio to paint. And guess what? I don’t pitch a fit. I simply do what needs to be done to continue on.
For whatever reason, this is easy for me to apply to my business, and harder to apply to situations that involve people. I have to peel my fingers from the white-knuckle grip they have on how people should be and be okay with the possibility of “my way” not being an option. Perhaps somebody else has an awesome way I’ve never even thought of.
3. Be flexible and don’t be attached to outcomes.
I choose to open my mind to all the possibilities. In the studio, experimentation and the ability to adjust comes very easily. In life, not so much. Last minute changes in dinner plans aren’t going to kill me. When someone is “inconveniencing” me by wanting to meet at 8:00 instead of 6:30 I don’t get pissed anymore. I go for a hike because now I have time to.
Does that sound too simple? I don’t think it is.
My old friend and I have begun to repair our friendship. She moved away and I miss her dearly. We have talked about the past, but not in great detail. I try to show her that my thinking has changed and I don’t want anything from her but her friendship. It’s a hard thing to repair when you live far away but it’s mending little by little.
I no longer expect her or anyone to think like me. When I start feeling superior, I have to remember that I’m no better and no worse than any other person on the planet. I hope she forgives her wayward friend. At the time, I really thought that I was doing her a favor by showing her a better way to live. It was hard to realize that my ego was running the show.
When I’m working on a painting and I make a mark that I didn’t intend to, I don’t look at it as a “mistake.” I look at it as an opportunity to go down a road I may not have seen had it not been for that out of place mark. This is how I strive to live my life now. When a monkey wrench is thrown in, I put it in my back pocket figuring that a wrench may come in handy at some point.
And if it doesn’t, that’s okay. Just as with my art, I choose to live open-minded to all experiences. Also, just like my paintings, life isn’t only made up of straight lines. There are twists, turns, and interruptions. The question I must ask myself is, do I want to put up a fight whenever something unexpected happens, or go with the flow and gracefully see where this new road leads.?
We can’t control other people and situations. But we can choose to set expectations aside and not put so much emphasis on how things are going to end up. After all, it truly is about the journey. And the destination? Well, sometimes the most beautiful views are the ones that we stumble upon unexpectedly, while on the way to where we’re “supposed” to be.
About Marigny Goodyear
Marigny Goodyear is an artist, living and working in Talent, Oregon with her husband, Goody and daughter, Nora. She plays in Crescent City, California where the ocean keeps her strong and inspired and often visits her hometown of New Orleans (also nicknamed The Crescent City), where the rhythm of her heartbeat is renewed. Visit her at marignygoodyearart.com and follow her on Facebook and Instagram.
Web | Facebook | More Posts
Get in the conversation! Click here to leave a comment on the site.
The post How Expectations Can Drive People Away and How to Let Go of Control appeared first on Tiny Buddha.
from Tiny Buddha https://tinybuddha.com/blog/expectations-drive-people-away-how-to-let-go/
0 notes
Link
Today, I’ll lay out my first DIY backsplash tile job to show you how easy it can be to do yourself! While you do need some special tools to accomplish the job, you can complete this project without prior experience and still have a great end result (if I don’t say so myself!). Lets get started!
Materials You’ll Need For a Subway Tile Backsplash Install:
We used a whisper white subway tile backsplash
Tape measure
Framing square
Marking pencil or Sharpie
Buckets
Drill and mixing paddle
Spray bottle
Tile trowel (Click here to see the size you should use for your tile)
Sponges (for grout)
Spacers – We used 1/8 size
Mortar – I like premixed
Grout – (Click here to learn if you will need sanded or un-sanded) We used Montana Grey from North American Adhesive found at Builders Surplus
Carpenter’s triangle
Safety glasses
Manual tile cutter (depending on type of tile)
Wet tile saw (depending on type of tile – click to see how to use) – This is what we used.
Now, I’ll assume you’ve measured your space and have the appropriate number of tile for your square footage. If not, you need to measure the length x width and multiply the two together. This will give you your square footage.
Leveling:
Your first step is to make sure that you have a level line to start with. While you may assume that starting on the ledge of the countertops and going straight across is the best way to go, you may find yourself with rows that are crooked, due to a floor or cabinets that are not level. After using the level on my countertops, I saw that they were level, but here is what you can do if yours aren’t.
In the event that you cant follow the line of the countertops, you’ll want to measure the height of half of your tile, which in our case is 1.5″ since our subway tile is 3″ in height. Now, use your level to make a line all the way across. This will give you an even line to follow. You can either build a small wooden ledge on that line to ensure that your tiles don’t slip, or you can make a point to check that they’re not sliding as you work, and adjust them if they are.
When your wall is tiled to the top of your space, you’ll then go back and make cuts for this last half row on the bottom, next to your countertop. If you have a slight angle, that is something you can cut into the tile if needed. This way, the bottom of the tile may be angled ever so slightly on the edge of the countertop, but the row itself will be straight.
Time to Tile:
Now, it was time to tile. Because my tile was level, I started in the left and moved to the right. Some people may tell you to do it in sections instead of row by row, but I found this way to be fairly easy. My husband, who does have tiling experience, was not home when I decided to tackle this project, and since I was not experienced with a tile saw, I found a solution. I decided to leave all my cuts for the end of my project, which may or may not have been the best way to do it, but it turned out fine in the end and made it easy for me!
Here was the space prior to backsplash. We have two other areas of splash but I will just focus on how we did this wall, as the others were more simple versions of this wall.
My first step was to lay a layer of premixed tile mastic on the wall. I did it to right above the outlet because I didn’t want it to dry before I could tile it. I started with my first tile, added my spacer to the right, and continued until the first row was done. The most important thing you can do with any tile job is butter the back. This makes the bond strong and makes sure you won’t have loose tiles. All you do is spread a thin coat of mastic on the back of your tile before sticking it to the wall.
For my second row, I started it in the middle of the first tile on the bottom row. Because I was not making any cuts, I just placed that tile and did my row. I would cut that piece later.
After stepping back and looking at my first two rows, I noticed that I had a few tiles that I needed to adjust for my second row to be perfectly straight. This was very important I found, because what looks straight up close may not actually be. Things can be tilted and still technically line up with the tiles that follow. Every few rows, step back to check your work.
I kept going until I hit the outlet. When I got the the outlet, I came as close as I could. I then measured the space and included the space for my tile spacers on either side of the tile. I make a mark and I skipped over that area. I would do it later when I made all my cuts. I did make sure to clear off the mastic because if it dried that way, I wouldn’t be able to get my tile even when I went back to lay it.
I continued this way until I hit the top. I left spaces on either side of my row where cuts would need to go. When all the non cut pieces were complete, we wanted to make cuts all at one time, so we measured all the spots at once.
Then, I wrote down all of the numbers on a piece of paper, and measured each one, writing it down as I went, making sure I left room for my spacers. When cutting, its always best to cut it a little long than short. You can always trim it down if needed.
We then made our cuts (I actually learned how to use the tile saw!) and we went to work placing each piece in it’s designated slot. Luckily, it worked out perfectly for us!
While it may not have been perfect, I was very proud of my first time doing a tile backsplash. Make sure that you remember to get bullnose tile for your edges. This will be a smooth curve to end your tile at the corners which will look much better than the regular edge of a tile. You can get them with the curve on the long edge or the short edge. We chose long edge and cut them like this (shown below).
Grouting your Backsplash:
When grouting backsplash tile, decide if you’re using premixed grout or you’re mixing it yourself. If you are mixing yourself, make sure you only mix enough that you can use in a 1-2 hr time period. I mixed half my bag, then the other half. I used Montana Grey to give my bright white subway tile the extra pop I was looking for. Remove tile spacers and make sure that your tile surface is thoroughly cleaned. If you have mastic on your tile faces like I did, get a bucket of very hot water and a sponge, soft bristled scrub brush, or wash cloth. The hot water takes it off fairly quickly.
After you mix (directions will be on the grout), make sure you have a bucket of clean water and a grout sponge ready. Spread grout on the tile surface, use a rubber grout float or a squeegee to force it down into the joints. I used an un-sanded grout from North American Adhesive because of the size of my tile and grout lines (see link above to determine yours).
Tilt the float at a 45-degree angle and with the edge of the float, remove the excess grout from the surface immediately. Now tilt the float at a 90-degree angle and scrape it diagonally across the tiles. After you’ve done an area, use your wet sponge and wipe the surface clean. See if any areas need extra grout. Rinse out sponge and repeat. Change water as needed. Continue this process until your tile is grouted. There may be some areas that you need to use a finger to get the grout in, like around tight corners.
Polish with a soft cloth when the grout has dried and a haze forms on the tile surface. Rinse again with sponge and clean water if necessary. Give your newly grouted a good look and yourself a pat on the back for a job well done!
I still need to give it one last scrub down. Some of the areas have a bit of extra grout on the tile, but it should come right off with hot water and a sponge. I hope this helps you in your own DIY backsplash journey and I can’t wait to hear about how it turns out! Leave your thoughts in the comments below!
Builders Surplus is a full service renovation company with locations in Louisville, Kentucky, and Newport, Kentucky, which also serves Cincinnati, Ohio. We are one of the leading providers of ceramic, porcelain, and large format tiles in Louisville, Newport, and Cincinnati. We specialize in interior design, kitchen design, bathroom remodel, building materials, and home improvement. Interior Design and measurements come as a free service to our clients. We sell building materials ranging in every price point, from unfinished kitchen cabinets to top of the line Wellborn cabinets. In addition to interior design, we also offer installation services. If you have any questions or would like to set up a free design consultation with one of our interior designers, we would encourage you to do so. We love sharing our knowledge with clients & potential home renovators. We write about interior design, home decor, decorating ideas, and home improvement. We hope you’ll check back in for our next article! Happy Renovation!
Written By: Allie Bloyd
The post Kitchen Backsplash Step By Step! appeared first on Builders Surplus.
0 notes
Text
Month 1
Item completed Camicia
pair of handkerchiefs accessory
The camicia was based on an extant historical item held in the Prado museum which features a squared neckline with attached lace and very full sleeves that are tightly gathered at the cuffs, again with lace added. The extant example shows goes added to give the fullness in the body however the fabric I chose was wide enough that I could simply cut the width rather than add it in.
I have attempted to stay as true to the extant example as I could.
The pair of handkerchiefs were simply off cuts from the camicia, and some of the lace that was left over. It is seen in a number of 16th century portraits that ladies did use lace edged hand kerchiefs.
#gallery-0-27 { margin: auto; } #gallery-0-27 .gallery-item { float: left; margin-top: 10px; text-align: center; width: 33%; } #gallery-0-27 img { border: 2px solid #cfcfcf; } #gallery-0-27 .gallery-caption { margin-left: 0; } /* see gallery_shortcode() in wp-includes/media.php */
Items completed in month 2
Sottana with optional removable sleeves in the style of Eleanora di Toledo
Beaded girdle belt- accessory 2
This sottana serves multiple purposes. It will be worn as an under gown as it is padded and boned as a supportive layer to wear with the veste and giubonne over the top in the style Lavinia Fontana’s self portrait of 1575. The sottana can also be worn with it’s optional removable paned sleeves in the style of the portrait Eleanora di Toledo of 1545. This style of Sottana spanned a number of years and styles in the 16th century ladies styles, beginning as an under gown, then becoming a gown in it’s own right with removable, optional and interchangeable sleeves, and then it moved back to being an under gown again with the incoming veste and giubonne styles later in the century. I look forward to wearing this very comfortable gown with or without sleeves, and also under it’s over layers, it will be a very flexible addition to my ever growing renaissance wardrobe. The design and pattern was originally based upon an Alcega that I adapted over time to best fit my ample proportions ans alter over different gowns to be most comfortable but still in keeping with the period design, with it’s side back lacing being reachable and able to be laced on my own without assistance when necessary. The skirt on this gown was not cut with the additional side gores as per Alcega due to the minimal amount of fabric I had, however the skirt if still very full and in keeping with the style I was trying to achieve. The skirt has been hand gathered onto the bodice and carefully enclosed between layers as it was very frayable and was worried it may give way without support. The hem has been thickened with an added layer of felted wool and some beige fabric I had on hand. I have always found this to be very helpful in keeping moisture from wicking up skirts and also to keep skirts from wrapping around ankles causing tripping which I am inclined to do. Both the front and back of the bodice were boned and padded to given the nice flat stiffed look and be very supportive giving a good base for the over layers to come.
The sleeves were created by using a normal straight sleeves pattern which was divied into several pieces, cut and sewn together with it’s lining. These panes are then turned in the right way and ironed, then the long process of hand sewing these panes together and adding the beading at each catch point. There is also lace with hand beaded added at the wrists and the tops of the panes are gathered onto tapes and then again sewn to each other to create the scrunchy baragoni. The ties for the sleeves are made from folded hand cut silk bias tape, I prefer these on the sleeves not the gown,they also feature lovely cast brass aiglets from the style of the 16th century, these pass through brass rings sewn on the underside of the straps of the gown, making them very easy to put on and take off and very secure once on. The construction and beading of these sleeves took a lot of hand work and tie but they are certainly work the effort.
The girdle belt took quite some time and patience to put together. It was created using some lovely almost cross style pieces with pearling on them, I had to visit both the local stores and buy all their supplies in order to get enough to complete the belt long enough. It is put together using eye pins and three glass pearls. The end is completed with a lovely pearled cross that I had on hand. The belt has a simple beak closure which can be attached at any point on the belt making it’s length variable as needed.These beaded girdle belts are seen through a number of portraits in the 16th century.
Item started month 2 but not completed
Silk Giubonne
Items completed month 3
giubonne with much handworking
accessories 3 Jewellery set consisting of two short necklaces, one pair of earring and a long coral necklace. One necklace to be worn with the sottana and sleeves option, the other two, being the real pearl and real coral ones, for the multi layered outfit. Earrings obviously can be worn for both
The third, but not final layer of my Lavinia Fontana inspired outfit is the giubonne (doublet) layer. It is based on a blend of a Alcega pattern and the waist coat pattern from the Tudor Tailor.I made a giubonne in last years IRCC and I started with that pattern but then I went on drafting several patterns to get this one sitting just as I wanted it to but without being overly tight as I find it too constricting due to health issues. It also needs to to be able to be buttoned up completed or left with the collar open depending on which style I am opting for on that day. For this outfit it will be worn collar open. The sleeves in the Fontana portrait are shown with quite full tops coming down to tight forearm so I added flare to my sleeve pattern and made the forearm into a style that is buttoned almost to the elbow.
The sleeve pattern was drawn up onto a piece of calico and I then drew the cutting pattern onto this. It features diagonal cuts in a star pattern and small holes in lines. It was difficult to make out the actual pattern from the portrait but this seemed fairly close. I cut the silk for the sleeves, NOT on the bias but on the straight grain this time. The three pieces were pinned down to a sheet of plywood and I cut the slashes with a small wood chisel, new so that it was very sharp. The small hole were punched through with a paper hole cutter I had in my kit from paper crafting days. It did not cut very well but enough that I could then careful trim the holes with small scissors. I then hand beaded small groups of seed beads into the middle of the slashing pattern. This was a very long piece of hand working but again very worth the time and effort. he more the silk has been manipulated during the sewing process the more the slashes and hoes have started to fray and open up showing the lovely cutting pattern and also the gold silk I used as a middle layer in the sleeves. The internal layer is simply a cotton. The cuffs of or the giubonne feature hand made slashed binding in the same silk as the body of the piece. this just gives a nice finish to the cuffs and reflects those shown in the portrait. the buttons for the sleeves and front are small pearl buttons carefully chosen to tone in with the ivory silk. This layer is very comfortable and I am glad I took the extra time to get the fit as I wanted it as another tight layer would have not worked for me. I am especially pleased with how the hand working had added subtle interest to this middle layer, those many hours were worth it.
The giubonne does not fit over the optional sottana paned sleeves these have to be removed when the outer layers are worn, so two outfits in one really depending on how many layers you want to wear.
The giubonne took a lot of my limited hand strength so in between layers I played making up the jewellery sets fro this outfit. I have a collection of jewellery making supplies which include old pieces that I pull apart and remake in renaissance styles. The necklace and earring for the sottana alone set were made in this fashion. I disassembled some items and played around until I got the look I was after. The short real two colour pearls and very long real coral pieces were simply strung from pearls and coral I bought for this particular purpose. They are strung on very strong wire to ensure no breakages.
I did begin on the put layer veste by starting the cutting out and making the hand cut bias for the edging.
Items begun in month 3 but not completed;
Extra layer Veste
accessory 4 garters
still to start partlet
So the final parts of my outfit
The overgown or veste- extra layer
the lace collared partlet – extra layer
the woven garters acessory 4
The outer most layer of this ensemble is the pinkish silk veste, with it’s two layered ruffled and pointed baragoni and very long hanging sleeves. This is a mixture of two portraits, the Lavinia Fontana one and one by Zuccari of alady seated in a yellow veste. The two portraits ar of a very close time frame and both artists were active in the same area so it stand to reason the styles are very similar, both have the ruffles but one has the long sleeves and the other the second row of baragoni, I have simply added both extra features into one gown.The Zuccari veste shows a loose back to the gown but it is hard to make out the fit in the Fontana portrait but it looks like a fitted back, for my own comfort and preference I have opted for the loose mongil style back as I already made this style and had previously drafted my pattern from one in Alcega I simple use this rather than reinvent the wheel. I had also previously mage the hanging sleeves and had a pattern for those saving myself a lot of time. Time that I sued to careful hand bead and attach the many many metres of trim that went onto this veste. The beading took a couple of days of many hours to complete but really made the trim much nicer. Again though the extra time and pain I put my hands through is well worth the effort and it really adds interest to the piece.
The baragoni themselves did not take too long to actually create. The ruffles were simple box pleated and the points were cut in half oval shape, sewn turned, ironed and more beading. I sewed the two layers together to stablise them before fitting them in the armhole along with the hanging sleeves, this did give many layers to sew through but thankfully my machine is made for the heavier duty sewing. This year I chose to completely line the veste and I hand sewed this lining in with invisible stitches. The body is lined with a cotton/linen blend that tones in with the silk, the handing sleeves are lined with a golden silk. All the edge seams also feature hand made and slashed binding. The top front of the sleeves have a hanging pearl where they finish in a point.
I had intended on make silk button for the veste but on making a few I did not like the ook of them, so I went rummaging around my stasha nad found some pearl cluster beads, caps and eye pins, and created 42 buttons for the front of the gown, As these are purely decorative they did not need to be be very strong. The gown is closed in front with hidden hooks and eyes.I really enjoyed hand making the buttons and already have plans to make more for future projects. The veste has very small openings in the side seams to allow the belt to be worn without holding the loose back in.
The partlet was actually fairly simple. I used my regular partlet, or I should be calling ti a coverciere, pattern. The lace was a wide lace I found in my stash. I hand pleated it and added temporary stitches to hold in shape, the ends I add some thin lave to give a nicer finish. The lace I box pleated onto the collar piece and sewed onto the partlet. The temporary stitces were then removed. The lace is stiff enough to keep the shape by itself. I am still not quite convinced I like how wide the lace is and might trim it in thinner in the future sometime but for now it is a lovely finish to all the layers of this outfit.
Although made last the partlet is worn under the giubonne.
The last item made was my final accessory, a pair of woven garters. I used my new inkle loom with some lovely silk thread alternated with some gold tone cotton. I created the pattern using an online inkle loom pattern generator which made warping the loom much easier. I used the silk as the weft thread as well, and as this was quite a thick thread the weaving was quite a lot quicker than I though only taking me a few days to complete. I sewed the weft thread back into the weaving to finish the ends off nicely. I did weave the whole warp in one go and the cut this in half to create two garters, I thought these would be long enough and they do work but I would like some slightly longer and will make another pair sometime in the future maybe. I do love the softness that the silk thread bought to these though and they are very comfortable.
The only day I had set aside to take my final portraits and it was teeming down with rain so we made the best of it and headed to the Arts centre which provided a nice background and enough protection so I did not get too damp.
I am so pleased that I finished this again, nine years! I look forward to next year being the tenth, and for me probably final, but who knows I may not be able to break the habit!
The entire IRCC9 write up Month 1 Item completed Camicia pair of handkerchiefs accessory The camicia was based on an extant historical item held in the Prado museum which features a squared neckline with attached lace and very full sleeves that are tightly gathered at the cuffs, again with lace added.
0 notes
Last Seen Blogs

ousemei
OuseMei Portfolio

fullyrawkristina
FullyRaw

expertehmedabad-blog
Expert Ahmedabad

tvduhoctrungquocedutime
Tư vấn du học Trung Quốc Edutime

futuristicspacediva-blog
Dee Booster, Girl of the Future